Saturday, September 28, 2019

Roadbed Redux

Working the area around the 3rd bridge, which is the Doswell Wye area, found that either I mis-measured or the roadbed crew was a bit over eager during installation as the roadbed as installed would cause the curves on both sides of Doswell to be out of wack.

So, out comes the oscillating tool with the scraper blade and up comes the cork.


Friday, September 27, 2019

Warning, Helix Approaching

Before construction of the 2nd bridge, we realized that we would need to know how the tracks leaving the helix would interact with the track on the upper level.

We started to measure and eventually came to the conclusion that the benchwork that supported the helix would need to be lowered by a bit.


First step was to take the plywood subroadbed off and then lower and level the structure.


Of course, I had a bit of help, which I always appreciate.

One to drill and one to fasten makes the work goes fast.
Bryce rolling brown down.

Wednesday, September 25, 2019

Staging Closing Ladder In Progress

Working on the closing staging ladder. All #6s and mostly RHs. This isn't a compound ladder as everything is built off the straight ladder, but it is still 9 turnouts to be built.

Lots of time spent at the benchtop belt sander, let me tell you..

Saturday, September 21, 2019

Bridge 3 Moving Right Along

I've got to find more in progress shots, but here's a few from putting homasote down on it.


Bridge at an angle

Thursday, September 19, 2019

Bridge 1 Roadbed

Have cork down on the first bridge.


Wednesday, September 18, 2019

2nd Bridge Start

As I've mentioned, I need 3 different bridges in place to complete the layout benchwork for the upper level.

The 2nd bridge spans the entryway into the room so it was the next to be tackled.

Initial build with yellow highlights placed.
The needed span was pretty long at around 80", but as it was straight, this was the next one to tackle. As we had rebuild the landing zones previously, the only additional thing to do was to put the yellow caution paint in place.

And yes, it is yellow on both sides.
Dad convinced me it needed more contrast to be more obviously apparent that it was installed, so some black paint was found and applied.

Shot from the stairs - this is a very nice visual when you come down the stairs.

More shots on the main gallery site: richmond-terminal.org

Tuesday, September 10, 2019

Benchwork Bridge #1

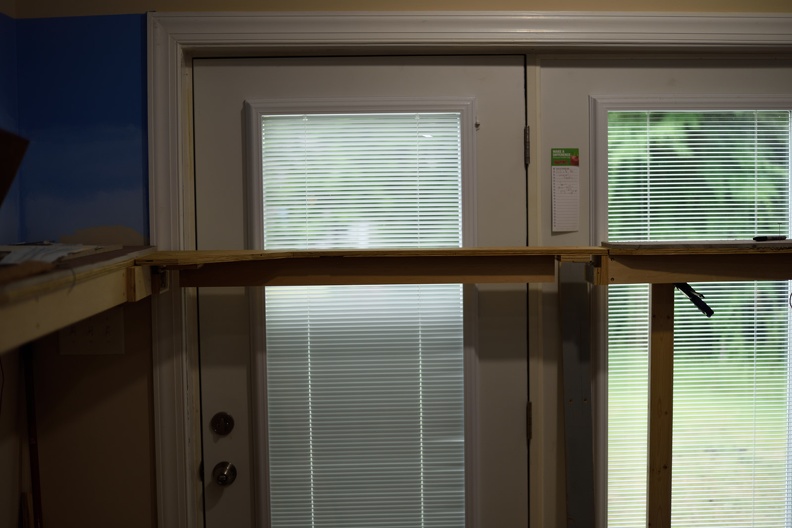
During the planning phase, a few walkways were identified as possible areas of use for the layout if an appropriate bridging solution could be identified, constructed and used.

The shortest bridge would span the back door to the yard. This is a standard 36" exterior door, that opens from the left to the right.

As there is area on either side of the door that benchwork can be permanently installed, it was decided that we would test our process here first.

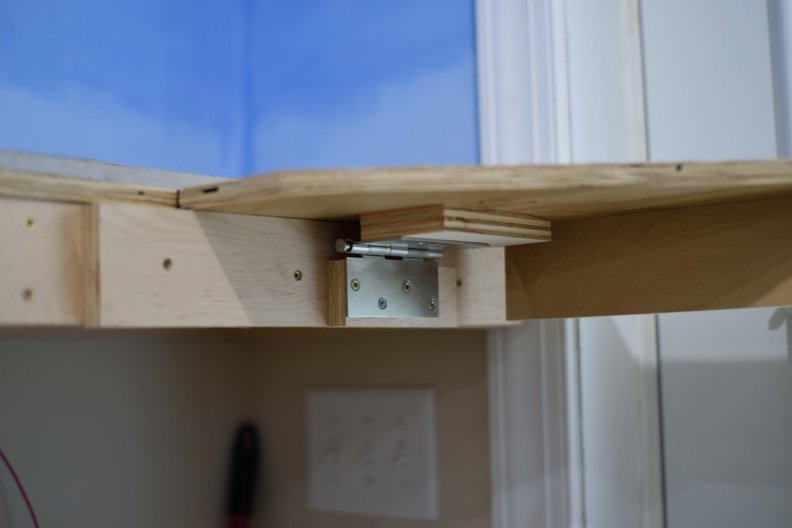
In casting around for a way to anchor the ends in a removable way, the engineering shops at the Western Maryland Moseley Division (WMMD) were consulted. Their answer was to use a door hinge as it would serve the dual purposes of alignment and removal.

We decided that we would just aim for a simple, lift in and out style bridge.

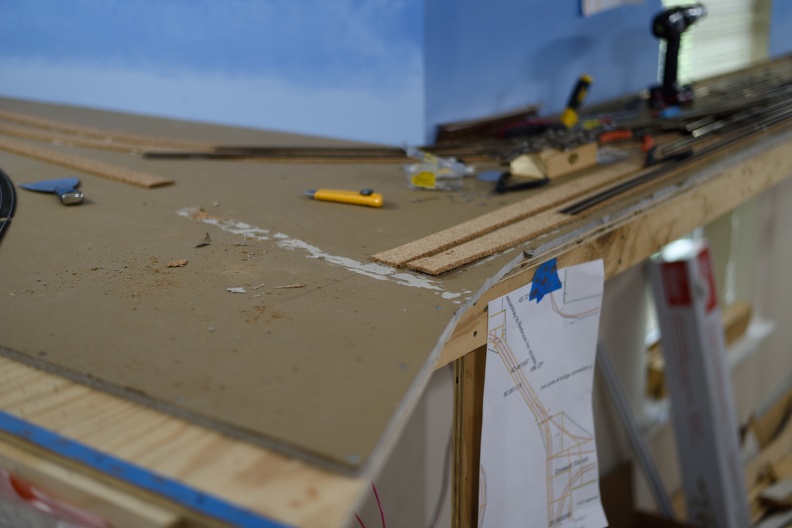
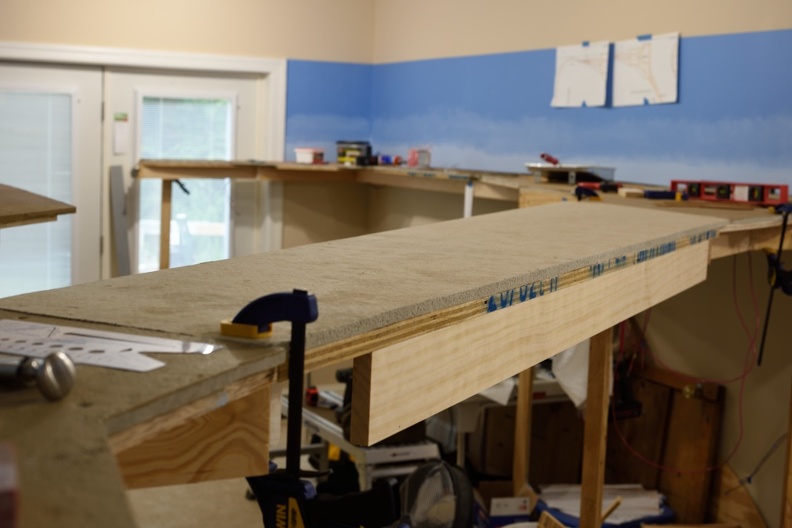
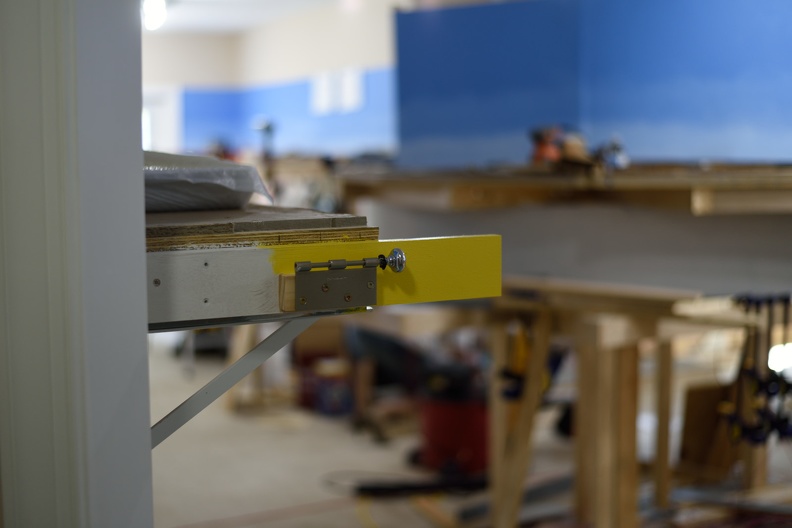
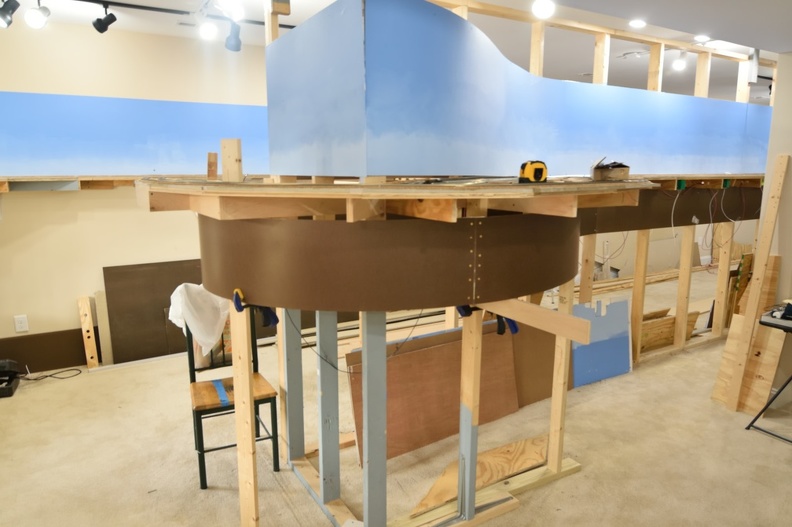
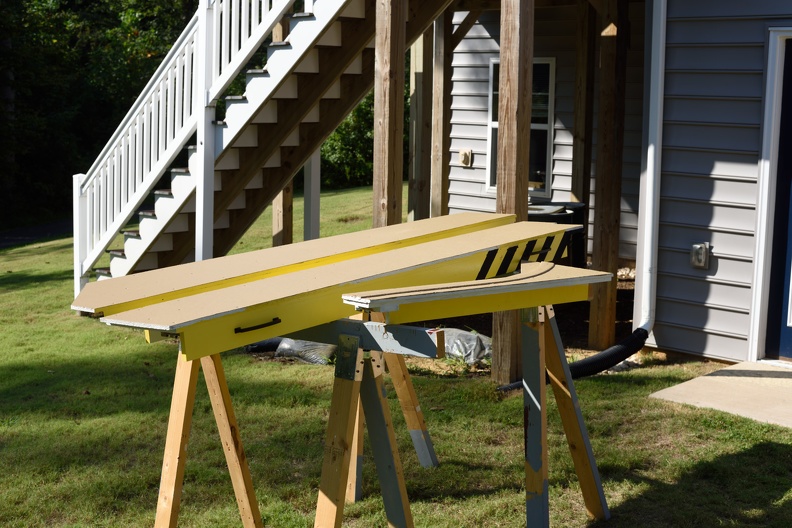
As the track curves in this area, we needed to make the bridge wider on one side.

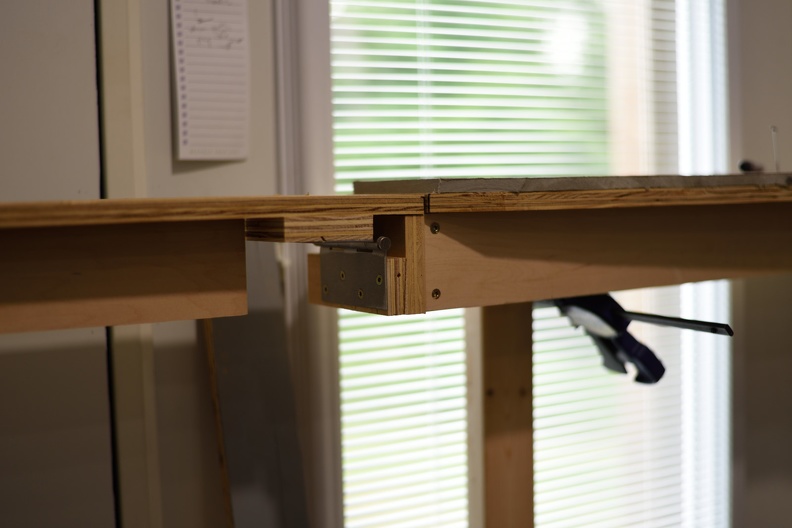
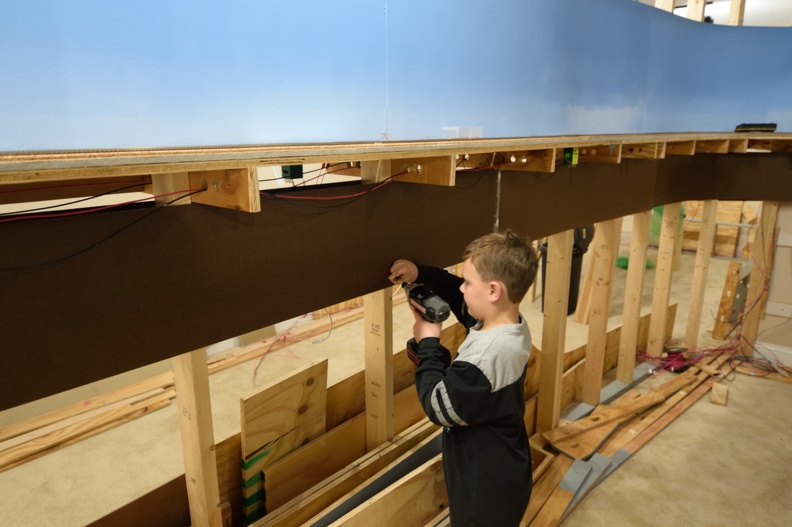
A landing block was afixed to the benchwork to give a reference and stop point to the plywood that acts as subroadbed as well as give us a place to mount the hinge. A piece of 3" wide, 3/4" plywood was used as horizontal stiffener by mounting it vertically under the subroadbed.

West side, showing the hinge used to an anchor point.

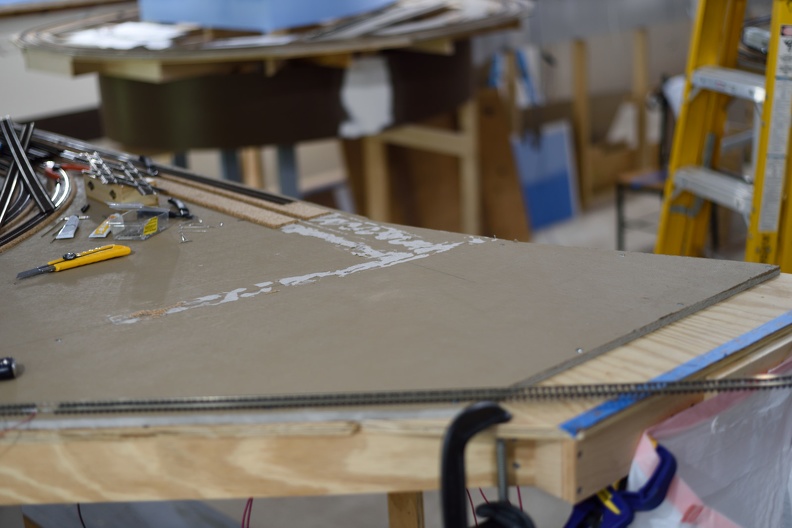
East side; this area is only 4 inches wide.


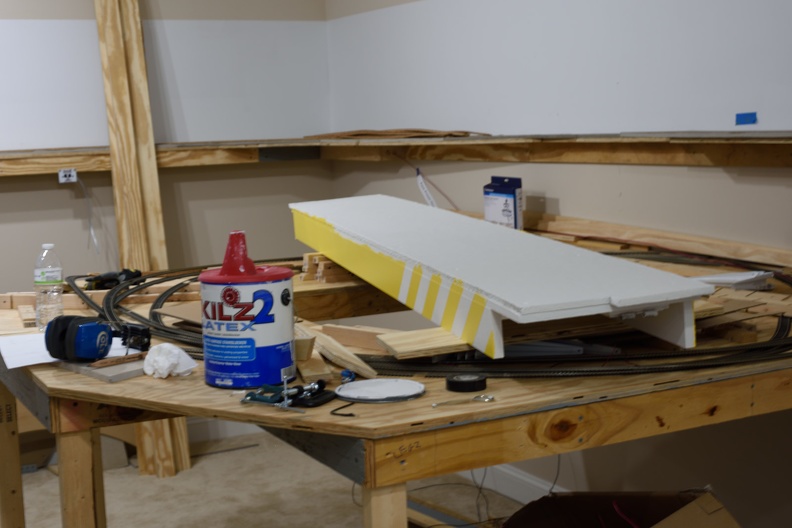
Finished product. Note the horizontal stiffener.

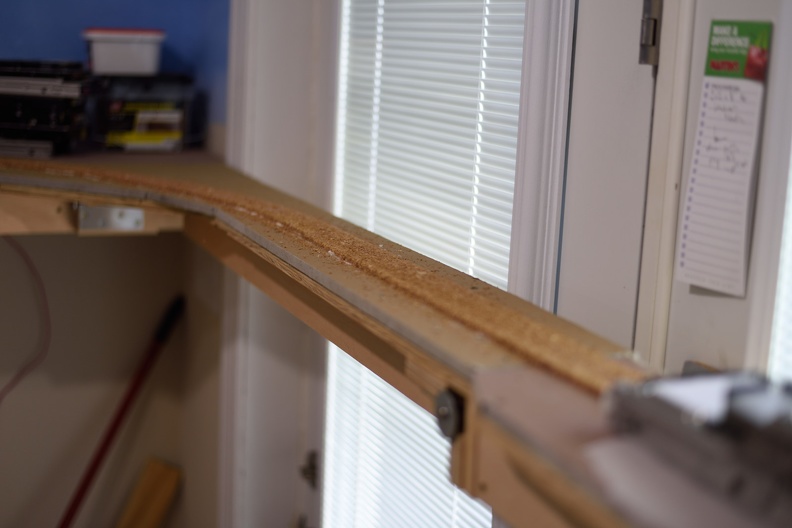
After the install and test fitting, the entire assembly was painted with oil based paint to seal it against any humidity changes so it won't become larger or smaller and no longer fit.

A further update will show how roadbed and track have been installed.

Sunday, September 8, 2019

Upper (North) Staging - Closing Ladder

As most readers know, I handlay my turnouts, ladders, crossovers and the like. I use the Fast Tracks jigs, tools and templates to produce consistent and solid running results.

As I laid flex track around the staging yard, I got to the point where I needed to construct the yard ladder to close the yard off.

As originally designed, it was going to be a compound ladder (meaning I would have two main branches, with a mix of left and right hand turnouts), like its opposite number already is.

Before I went down that path, I figured to use the templates to put some physical controls up to see if there was any alternatives that would work to the compound layout.
An overview of an option found during layout

This somewhat track level shot shows that I didn't have it laid out as straight as I thought; but the benchwork wasn't 100% square either.

What shook out was a couple of alternatives from the compound arrangement.

Alternative with a standard ladder arrangement.

I ended up selecting the option with the ladder built next to the aisle way edge, to make it as easy as possible to work.

Next time, I will share some shots of the yadder build in progress.

Friday, September 6, 2019

Curving Backdrops

After having some success with curving backdrops on the upper level, I decided to continue the process on the lower level.

I'm using 1/8" masonite for the backdrops. I am not doing anything like wetting or kerfing to make it fit certain radii; just letting it flop.

The current progress (as of September 2019) is much further than these shots show, but I wanted to show the progression in a somewhat step by step format.

This is at the end of the center aisle.
With some temporary support in place.
2nd Son is just the right height to help fasten everything in.

Monday, September 2, 2019

Last Post in April, yikes!

Wow, didn't realize I was slipping so much on updates. Thankfully, the railroad itself has seen lots of progress.

I have set December as my first test session target so we are rapidly getting there.

I will publish a couple of updates in the next week or so to bring the readers of the site and blog up to speed.