As a shared in part 1, I though the brass bug had gone dormant.
This past summer in Orlando, the National Convention had the usual fair, including the silent auction.
I always peruse the auction since you get a chance to look through a wide variety of stuff. Some of it is crap (brass track that looks like it has been pulled up from at least 4 railroads), some of it is a treasure (long out of print books and magazines), and some is in between (slightly older engines, the odd fast tracks jig).
Normally there are a couple of pieces of brass. I normally see a bit more steam that diesel, but on occasion it will swing wildly in one direction or another. I've seen some passenger cars and other brass rolling stock, but engines dominate.
You could potentially see stuff that was imported in the early sixties to stuff that was just imported in the last few years. This means that pricing, quality, detail and interest are all over the map.
At this auction, there was a fair amount of brass offered.
Some of it wasn't great. There was a SAL E6 (I think it was Overland, but maybe not) that had been painted poorly in its past and really made it hard to tell just how good the underlying model was. The starting bid on it was also high with respect to how much work faced the purchaser, even if you wanted to just return to a natural brass model.
Some of it was interesting, such as a couple of interurbans.
The pieces that I took particular note of, where a pair of Overland P40s (labeled by them as the "AMD-103") in their as-delivered scheme that was a modification of the standard Phase 3 Amtrak paint - the stripes faded in a somewhat pixelated way towards the back of the carbody. There was also an Overland F40PH in Phase 3.
All of them had low starting bids at just over $200 each. That was an attractive price point, as that isn't much higher than what plastic sells for (for a comparison point, look at Rapido's asking price on their F40PH run this last year for a DC version, much less the DCC/sound edition!), and one of the units already had DCC installed.
I talked myself into taking a flyer on all the models at the starting bid after I saw the the brass guide showed pricing into the $400 to $500 range. One of the P40s had a few blemishes on the paint, but as I intended to use them to run the Auto Train on the layout, it didn't bother me much at all.
In a surprising turn of events, I was the opening and SOLE bid on each.
So, I came home from Orlando, having now quadrupled my brass fleet.
The bug wasn't dormant anymore.
(Slight edit February 2018 for phrasing and grammar)
Sunday, December 24, 2017
Friday, December 22, 2017
The Brass Bug, Part I
Brass Trains.
Anyone who's been in the hobby for any length of time knows about brass.
Brass has a much varied reputation, depending on who is doing the telling.
I could probably spend a couple of pages rehashing all the ink that's been spilled or all those electrons that have been inconvenienced over the years but in the interest of making this post actually useful, I won't.
I've had an interest in brass, but it was an armchair interest, as I'd not been in a place, life wise, where my interest could coalesce.
My father has had a single brass engine, a United 2-10-0 Russian, since the late 1980's when we were living in Meridian. This model in question was professionally painted and he bought it from the painter direct as somehow it became his via a deal with another customer.
The painter was one of the civilian contractors that worked on the base (NAS Meridian, MS). (I'll have to ask Dad which group he worked in.) The name of the painter is Mr. Alexander; I don't think Dad remembers his first name; and in the telling he was a custom, professional painter of some note as his customer base was diverse and included some folks of various levels of fame, to include some country artists.
Anyway,I ran it a couple of times on the 4x8 we had then; the big open frame motor that it has isn't exactly a well running machine that will creep along at a single volt, but it still ran fairly well as I remember.
Be that as it may, as always, time passed.
I became an adult and got pretty established in a career.
First brass model I purchased was at the 2012 National Train Show, an Overland Amtrak P42.
I'd like to note, that at this point, Kato had yet to announce their plastic P42 and the Kato F40PHs did not have (and do not have, even in multiple units) the ability to pull my modeled auto train up the helix on version 1 of the Richmond Terminal. (And they won't be able to on Version 2 either, but there's a workaround for that already in place)
The brass bug got a nibble on me.
I was able to fight the infection off, I thought.
I remember telling Dad after I'd bought it that when I passed, one of my sons would get that Amtrak P42 and the other would get that United Russian.
Turned out, it just went dormant.
While working on this post again (probably for the 5th or 6th time; writer's block), the youtube playlist had clicked over to Nothing More's "Fade In/Fade Out"; that'll hit you in the feelz. https://www.youtube.com/watch?v=z5BGVL6Ja9M
Thursday, December 21, 2017
Removable Bridge Building, Part 1 of Unknown
I think I need to expand my amount of construction labels. I'll make that a to-do for sometime in the future.
Onto the content.
The plan for version 2 as it currently sits will require 5 removable bridges to carry track across walkways.
They will only be in place during sessions, and 4 of them surround the staging area so that is only going to be a slight inconvenience to the staging and traffic manager. This same job controls inbound/outbound to staging so he can remove the lower bridge between his job location and the bathroom, so where were we again?
Oh yes, bridges.
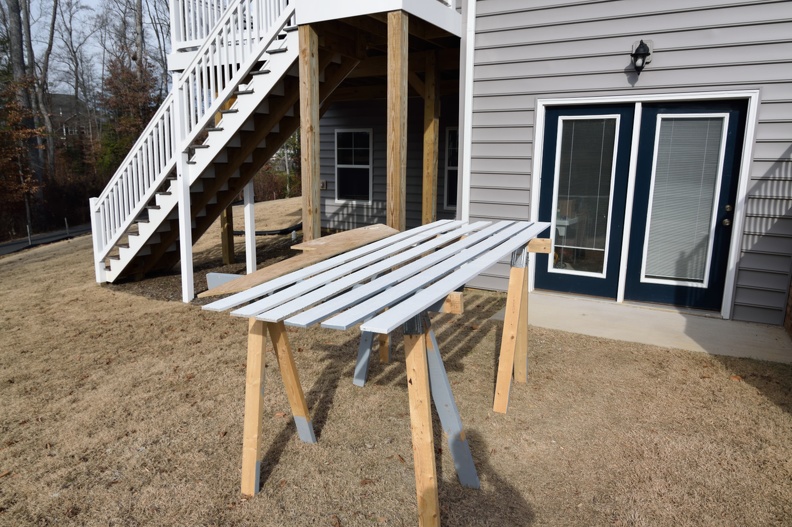
The number one rule offight club removable bridges is sealing them from humidity.
To do so, you must use oil based paints. Latex paints "breath" which will let humidity in. If there is one thing we have aplenty in Virginia, it is swings in the amount of humidity.
Note, you should ventilate VERY well when using such coatings.

They need a second coat, which did not get applied since when I went back out to do it, the skies had gone a rain soon gray so I bundled them back inside and got to stew in the fumes for a bit.
Ugh.
Anyway, hopefully later this week or Christmas week will have some sun I can use to finish this up.
Had to buy a quart of Kilz - the old oil based primer I had from version 1 got frozen or somehow else turned into this liquid plastic-ish stuff. That'll be a hazmat drop off in my future. 😒
Onto the content.
The plan for version 2 as it currently sits will require 5 removable bridges to carry track across walkways.
They will only be in place during sessions, and 4 of them surround the staging area so that is only going to be a slight inconvenience to the staging and traffic manager. This same job controls inbound/outbound to staging so he can remove the lower bridge between his job location and the bathroom, so where were we again?
Oh yes, bridges.
The number one rule of
To do so, you must use oil based paints. Latex paints "breath" which will let humidity in. If there is one thing we have aplenty in Virginia, it is swings in the amount of humidity.
Note, you should ventilate VERY well when using such coatings.
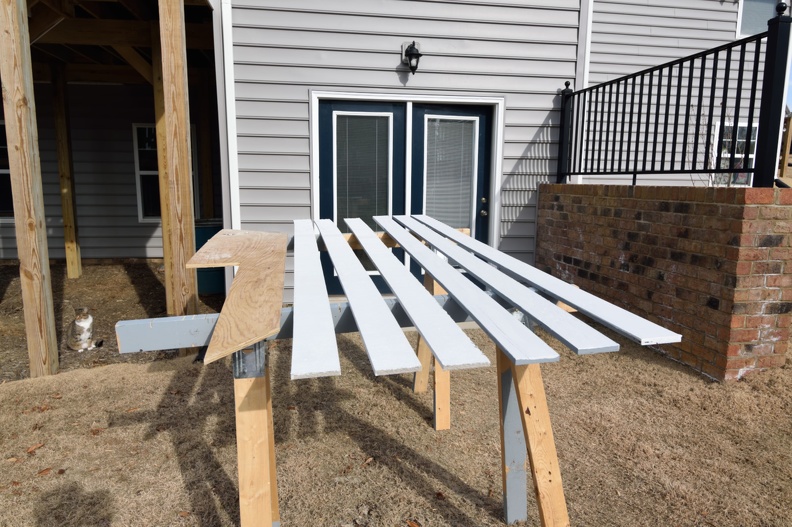 |
| Avoid getting any on the cat, BTW. I think the smell kept him away.. |
Ugh.
Anyway, hopefully later this week or Christmas week will have some sun I can use to finish this up.
Had to buy a quart of Kilz - the old oil based primer I had from version 1 got frozen or somehow else turned into this liquid plastic-ish stuff. That'll be a hazmat drop off in my future. 😒
Wednesday, December 20, 2017
Staging Yard Track Access
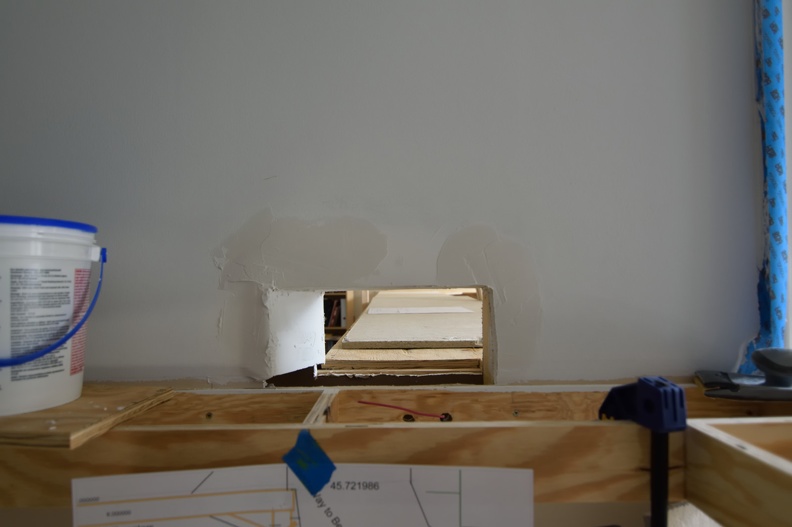
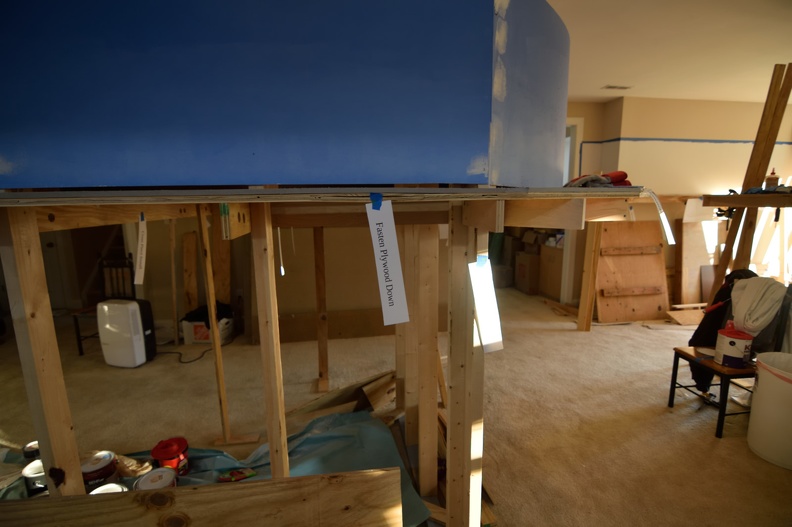
A way to get my wife to do anything else around the house is to mention working on drywall.
We finished the last basement ourselves and spent way way too much time doing it, and along the way, absolutely making my wife hate working with it.
I understand her dislike and truth be told, it isn't one of my favorite activities, either.
A part of it that I do hate the fact that you'd think a gallon of joint compound is plenty.
Here's a shot after the 4th coat of mud of the access hole to staging.
Take it from me, if you have a project of any size, you might as well as buy the 5 gallon bucket..
We finished the last basement ourselves and spent way way too much time doing it, and along the way, absolutely making my wife hate working with it.
I understand her dislike and truth be told, it isn't one of my favorite activities, either.
A part of it that I do hate the fact that you'd think a gallon of joint compound is plenty.
Here's a shot after the 4th coat of mud of the access hole to staging.
 |
| Note 1 Gallon Pail on left, ugh! |
Tuesday, December 19, 2017
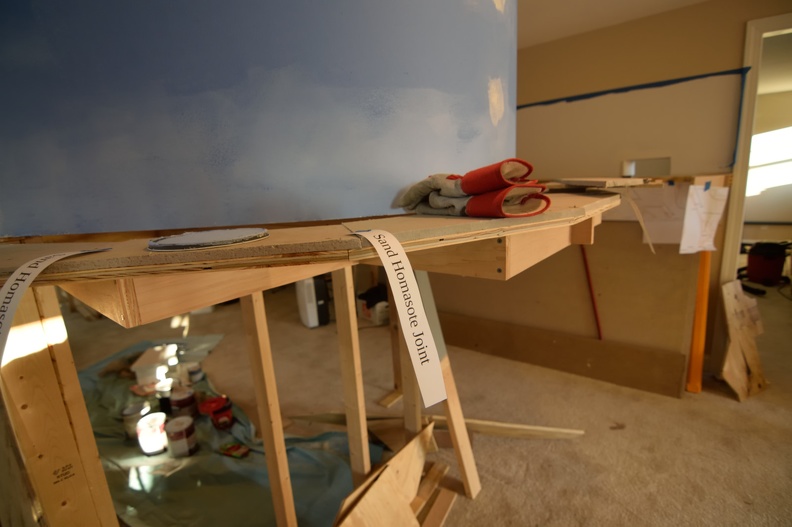
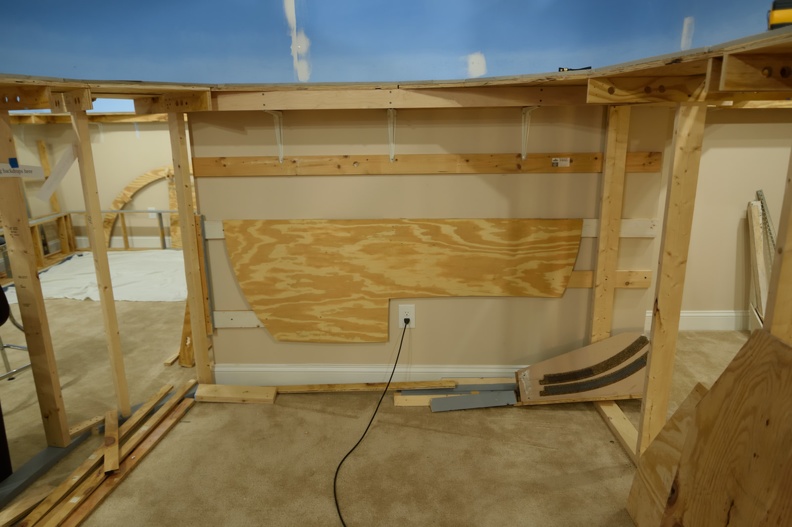
Update on Staging Yard Construction
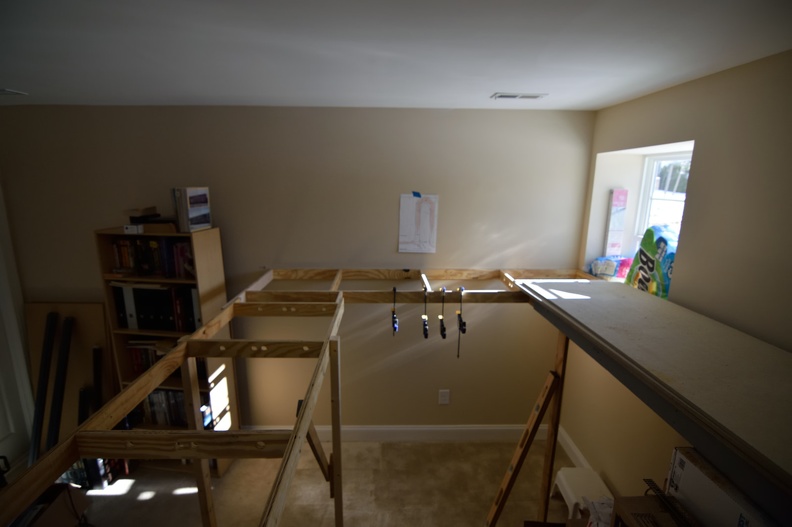
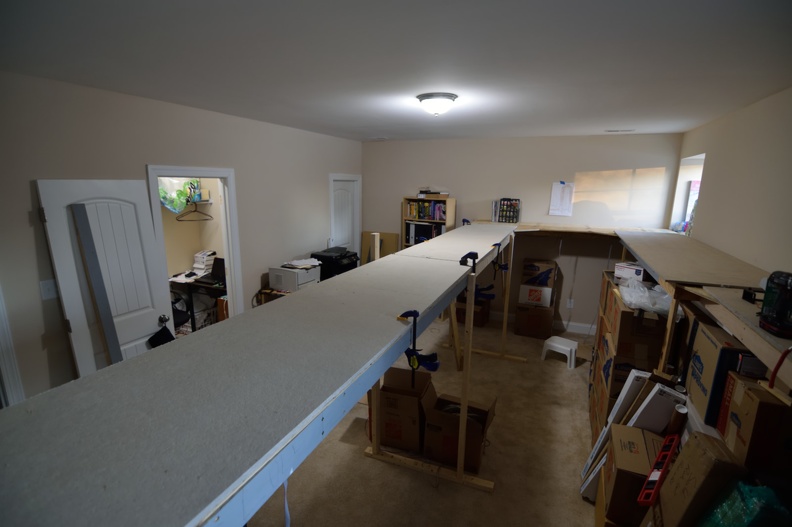
Benchwork for the upper staging yard is complete, thanks to the work session on the 9th. I only had a single attendee, but I lucked out and got a wood worker, so progress went forward.
Since it was just two of us working, I didn't get a chance to snap any "in-progress" views so what's here is the result.
Put in the back piece of plywood so homasote could start going down.
Since it was just two of us working, I didn't get a chance to snap any "in-progress" views so what's here is the result.
 |
| Framework in |
 |
| High Angle Shot |
 |
| Sanded the angled cut's edge to hopefully prevent splinters. |
 |
| With homasote down, all I need to do now is paint dirt! |
Monday, December 18, 2017
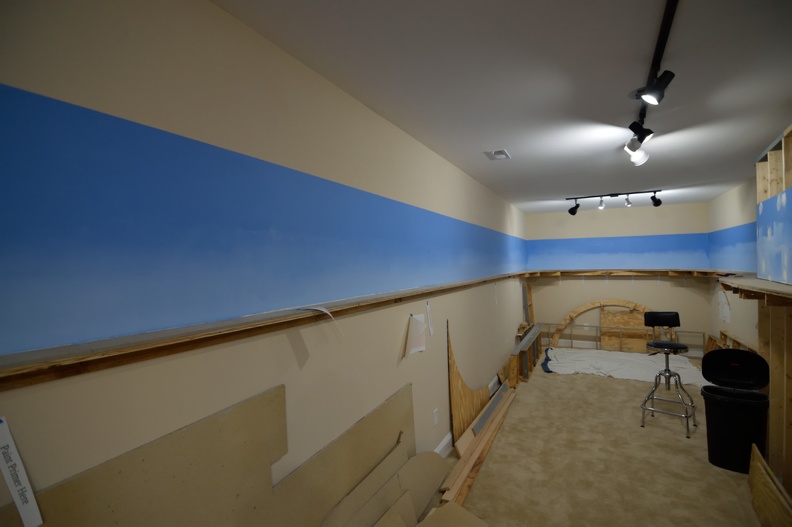
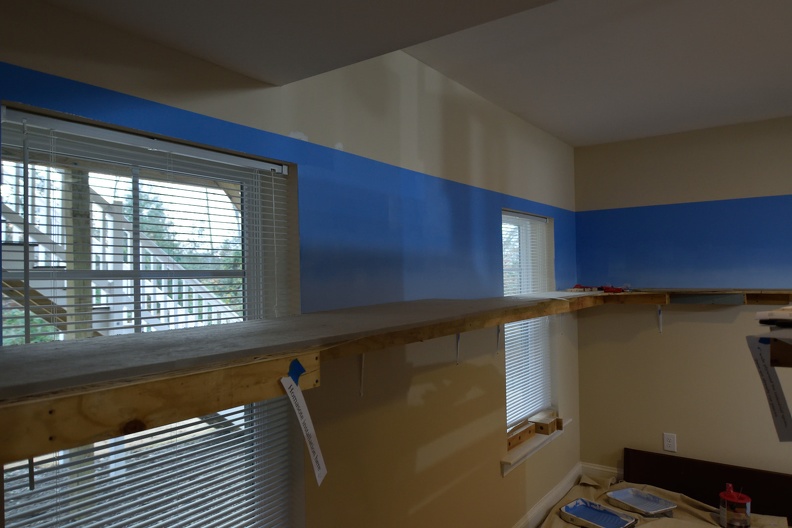
Upper Backdrops - 95% Done
Two walls left; about 60 square feet.
Took most of a Saturday, but got the rest of it painted.
Very proud of my work, but man, my arms are still tired.
Additional pictures up on the site gallery on the main website.
Took most of a Saturday, but got the rest of it painted.
Very proud of my work, but man, my arms are still tired.
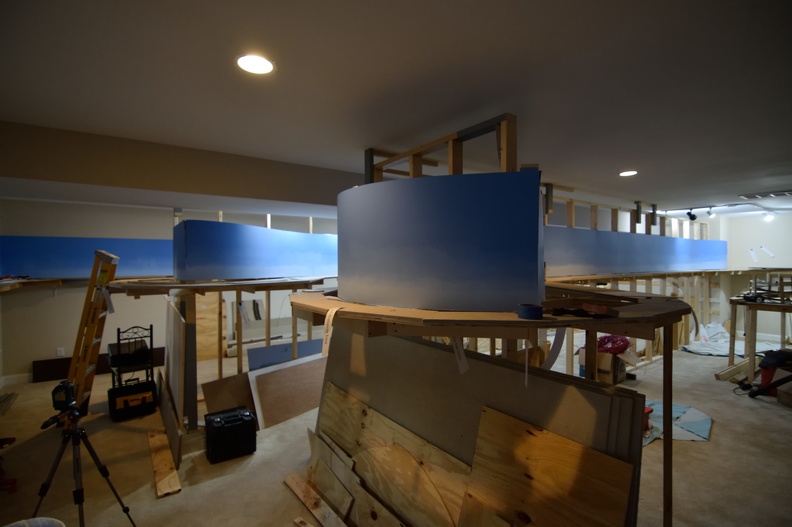 |
| Revel in the Glory of Blue! |
Monday, December 11, 2017
Note(s) to Self Or How to Keep Progress Tracked, Live
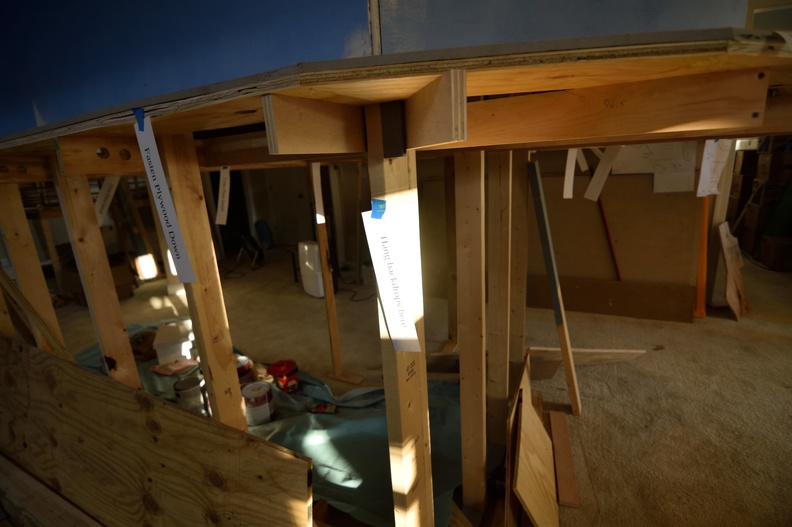
As I've mentioned previously, tagging areas of the layout that are in progress makes it easy to remember what the heck you were doing when it is been a week or more since the last time you were in the layout room.
I've made it a point to keep up on this system, as it also makes it easier to manage work session since you can just point out the to-dos and keep your crew going.
A couple of snaps from before the work session in December to illustrate the idea.
Note, homasote is 1/2" thick from the factory. That's a guideline, not a standard, by the way...

Notes of all types.
I've made it a point to keep up on this system, as it also makes it easier to manage work session since you can just point out the to-dos and keep your crew going.
A couple of snaps from before the work session in December to illustrate the idea.
 |
| Is the sun trying to tell me something? |
Notes of all types.
 |
| Plywood quality... |
Friday, December 8, 2017
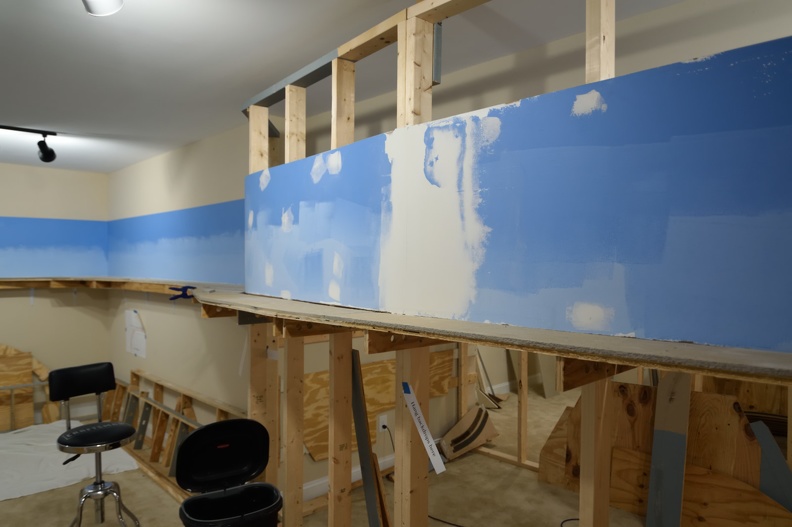
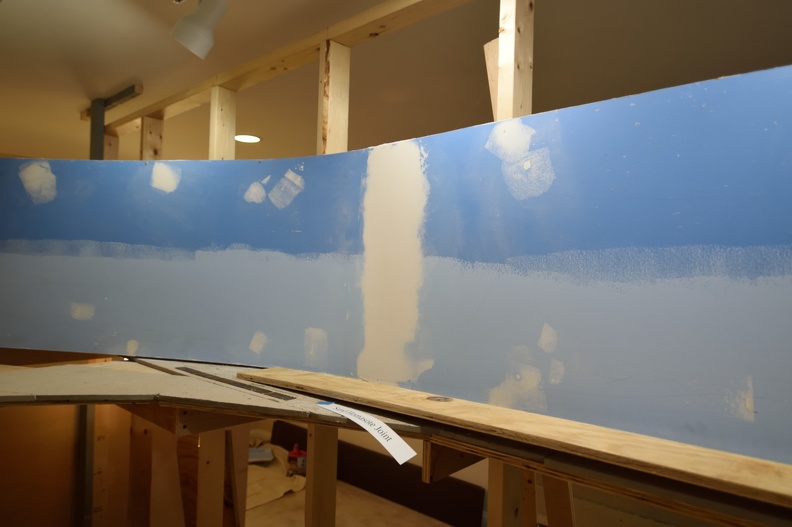
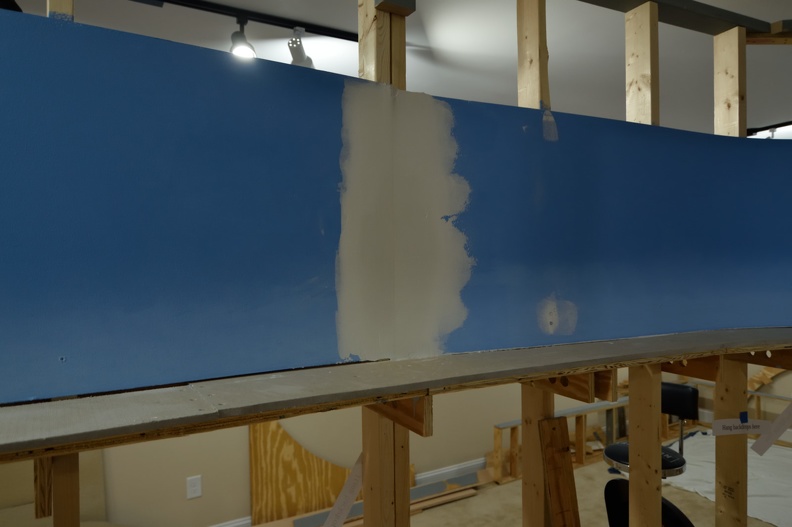
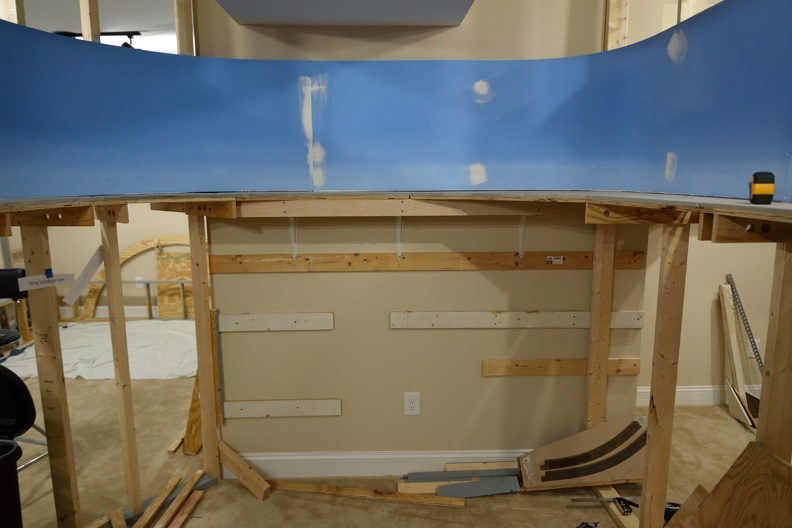
More Blue Backdrops
In a previous post, I talked about the progress in painting sky backdrops. I've made additional progress on that front, as well as working back to fix a couple of issues that, after some reflection, weren't up to snuff.
You can see the previous post here: Previous Post
I'm going to just highlight a couple of things in this post so it doesn't get to loaded down.
Somewhat against my better judgement, I bought some drywall tape and a gallon bucket of mud. I promised myself it will be my ONLY gallon for the top level.
I did do some rework on places I already painted blue.

At this point, all these patch places have been hit with two coats of Kilz primer so they are ready for take two blue next time.
Additional photos galore are on the main site gallery.
You can see the previous post here: Previous Post
 |
| Down the long aisleway. |
 |
| You can tell this area of the room has its original lighting still. |
I'm going to just highlight a couple of things in this post so it doesn't get to loaded down.
 |
| Reusing some of the old backdrops meant scraping and re-mudding joints. |
 |
| Center aisle, reusing again. |
At this point, all these patch places have been hit with two coats of Kilz primer so they are ready for take two blue next time.
Additional photos galore are on the main site gallery.
Thursday, December 7, 2017
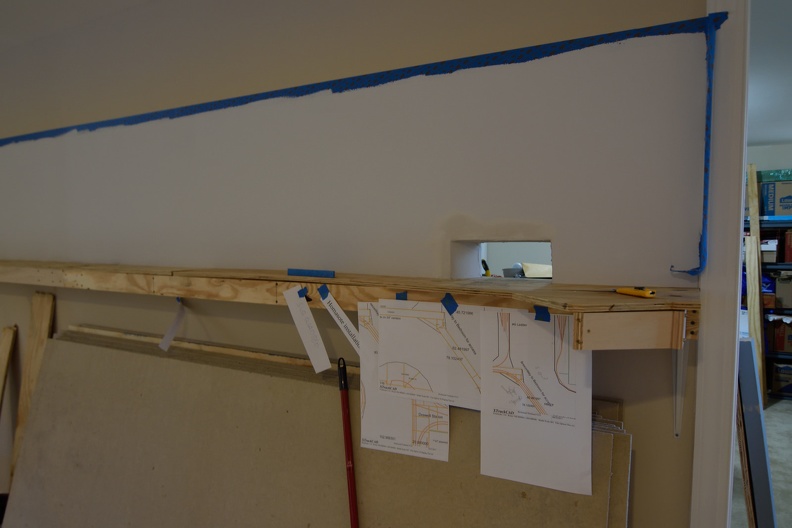
Planning for DCC
One part of the planning process that can get overlooked is being able to wire the layout up so you can run trains.
You need to plan for a place for the wire runs, of course, but don't forget to have space set aside for where you DCC command station, booster(s), circuit breakers, etc are going to go.
Due to the size and nature of Version 2, I'm going to end up with 3 booster districts, broken into a couple of circuit breaker sub districts. Version 1 was powered by a single Digitrax DB150; the current plan calls for one addition DB150 if a good deal can be had on one, or the current generation booster, as well as the top of the line command station, the DC240.
Having three power feeds will allow me to avoid building any sort of bridge to carry bus wires over the lift bridge areas, as well as keep the buses to 50' in length or less.
The central location is inside the middle aisle. I didn't want to deal with trying to mount the various components to the drywall, so a wall field was in order.

An additional 1x4 was put in to complete the furring strips. I also took this opportunity to put in a spacer piece for the lower level backdrop in this corner.
Again, in a waste not, want not, solution, the scrap from building the upper helix approach from version 1 was reused here. That will explain the curved sides. :)
You need to plan for a place for the wire runs, of course, but don't forget to have space set aside for where you DCC command station, booster(s), circuit breakers, etc are going to go.
Due to the size and nature of Version 2, I'm going to end up with 3 booster districts, broken into a couple of circuit breaker sub districts. Version 1 was powered by a single Digitrax DB150; the current plan calls for one addition DB150 if a good deal can be had on one, or the current generation booster, as well as the top of the line command station, the DC240.
Having three power feeds will allow me to avoid building any sort of bridge to carry bus wires over the lift bridge areas, as well as keep the buses to 50' in length or less.
The central location is inside the middle aisle. I didn't want to deal with trying to mount the various components to the drywall, so a wall field was in order.
An additional 1x4 was put in to complete the furring strips. I also took this opportunity to put in a spacer piece for the lower level backdrop in this corner.
 |
| Note the cut around the outlet. |
Wednesday, December 6, 2017
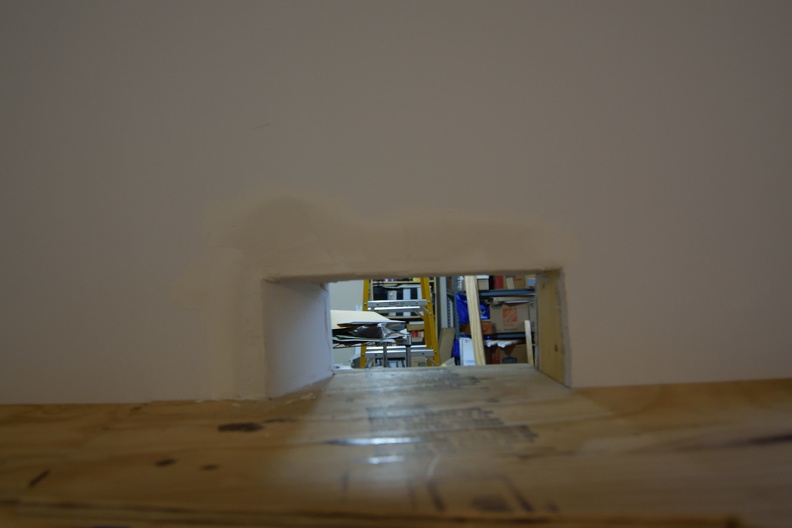
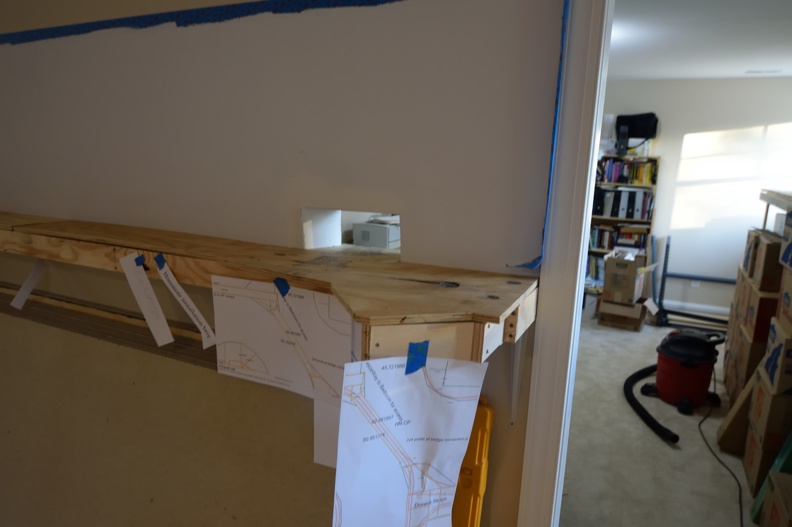
Another hole in the wall
Have I mentioned I hate Pink Floyd?
Anyway, showing this to my dear wife earned a comment about having to patch up drywall when we move, but nothing on how nice it it that I'm just about to complete the benchwork so track laying can start.
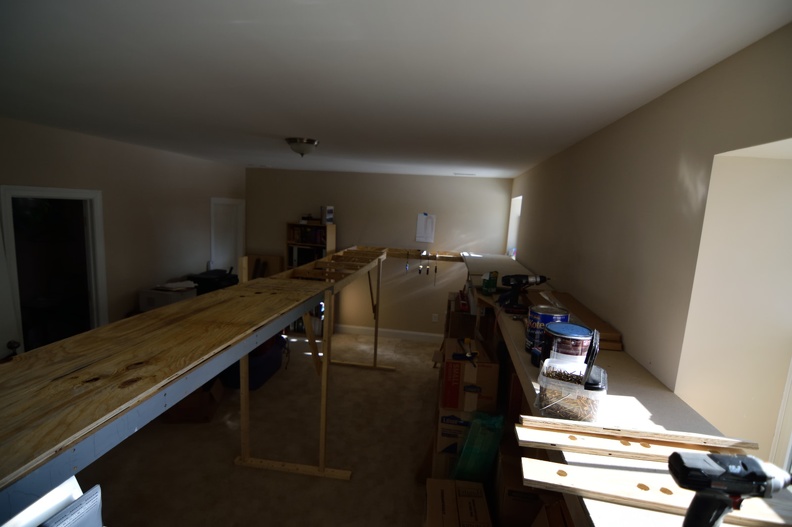
The main line track enters staging through this hole after running the length of the upper level; this will be the northern terminus of the modeled line. This particular track in this area is going to be hidden behind a small foam or masonite divider, as to not take away from the track just beginning it's journey on the upper level.
Once I get a finish coat of joint compound on this, it will be time for another coat of primer and then time for the backdrop to go blue.
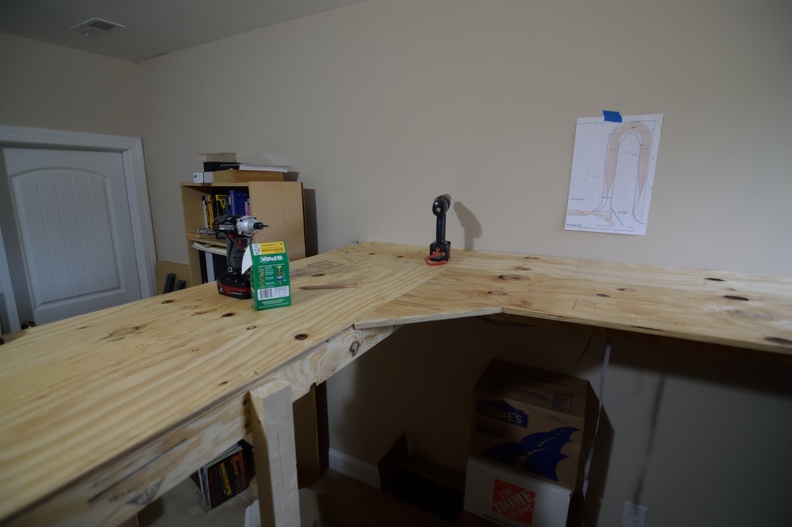
The piece of plywood on that corner was cut from a scrap left over from a different section of the upper level. It was an odd shaped piece and took some figuring on how to best utilize it. It saved me another run to the lumber store and another $25 for plywood. I'll be able to complete the upper level with what I have on hand, which is a bonus for both the train funds, as well as keeping the construction momentum.
Anyway, showing this to my dear wife earned a comment about having to patch up drywall when we move, but nothing on how nice it it that I'm just about to complete the benchwork so track laying can start.
 |
| You can see the breeze through to the bedroom/staging yard at far right. |
The main line track enters staging through this hole after running the length of the upper level; this will be the northern terminus of the modeled line. This particular track in this area is going to be hidden behind a small foam or masonite divider, as to not take away from the track just beginning it's journey on the upper level.
 |
| I used the cut pieces from the wall to fill in the gap so there wouldn't be an opening in the wall cavity. |
 |
| High level shot |
Tuesday, December 5, 2017
Work Session this Saturday, December 9th
Lunch at noon, then we'll work until we are sick of it.
Hope to complete the benchwork for the staging yard so track can start going down around Christmas.
Email if you are interested in attending.
Hope to complete the benchwork for the staging yard so track can start going down around Christmas.
Email if you are interested in attending.
Subscribe to:
Posts (Atom)