Saturday, December 31, 2022

Multiple Deck Layout Construction - Support Options for the Upper Deck

 As the layout was built, we added support legs where we needed them, generally in areas where the span of the structure was too long to effectively cantilever from the center line structure or the wall.

Most of these spots got "temporary" legs made from the same 3" wide ripped strips of 3/4" plywood that was not straight enough to use elsewhere.

As an aside, we realized a few years in that our ripping technique was causing non square cuts near the end of the rip cuts, causing all sort of issues. Once we had a tablesaw to use, our accuracy was improved immensely. 

Now, a 3" wide support will impede the view and can potentially made access a bit tricky, depending on some other factors as well.

Readers familiar with Version 1 will remember that one of the helixes was suspended above another  helix via a system of 3/8" threaded rod (aka all thread) and metal straping. When Version 1 was torn down, all that metal was saved for potential use on the next layout.

I am now getting to where I can remove the temp support and install some permanent ones, so I broke out the hacksaw and cut the 3' long pieces in half to 18".


Having nipped myself on the threads, I decided that I needed to figure out a way to protect people from the threads if I was going to use it again.

I came up with an idea to use styrene tubes (1/2") to protect the threads, which is working great.


Thursday, December 29, 2022

Prototype Photo Series: Seaboard US&S CTC Panel

During a road trip this fall, I was able to swing by the North Carolina Transportation Museum and take a bunch of pictures of the Union Switch and Signal CTC Panel from the Seaboard's line in North Carolina.

At this stage, I wouldn't expect any of these panels to still be in service on a US based railroad, so seeing one in actual action would be limited to some years ago.

This panel is in decent condition; some of the levers are apparently broken and hang down, instead of being in a expected position, but otherwise, the model board is in good shape and most of the lamps are present as well.
There seems to be some sort of automation of the various lamps coming on here and there to simulate some amount of activity on the line, even though I expect it has been decades since this machine was actually connected to a code line.


Note the original Norfolk Southern Railway crossing between New Hill and Merry Oaks


Even more pictures are in the gallery at richmond-terminal.org.

Tuesday, December 27, 2022

Resistor Wheelsets Again

Some time ago, I created a couple of batches of resistor wheelsets to be used on the freight car fleet to make sure that block detection worked fully. The blog post about the first phase of this is here if you are so inclined.

I used the Intermountain bulk wheelsets, 33" diameter for the first batch back then.

After using a bunch of them, I realized that some of the car fleet had a 36" wheel size, vs a 33" wheel size.

So, that means I needed to make some 36" wheels up with resistors.


I'm still using 10K 1/8W 0805 1206 SMD with the same procedure as before.

Jan 2024 Edit to fix this. I put together a new post about it, and wanted to link to the old posts. As I pulled the old posts to link, I realized I have had the resistor size wrong for years. Whoops!


Saturday, December 24, 2022

Freight Car Projects Part I: Hood Brothers Packing Refrigerator Car

 As the layout is starting to transition from major construction phases such as benchwork, roadbed and track towards tasks like signaling, operating improvements and limited scenery, I had a chance to consider some car building projects.

I have a stock of undecorated kits, mostly Athearn blue box from many years ago. Most production now are assembled and decorated cars, and when undec options are available, they are hardly cheaper than the ready to go option.

As an example, looking at trainlife.com, they have a handful of Exactrail kits for around $50 each. This means anybody looking for source material for a fleet of freelanced cars for their railroad is in a tough place unless they can haunt train shows and find folks selling new old stock options.

In my pile of kits, I have 4 Athearn 57' Mechanical Refrigerator cars. 

The prototype basis is a R70-20 series car that Pacific Fruit Express (PFE) and other refrigerator car leasing companies used. It is primarily a western US prototyle, as on the east coast, Fruit Growers Express (FGE) was the dominant leaser AND producer of cars. FGE had a facility in Alexandria, VA that built cars used by most of the Eastern railroads. Model exist of the FGE cars, of course, but I don't have any in my stock.

So, back to these 4 cars. I know they didn't match the handful of FGE cars lettered for the RF&P, so that was out. I kept turning over what to do with them in my mind.

In November, late one night as I was trying to fall asleep, I had a flash of inspiration - I could decorate these for Hood Brothers Packing, which was a major industry and shipper on Keith Stillman's Easton and Potomac.

I figured that both the E&P and Hood Bros was rebuffed in trying to join with FGE and its owner railroads when the Armour Packing antitrust fallout happened (what caused FGE to be created) and as FGE expanded westward with Western Fruit Express (WFE), PFE came calling to find an Eastern based partner and found Hood Bros and the E&P, hence these cars.

The paint scheme is simple - reefer white all over, with green lettering.

After polling the E&P FQOs, I was able to get my hands on a original decal sheet to use as basis for my custom printed decals. I used Micromark's clear decal paper and was able to print using my standard Epson printer, turning up the quality as far as it would go. I bought a can of an acrylic fixative, as recommended in the decal paper instructions, to spray after printing to seal the decals up.

The cars are molded in black plastic for all parts out of the box. I planed on a white body, but as I dug through my drawer of paint, I found a bottle of gray and thought that would look great for the underbody.

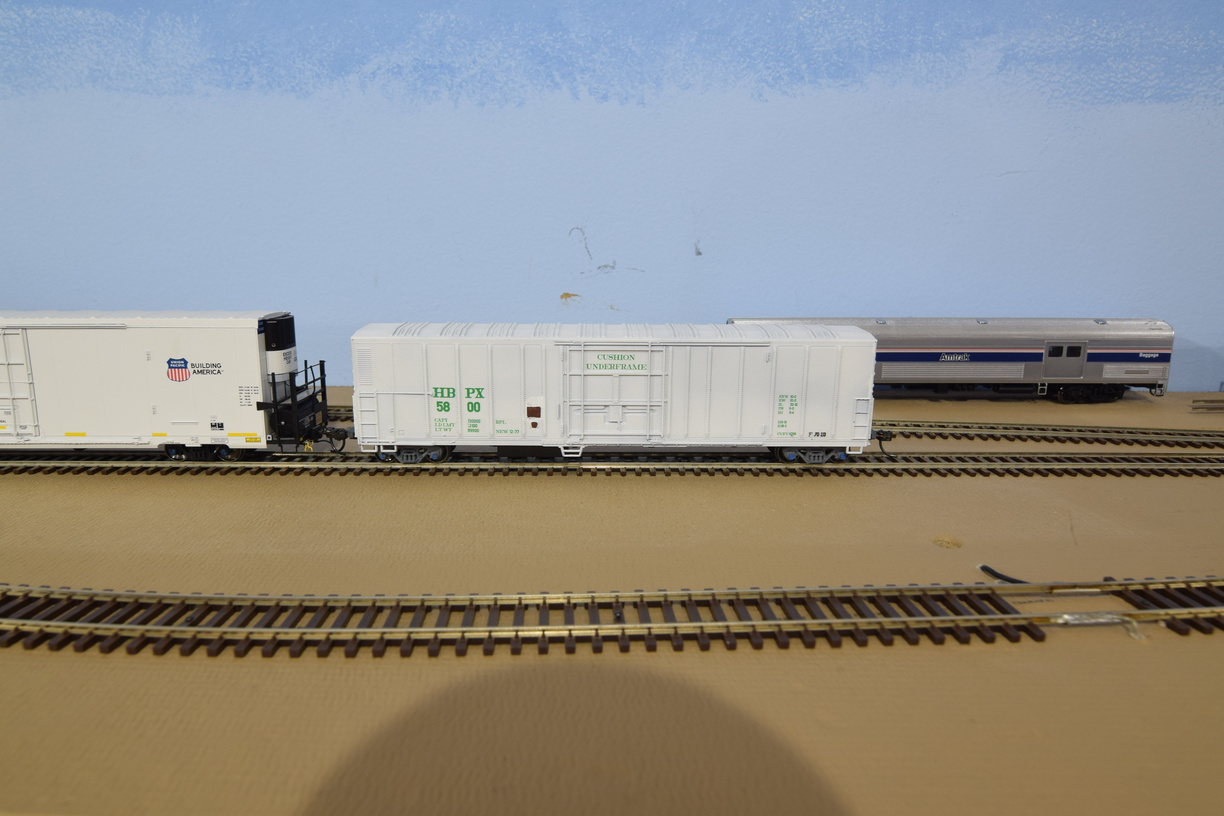
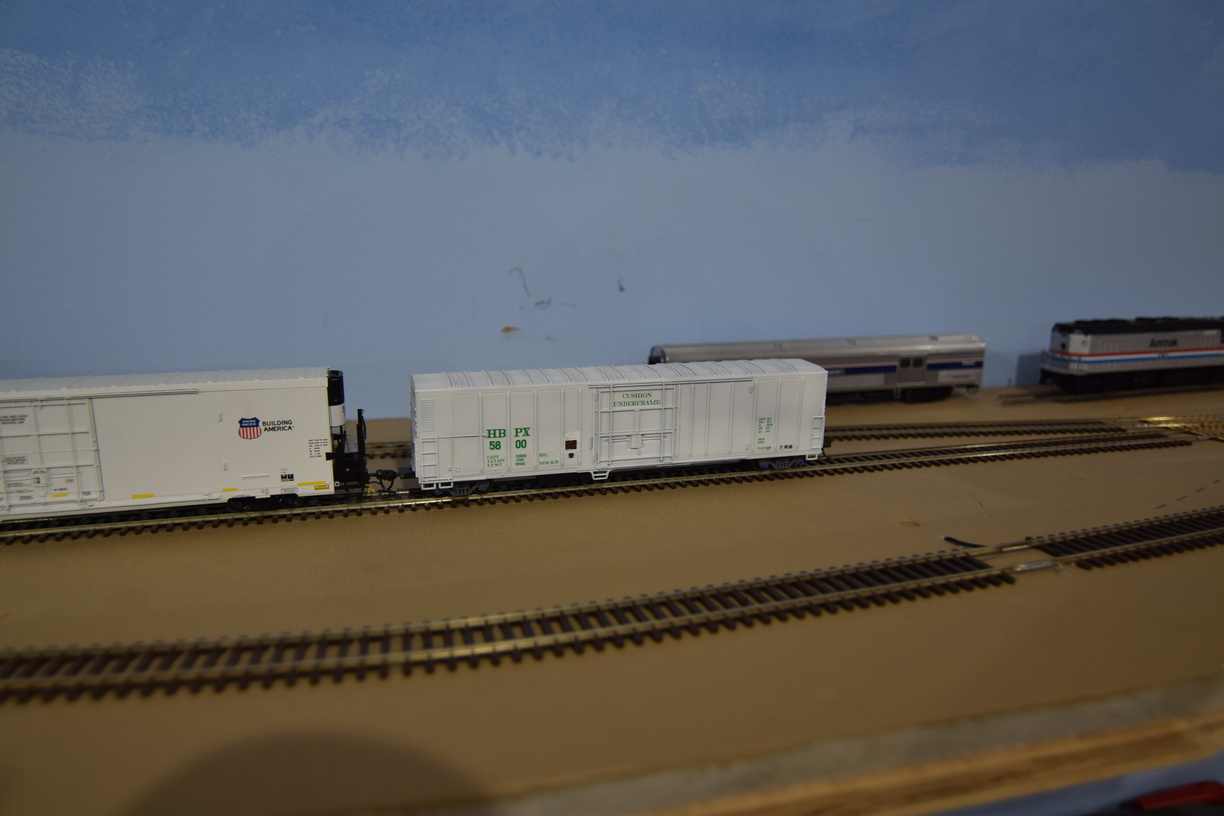
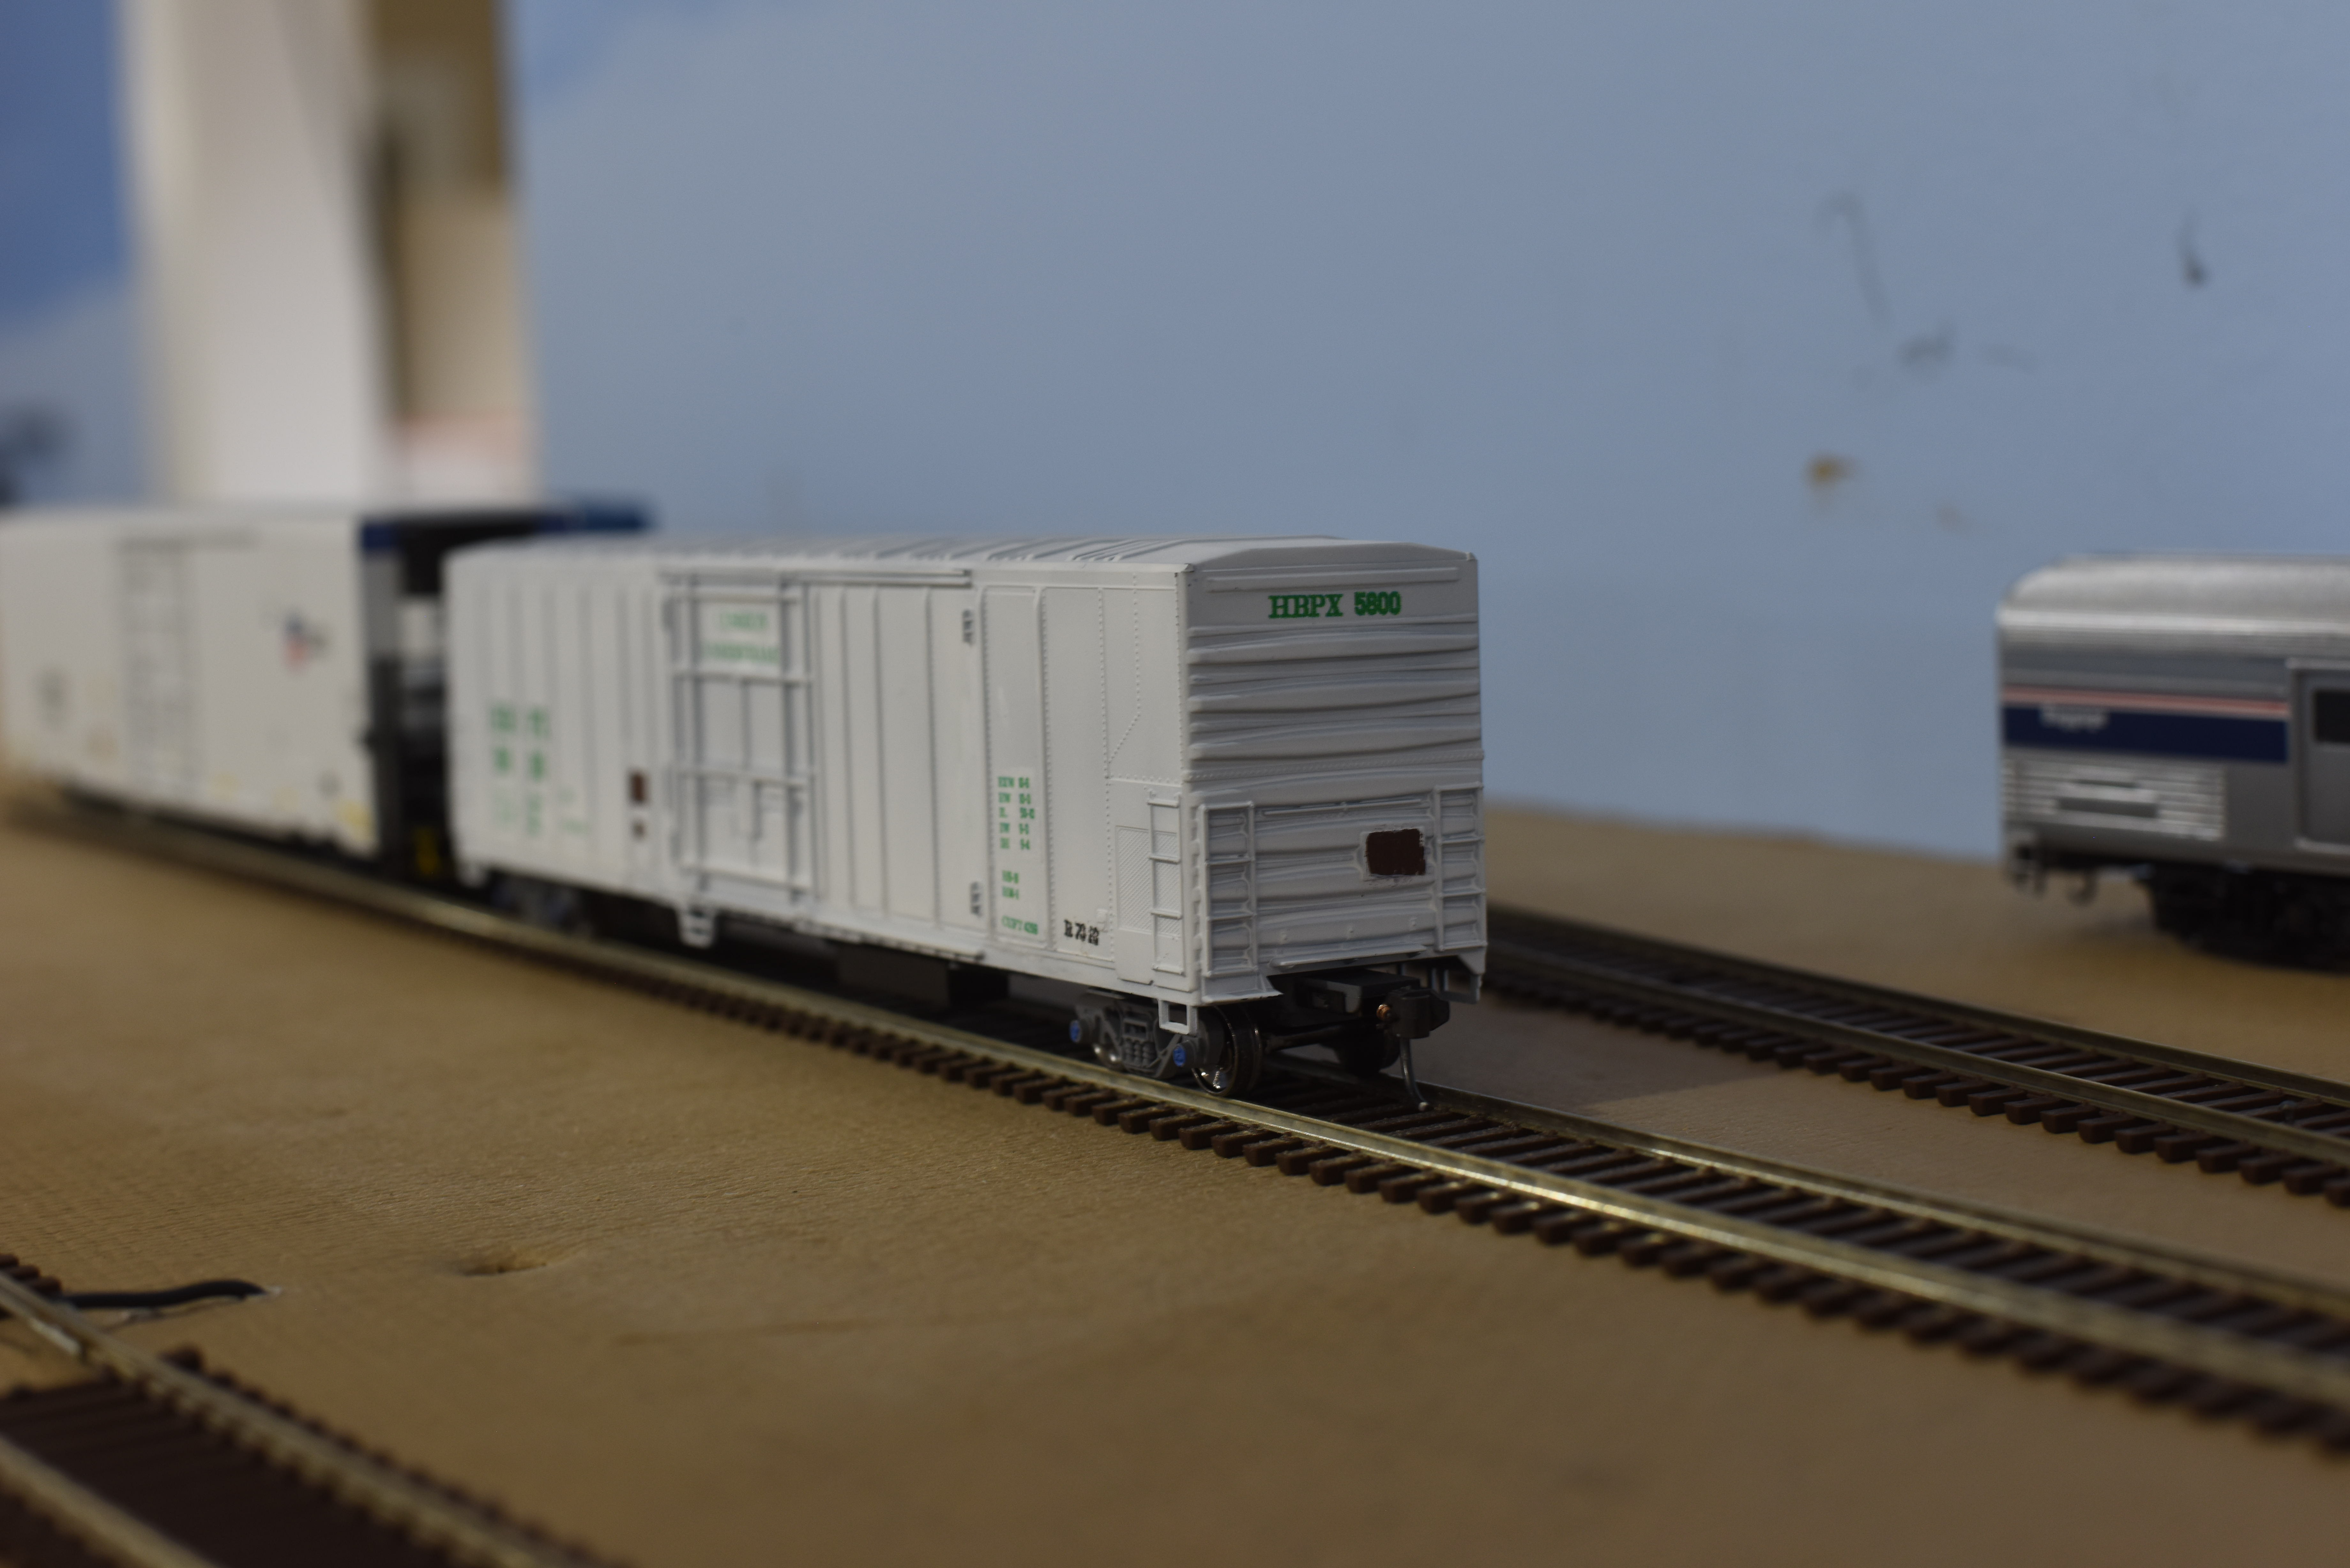
Car 5800, double zero, was my original test car for this - a proof of concept to use a technology term.


I really like the white body, gray underframe, black fuel tanks, and blue roller bearing caps.


Next to a current production style reefer built by Trinity (this model is probably BLMA), which are 64' long and excess height to boot, these cars seem small, but this encapsulates railroading in the 1990's - there is lots of change as the 40' long standard boxcars finish fading away, and many of the 50' cars begin to show their age and hard lives as the allowable total car weights rise and shippers ask more from the railroads.


As I expect these cars to be a part of operations, I made sure to include reporting marks on the ends, high enough to be read from either side from an angle.


I airbrushed the body, underframe and trucks. (A separate, longer post about airbrusing and painting is in development) The tack boards and roller bearing caps were brush painted. Paint was a mix of old Polly Scale (reefer white and MOW Gray) and Vallejo Model Color. Going forward, all the paint will be Vallejo, as my stock of Polly Scale is a few bottles, of which I've used all my reefer white up..

After Double Zero was done, I realized I was missing decals for the COTS lube plates and I needed to finish any touchups, before I sealed up everything with a matte spray varnish. You can pick out where I used Vallejo Model Color white to clean up around the tack boards after the fact.

I also realized that I should put some spaces in the decals so I could apply the reporting marks and car numbers with one decal, versus trying to line up 4 different smaller decals. Same story for the car data, such as cubic feet, weight and similar.

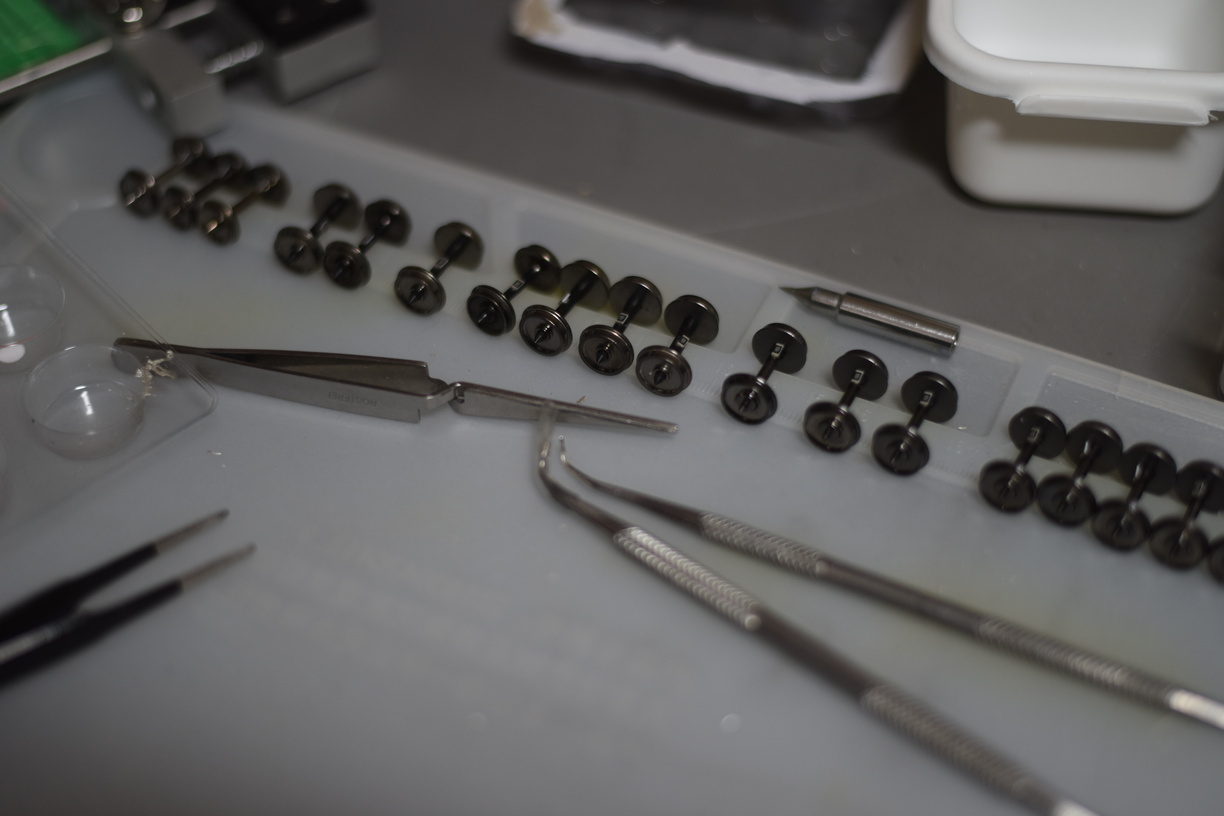
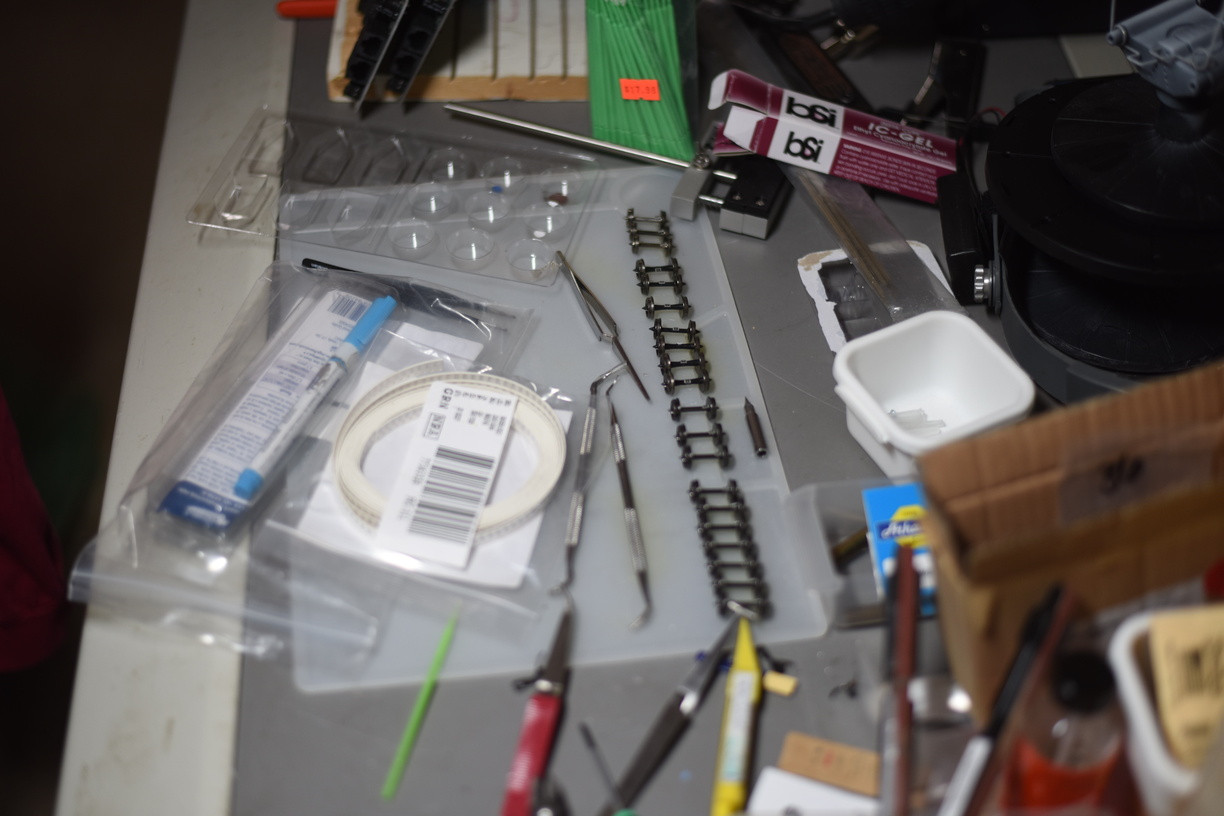
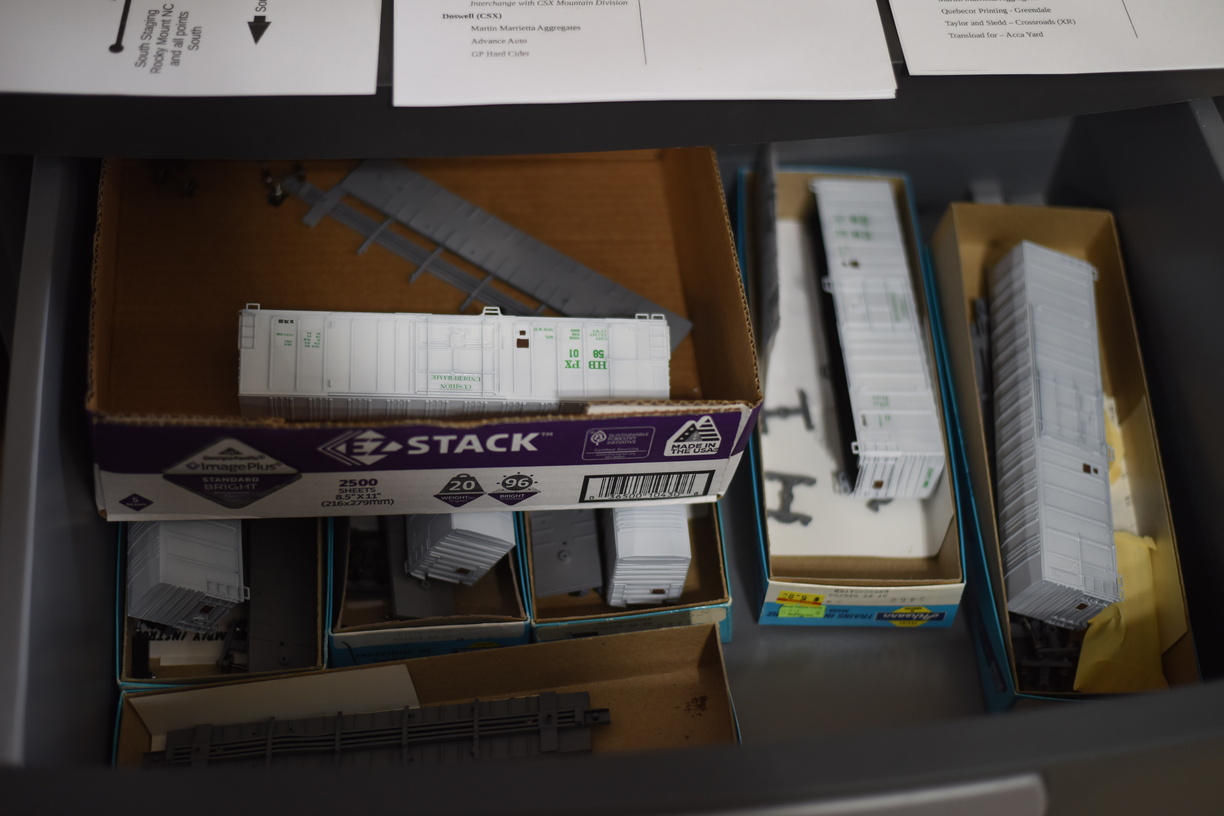
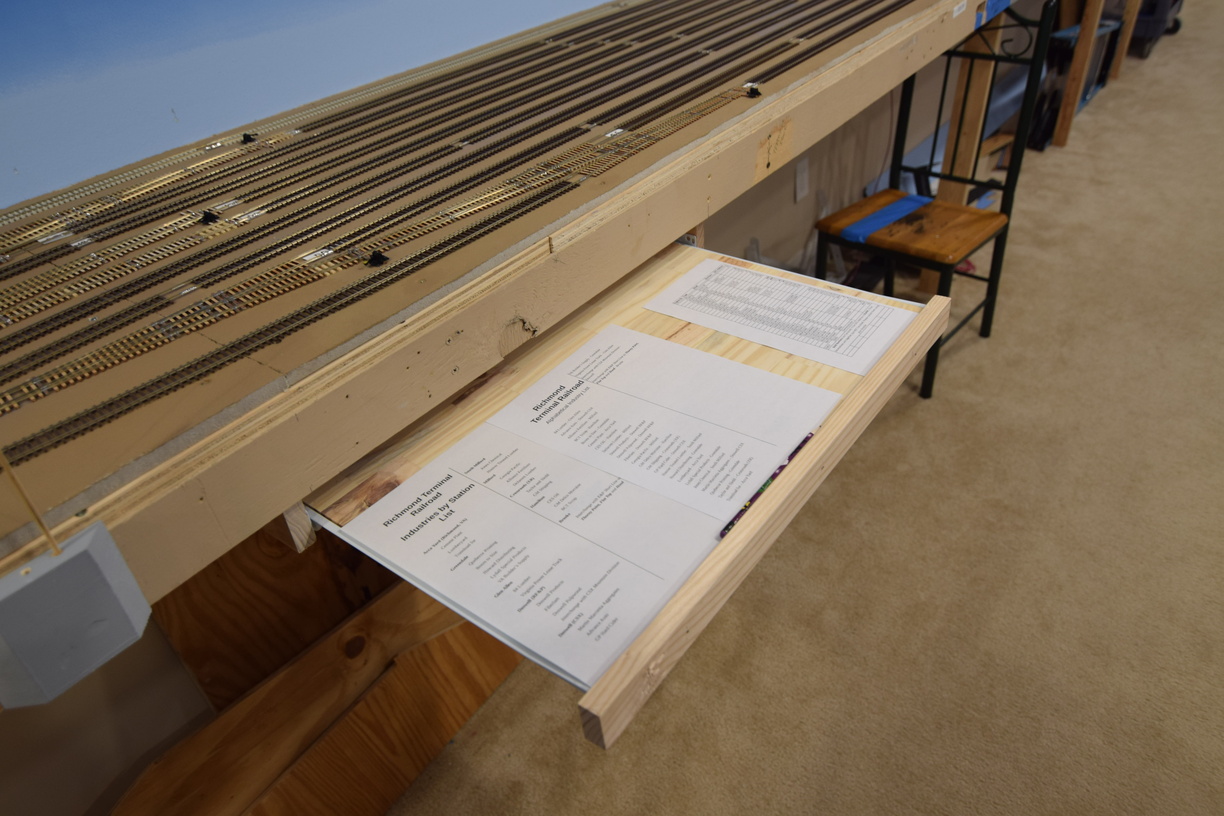
Here's the drawer of the cars in progress. The cars with decals applied are from the first run of 3; the 4th car had been assembled as a plain black car and put on the layout by a child so I couldn't find it until after I had painted the first 3 cars, so it was rolled back to the next run.


You will note in this shot some painted car bodies but not decaled. I sourced another couple of cars from eBay to make it worth getting the airbrush setup for car #4 that I had to find and disassemble.

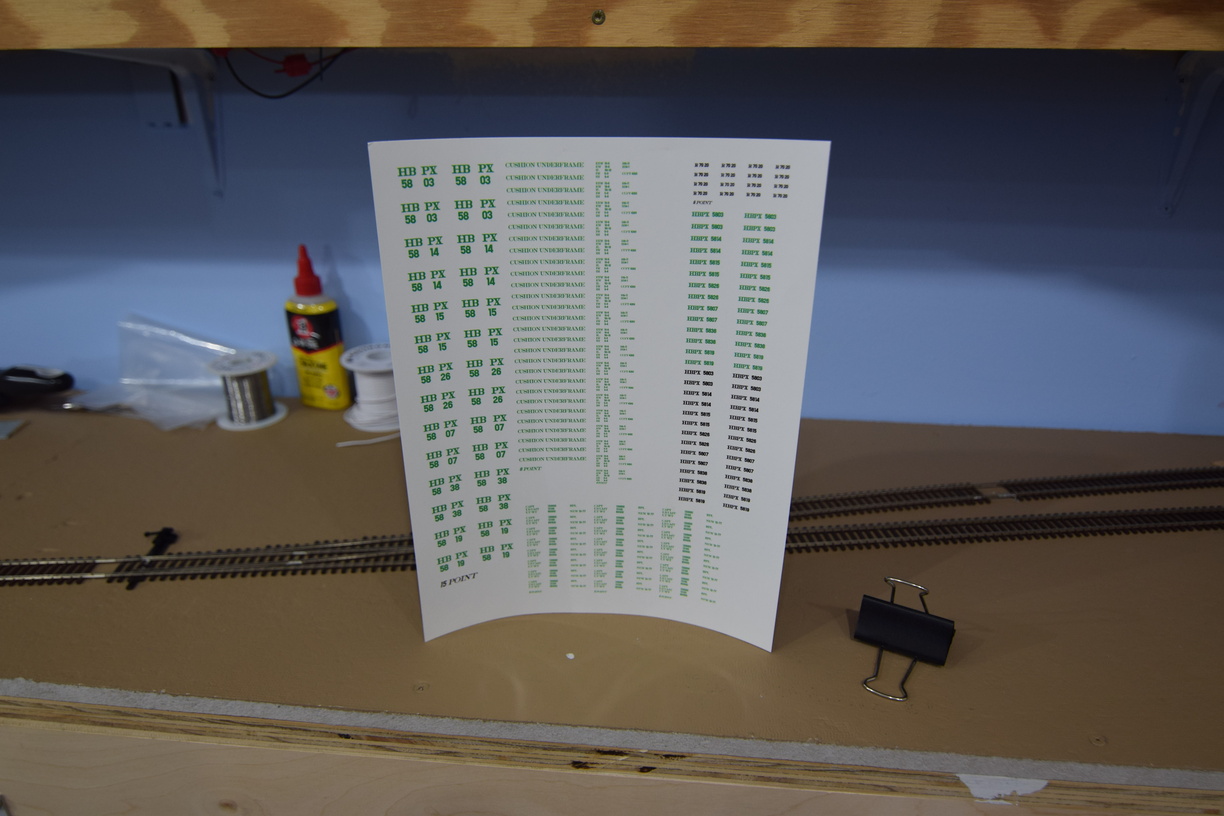
Printed decal sheet for the 2nd phase cars that will be built - I ended up sourcing 6 cars from eBay, to bring me up to 10 cars total. I spaced the numbers out to make it look like way more cars are in service, but just not on the layout.


More pictures on richmond-terminal.org.

Thursday, December 22, 2022

Scenery?! Well, landforms at least..

 For a total change of pace earlier this fall, some landforms were built up.

I'm using the cardboard strips and glue shell method, using red rosin paper as the top layer of shell.

The cardboard strips are hot glued together, so management has been saving corrugated cardboard boxes for recycling into the strips.

I started in the corner near Quantico, with the thought that there are no plans to change the track in this area, signals are already installed and the sharp corner is pretty obvious.


I used my normal brown latex paint to go over the red paper. Some additional tweaking will be necessary, but for a first attempt, acceptable results were obtained. 

I put another of these in Hamilton, to help hide the gap between the backdrop and the homasote that serves as subroadbed.

Some painting touchup is needed..

And here is an overview shot of the area south of South Milford. You can see the cardboard peeking out from the form closest to the camera.


As the hot glue is very stringey, I recommend covering you track with paper masking that you will find in the painting tool aisle at your local home improvement center. Makes clean up simple as the paper that protected you track can just be thrown away or recycled, depending on your desires.

A key consideration is using enough cardboard strips to support the overall landform shape you want.

A few more pictures on the website gallery - richmond-terminal.org

Eventually, there might even be some ground cover and trees planted, but let's no go crazy.

Wednesday, December 21, 2022

Smoothing Operations

 Long time RTRR operators probably remember that the Digitrax throttles were stored in an untidy pile on the benchwork in Doswell.

Management finally tired of the situation enough to make some changes.


Those with a keen eye will realize this is a reused car card box from version 1.

Waste not, want not.


Monday, December 19, 2022

Rework Part II: Workspaces for Acca Crews

 The operating framework on Version 2 is switchlists. We use JMRI to make the car routing decisions and that is where we print out the switchlist from.

This is a break from the previous Car Card and Waybill paradigm on Version 1.

As you can imagine, working from full letter size paper is great to read from, but it can be awkward when it comes time to put the paper down and move a train.

The yard crews have mentioned that a desktop space would be helpful in managing the paperwork aspect of the job and keep the paper from being set on top of the track and cars.

I decided that making some roll out desktops via the keyboard style drawer slides was the way to go.

I bought one of those premade tabletops from one of the big box home improvement stores; the ones made out of various pieces of 1x3" pine and glued together at the factory that gives you a 2x4' or so surface. I bought one large enough that we could cut it in half and make two slide outs.

Dad used his brad airnailer to attach a piece of 1x2 as a combination stop, handle and fiddle.


One is at the end of the Acca aisleway, the other is near the beginning, where the layout goes from 18" to 24" wide.


Here is a drawer in the stowed position:


A few more pictures can be found in the construction gallery at richmond-terminal.org.

Saturday, December 17, 2022

Rework Part I: Crossover and Signals at South Doswell

 As I mentioned in a previous post, a prototype crossover south of the diamond at Doswell was not selected for inclusion when the track was laid in that area of the railroad.

The reason for it being left out was the fact that I thought it wasn't needed based upon our operating designs at the time.

After a few operating sessions were ran, I realized that leaving it out was a mistake and it needed to be installed.

As shown in the post about the September work session here I built a crossover and a work crew installed it. What was left to me was installing the signals to make it a control point, along with the LCC components.

The Signals for SB traffic were pretty easy - a BLMA/Atlas modern, 2 track signal bridge was installed. As a side note, it has been tough to source the BLMA now Atlas signals due to various production/transporation delays and I ended up finding a hobby shop in Canada that has them in stock.


You will note in that picture, a track behind the signal mast. That is the last little bit of main line before you enter the north end staging yard; the wall cutout is just to the right by a few feet from our view here.

This meant that closer to the removable bridge that spans the main entrance to the layout, there isn't the space needed to install one of these type of signal bridges and make it hang the heads over the correct tracks.

To the rescue was my collection of polystyrene shapes and boards. I've scratch built a few other signals bridge on the layout, but this was my first to go over 3 tracks.

I used the Atlas/BLMA heads vs fooling with building my own, as that takes a way more time that just building the structure.


I also got my airbrush out and painted it with Vallejo's Model Air Steel color - really brought it up a few notches in looks from the bare white of the plastic. It was so impressive that I went and painted the other previously installed bridges across the layout.

We will close this post with a nice high angle aerial view of the control point.


More pictures are in the gallery at richmond-terminal.org

Thursday, December 15, 2022

Note on Updates

 I am filling in posts for the past few months of sessions and progress.

Their dates are getting set to track when it happened, vs when I got around to posting it.

So, any followers concerned they missed those posts - you didn't!

Tuesday, December 13, 2022

Final Op Session for 2022

 Sunday before last, was the final run in 2022 for the Richmond Terminal.

Session attendance was a bit light so about half the schedule was run in the two and a half hours. Session length should eventually be about 3 hours, assuming we keep the fast clock at 4 to 1, which should match version 1 of the railroad. If we go down to a 3 to 1 clock ratio, that should push the sessions to 4 hours. Either way, we are trying to simulate 12 real hours of action during a session.

This session and the previous sessions are being used to dial in our use of the JMRI Operations module and identify issues with the layout infrastructure and rolling stock and determine what needs to be tweaked.

There has been a long list of issues identified, and I plan to document and discuss them in follow up blog posts.

Sunday, October 30, 2022

October Op Session


Bryce, well in advance of whatever he's running.

That is Dick and Bill way down there, in what is operationally the middle of Acca.

Friday, September 30, 2022

September Work Session

 After the August operating session was held, Management realized that significant help would be required to move the railroad forward to be ready for the next session.

The South end staging yard needed to be marked out for track centerlines, a crossover needed to be installed at Doswell (I had left it out of my initial plan. Turns out there was a good reason it was there in real life), and track needed to be laid from the south end of Acca, towards staging.

An interpid crew of workers attended a Saturday session and much progress was made!


Here at Doswell, track had to be removed, roadbed added, sanded flat, and the crossover (a #10, built via my fast tracks tooling) installed. After the crossover was spiked down, tortoise switch machines needed to be installed, and the flex track reconnected. After all that, wiring changes would need to be made the DCC feeds.

John and Bill tackle the crossover install at South Doswell

John and Bill were able to get mostly through this list of work, which is a testament to their skills.


The master of geometry, Dick, led Mike B in getting the centerlines laid out in the staging yard.


And the final crew of Tom and Mike P worked to get track laid from Acca heading south.


Note Mike mugging for the camera and everybody else working.

More pictures in the gallery here: richmond-terminal.org

Thursday, September 15, 2022

Lower Level Staging Yard Build Out

 Most long time follower will remember that the layout is intended to terminate in a staging yard south of Acca Yard, that will simulate traffic from Rocky Mount, NC and points south. The staging area is also built to support traffic to/from the former Seaboard and C&O lines that are east of Acca so we can simulate trains being transferred off of the CSX James River Sub and the CSX "S" Line.


Framing is the normal 3/4" plywood that is ripped into 3" tall strips and screwed together. An innovation that we've recently started to use is the Kreg pocket screw system. There are significant advantages to this paradigm - no screws or fasteners into end grain, which also minimizes the chances of splitting. Since you are fastening from the "inside" of the structure, out, the assembly steps are flexible and you can move supports as you see fit to work around all the under table stuff that you have on a model railroad (Tortoises, DCC and LCC pieces, wiring, etc) It also provide a very nicely finished look from the aisleway, which is a nice bonus.

Here is a nice shot of the benchwork that supports the approach to the staging yard. Note the lack of visible fasteners from the aisleway.


As plywood is still highly priced, for only a nominal amount more money, you can purchase higher quality birch faced 7 ply, which is what we did for this final push of construction. 

We've also found that this stuff is more consistent than the sheathing grade we've used in the past and it also seems to be less prone to splintering.

We have to build the support in situ for the legs that support the top staging level, so that adds to the challenge.


Got smart this time, and pulled DCC bus wires BEFORE the benchtops went on. Learning from the top (North End) staging yard, a bus per track was installed to enable us to turn it off track by track.


From a suggestion of an operator, we rounded the outside corner to make it less likely to jab you in the small of your back.


Here's the approach, with homasote painted and installed. Note the cleat for the removable bridge across the door in place.


Ready for track mark out!


Sunday, August 28, 2022

August Op Session

 The railroad operated in August with a full crew.

This was the first session where Acca was in service.

A few shots of the session; as this post is being done months after the actual event, I don't have any details handy.


Thursday, July 7, 2022

Industries at Acca Yard

 Acca has had, and continues to have, a number of industrial spurs in the yard area proper.

In the era that I am modeling, I am utilizing a number of them. They are not in the exact location on the layout, that they are geographically on the prototype, but in general, they are nearby.

Most of the industries are the the northwest side of the yard in real life. The major exception that comes to mind, is Transflo, which is the transloading area of the yard. In a previous iteration, that area was used as a container loading and unloading ramp. 

On the layout, they are all put on the northeast side, off the number 1 advance track.


In this shot, we are looking railroad north and the NA interlocking is just above the center of the photo. You can see the bag of ties right above the scissors crossover - the NA crossovers are right there.

This track layout has 3 dedicated spurs - 2 for the concrete and gravel operation, and 1 for a lumberyard. The runaround area might be used as an offspot, haven't committed to that right now.

All this rail is code 70, from Microengineering.

Gluing ties down. 

I used a gray-ish stain for the ties around the concrete plant to give the impression of lots of cement spills and dust building up over the years.


I'm going to use a standard, dark brown stain, on the rest of the ties.

More photos on richmond-terminal's gallery.

Tuesday, July 5, 2022

A word about handlaying and ties

 I use individual wood ties when I handlay. The ties I use currently are standard crossties for HO, from Mt. Albert scale lumber. Mt. Albert is now owned by Fast Tracks, but there are a couple other places that supply ties, if memory serves.

The ties are made from sugar pine, and are fairly soft, so you have to be a bit gentle when you spike, as if you slip, you can easily crush the tie and leave an unsightly mess.

You can stain before you install them, via soaking in stain, or you can stain after you glue them down.

I use plain white Elmer's glue, straight from the bottle, to glue ties to either cork or homasote. I put down a bead, and then use a finger to spread it out nicely.

I've installed ties one by one, which is doable, but super slow, and keeping consistent spacing can be tough.

Fast Tracks makes a couple of jigs to help with this, so here's two shots of the jig in use.

I do have a spot motion style video of me placing ties in the jib, but as I'm still learning the camera, it is only a second long, so seems pointless to post. Going to have to continue to experiment with that.


Ties placed in the jig

Final step is to you a thin strip of blue painter's tape to get the ties out and have a tie roll to quickly install them.


Monday, July 4, 2022

Structures? Inconceivable!

 I am building many of the kits that I salted away over the years for installation on the railroad. Certainly, I am not the world's best structure builder, but you can only improve by doing it.

I know this violates my "not a pound for air to ground" mantra about scenery, but as the layout presents significantly more finished than raw, unlike version 1, I think I should embrace the change.


Here's the concrete plant on the North end of Acca. Prototypically, this should be more towards the center of the yard, and on the opposite side of the tracks from where it is here, but as model railroading is a compromise, it sits here, on the end of what will be a long spur using smaller than mainline rail.

Saturday, July 2, 2022

Handlaying track

 Long time supporters of the Richmond terminal will remember that there were a couple of fully handlaid track sections on version 1 of the layout.

Version 2 isn't any different, and if anything, more track is being handlaid than before.

Here's a segment inside the south Acca trackage that was haidlaid on individual ties:


And the North Acca industrial area, all handlaid code 70!


Another post will discuss this area, properly the number 1 advance track industries, in more detail.