 |
| Starting to think I need more light here |
Friday, October 26, 2018
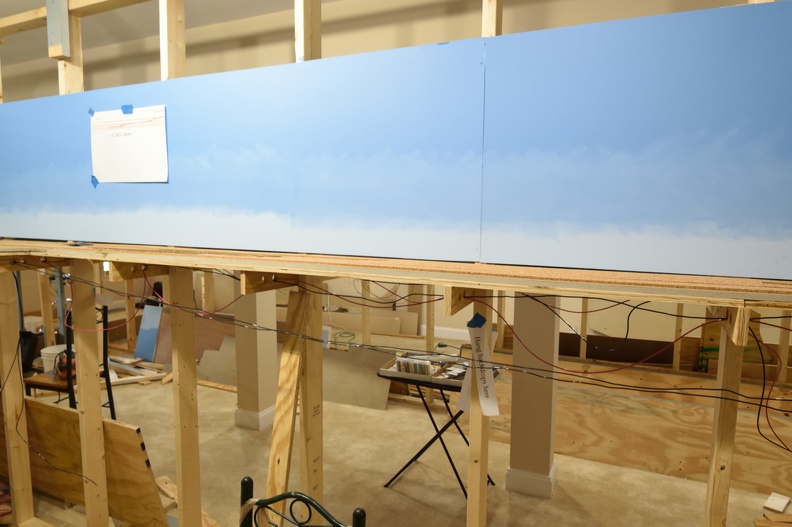
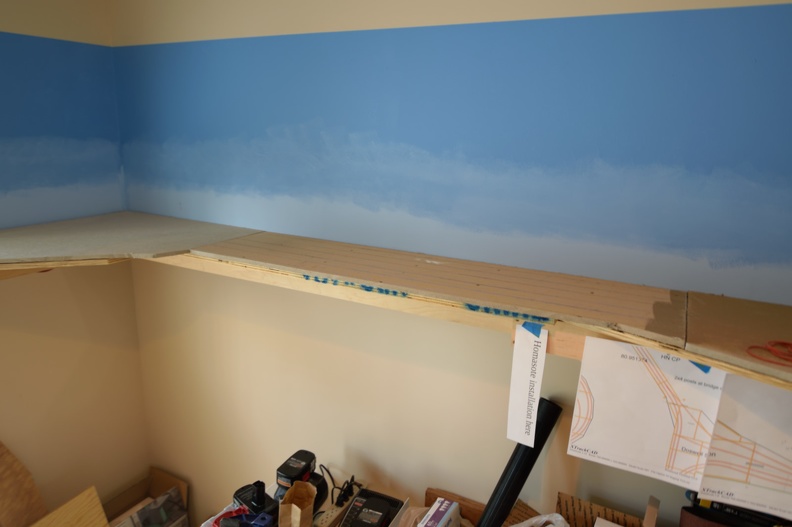
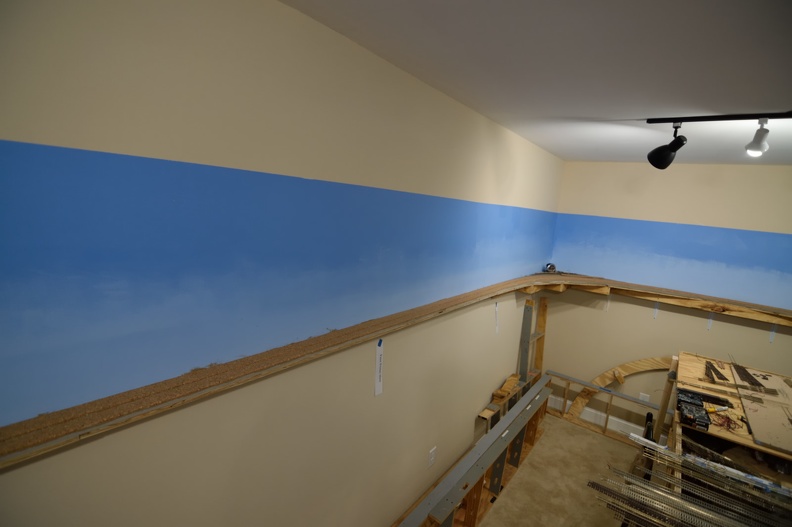
A bit more paint.
Decided I needed to make this the backdrop go a bit further and put on a second coat of Kilz before the blue.
Thursday, October 25, 2018
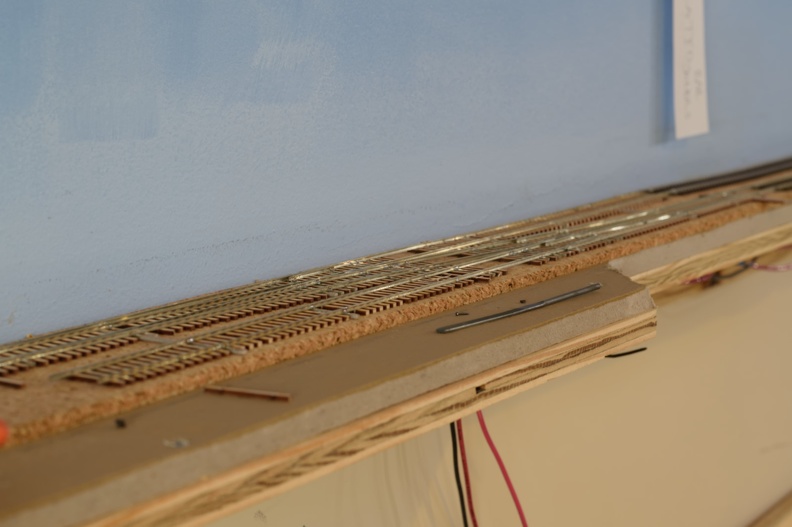
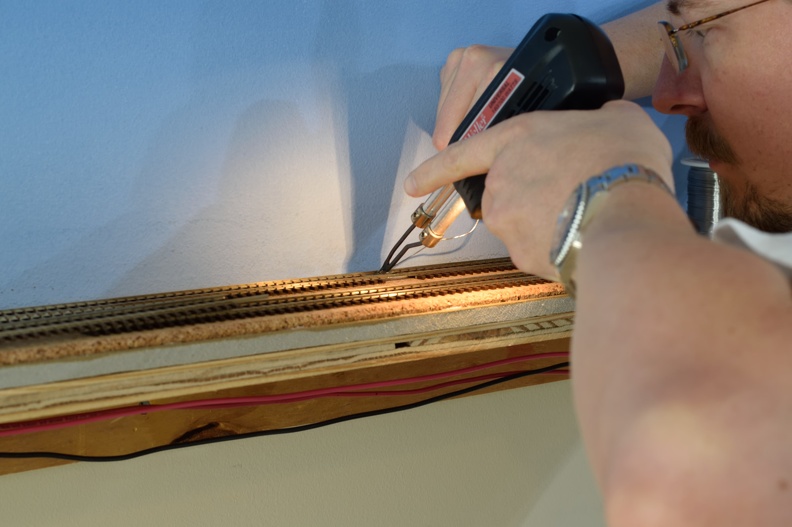
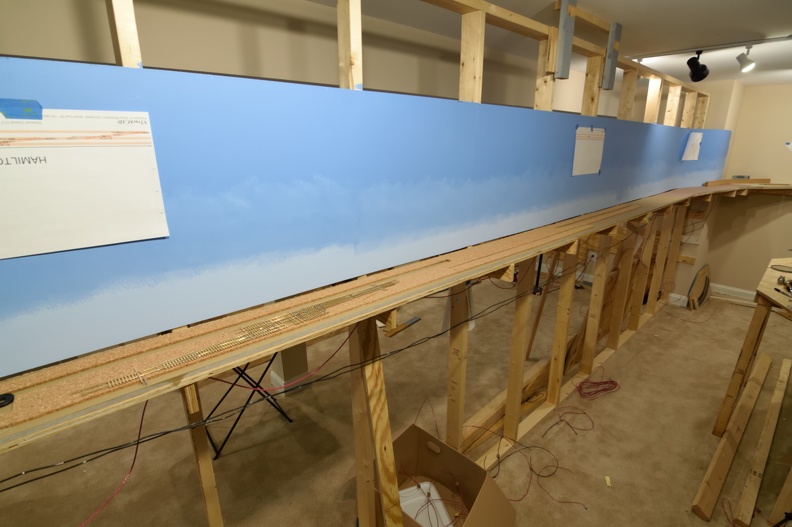
North Doswell Cross Over
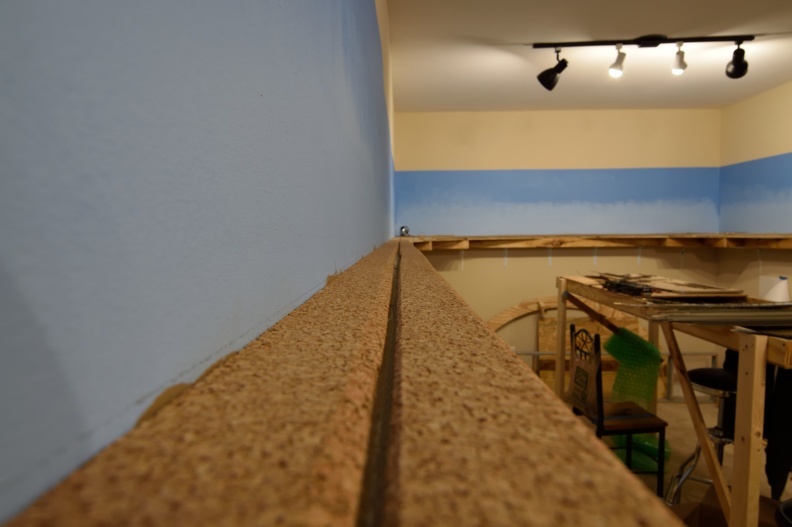
As Doswell has started (see post here for the track arrangement details) I needed some track down to anchor one end of my work so I would have datum point to build from.
At North Doswell, there is a cross over before the track makes the run to the next control point and on the layout, this is the same as there is over a 50' run to the next CP.
At North Doswell, there is a cross over before the track makes the run to the next control point and on the layout, this is the same as there is over a 50' run to the next CP.
 |
| Finished product |
 |
| Number 10s are nice and long but a zoom lens will squash them up a bit |
Tuesday, October 23, 2018
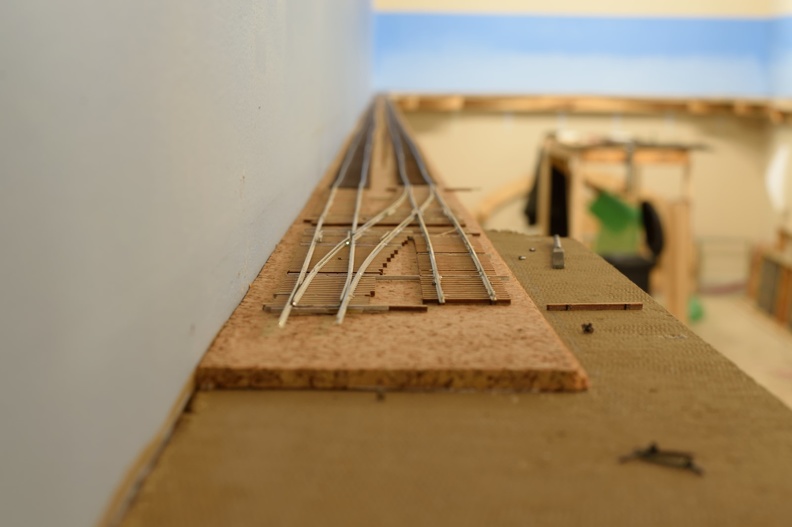
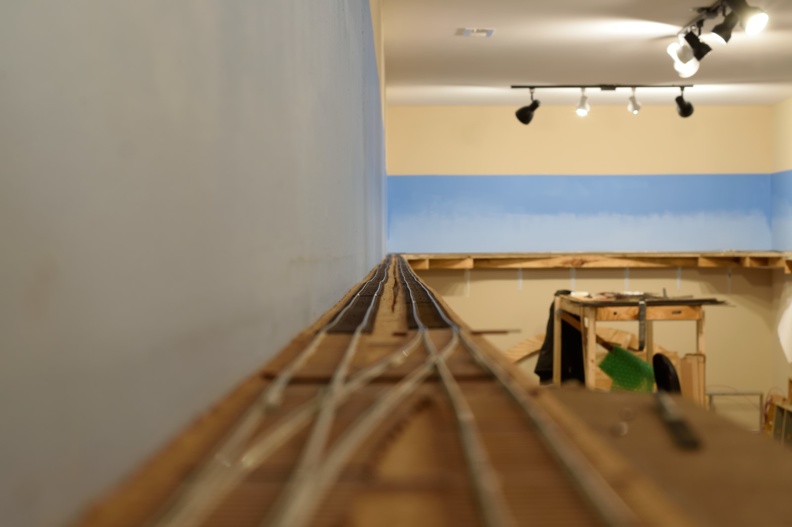
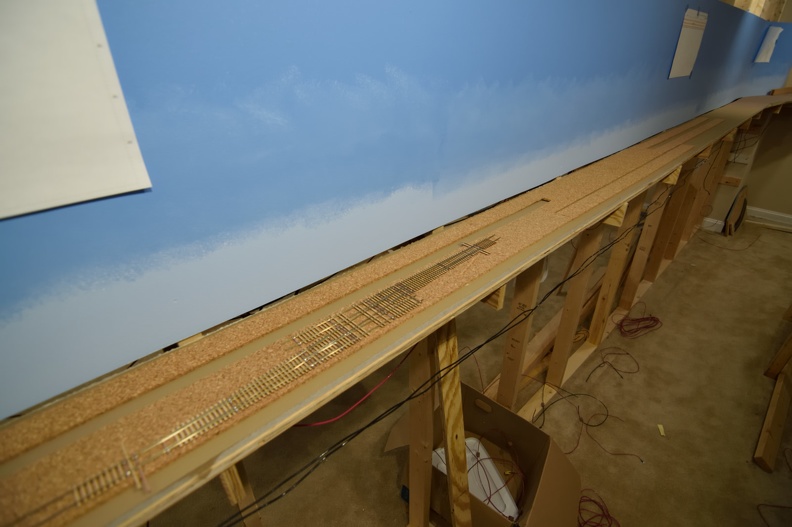
Track Progress to Doswell
The long runs have been spiked and the cross over at North Doswell is being test fit.
Next time, a 6" wide shelf is in order, as spiking flex track down next to the wall was a bit of a challenge - just not that much room for my 1:1 hands trying to pierce the ties on Atlas flex when the track is within an inch of the wall.
Try to remember that for next time...
Next time, a 6" wide shelf is in order, as spiking flex track down next to the wall was a bit of a challenge - just not that much room for my 1:1 hands trying to pierce the ties on Atlas flex when the track is within an inch of the wall.
Try to remember that for next time...
 |
| Long way down |
Sunday, October 21, 2018
Friday, October 19, 2018
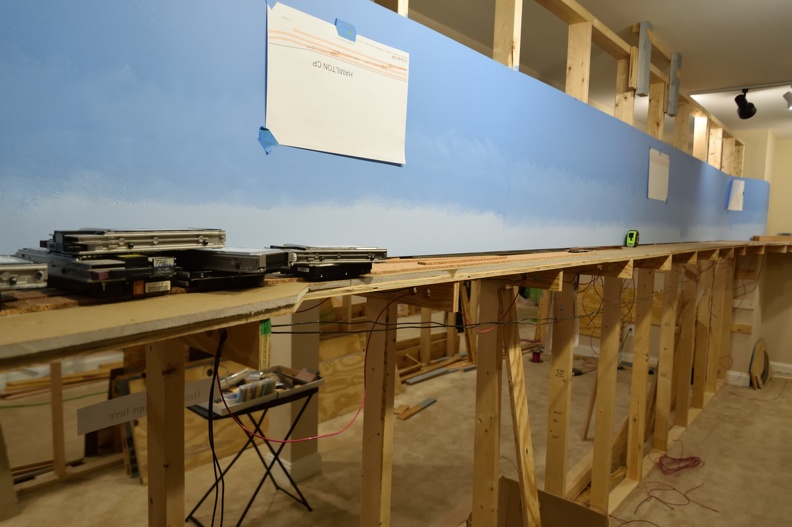
Roadbed for Hamilton Control Point
Working roadbed at Hamilton here lately so figured to share some in progress shots.
Hamilton has a single cross over on the main that allows access from the south to a industrial spur.
On the layout, this will be a #10 left X over into a #8 left turnout pair that will allow access to the spur via a tail track as this isn't a siding.


Hamilton has a single cross over on the main that allows access from the south to a industrial spur.
On the layout, this will be a #10 left X over into a #8 left turnout pair that will allow access to the spur via a tail track as this isn't a siding.
Wednesday, October 17, 2018
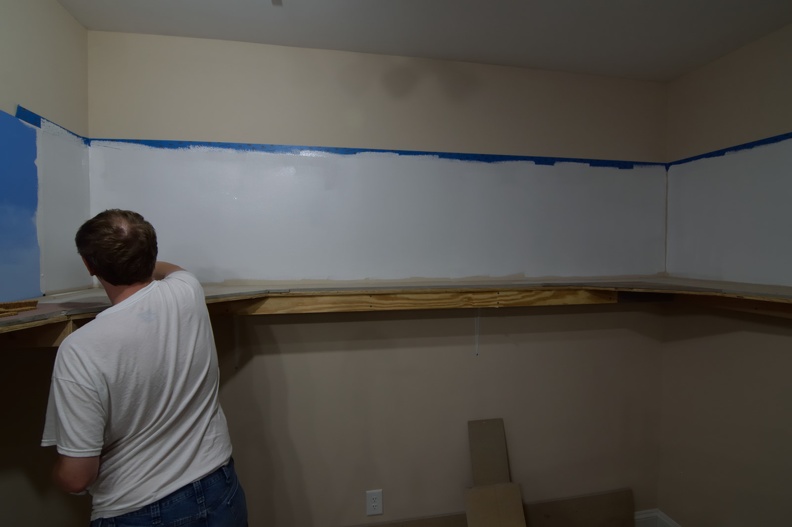
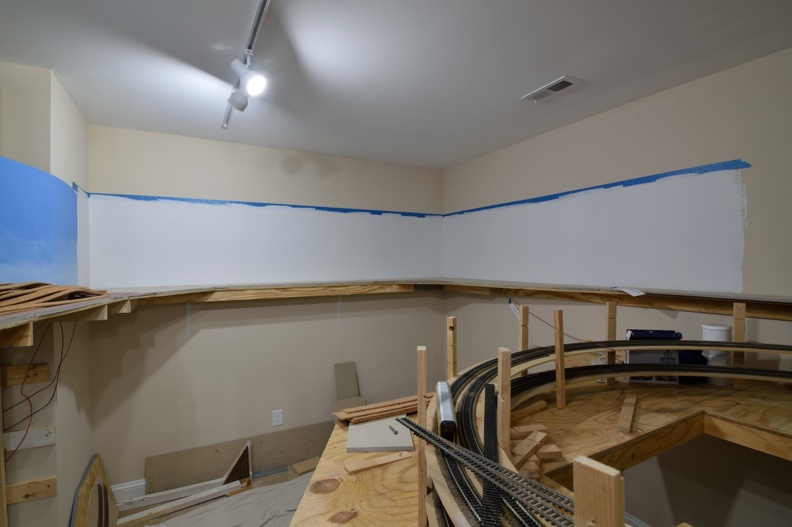
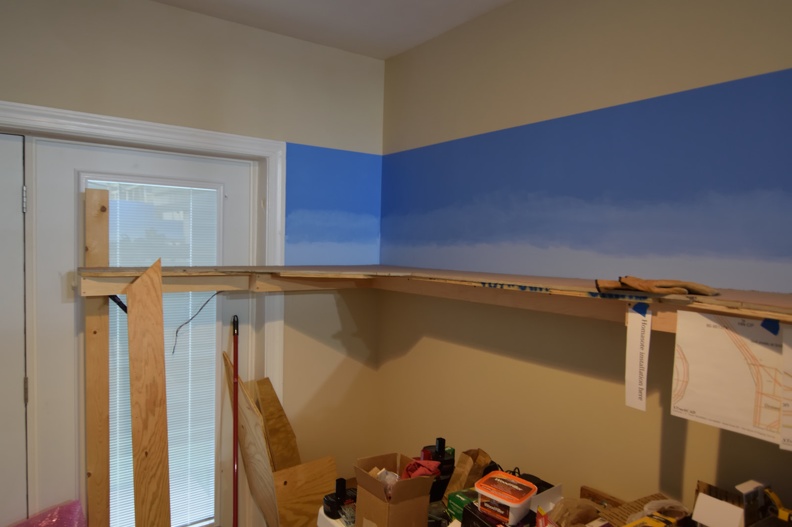
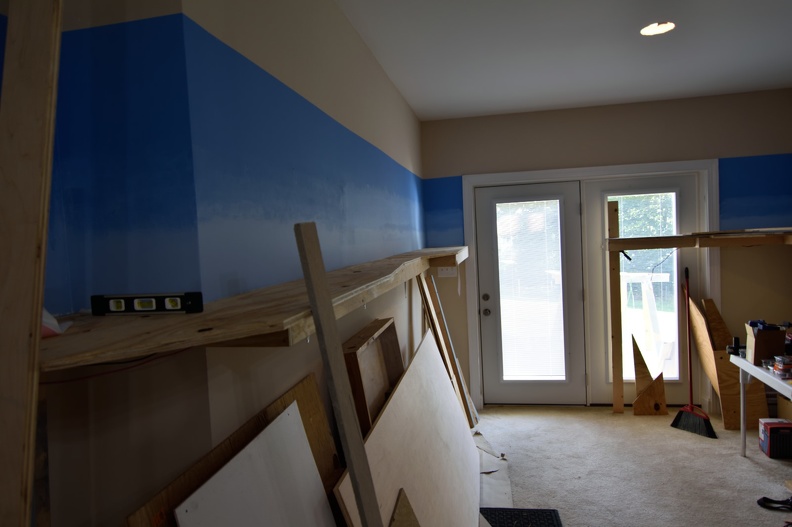
Finishing Upper Level Backdrops
Working through a couple of tasks to finish up some line items.
One of these was getting the upper level backdrop finished from a foundational paint perspective, but step 1 is to Kilz the wall so the blue can go on without any sort of bleed through from the default wall color.
As I needed to keep the edge consistent, out came the painter's tape again.
One of these was getting the upper level backdrop finished from a foundational paint perspective, but step 1 is to Kilz the wall so the blue can go on without any sort of bleed through from the default wall color.
 | |
| Taping the line |
 |
| Finishing up with the brush in spots for the 1st coat |
 |
| Done. |
Monday, October 15, 2018
Scheduled November Sessions - Work Session and Open House
Work session has been set on the first Saturday of November, which is the 3rd.
The following Saturday, I will be hosting an open house after the NMRA JRD Meeting that day.
Updates after; more content will be published as there have been some additional work done.
The following Saturday, I will be hosting an open house after the NMRA JRD Meeting that day.
Updates after; more content will be published as there have been some additional work done.
Friday, October 12, 2018
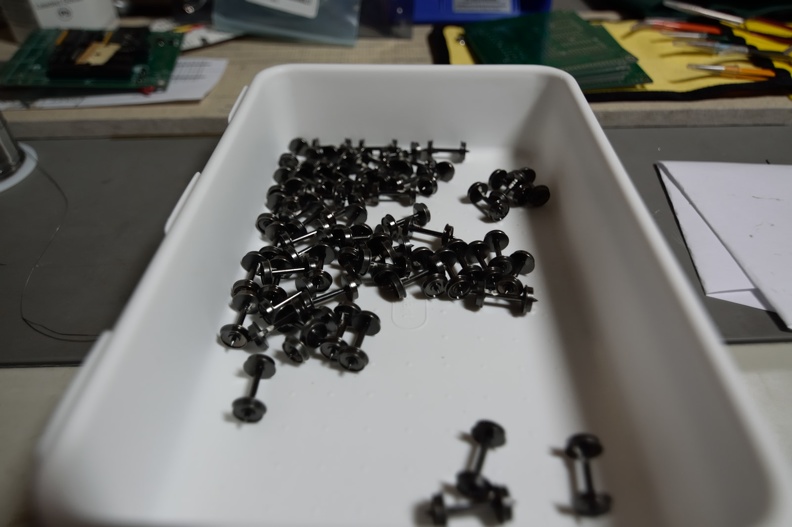
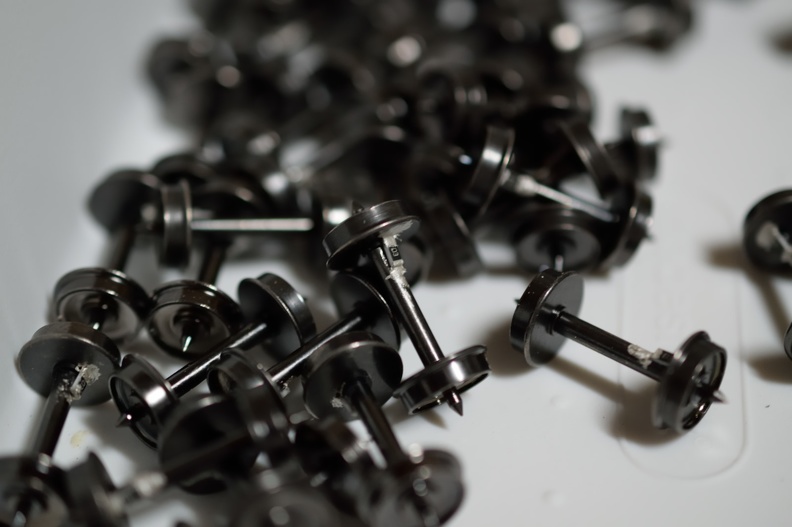
Detecting Trains for Signaling
Something that I didn't have on version 1 was detection of any rolling stock; only the engines were detected.
As you can imagine, this caused turnouts to get thrown under moving trains somewhat frequently.
The fix for this is resistor wheelsets. I bought resistors and conductive paint years ago to get it going and never actually sat down and got it done.
I sat in a clinic by Stephen Priest at KC2018 and he mentioned where he had done his entire fleet of cars (700+ ish) in 2 half Saturdays of work. He did an axle per car and that's what I am going to aim for as well.
That inspired me to give it a try.
The conductive paint pen didn't really work, as it has a finite lifespan and it was well over it so I had to take the pen apart and use a microbrush to get the paint onto the wheelsets.
I decided to standardize on Intermountain wheelsets, and in a spot of great luck, my Dad had a bunch of them from a buy his club did a while back.
Process - use a pair of tweezer to glue the resistor onto the side of the axle joint that is insulated with gel CA and wait. Then dab your conductive paint onto each contact side of the resistor and wait to dry. Test with your multimeter. Easy!
I'm going to buy another silver pen shortly when I'm ready to do more of them.
January 2024 Update to this post:
You can source a partial reel of 1000 of these resistors, for ~$15, even at current 2024 prices from Digikey or Mouser. I use Yageo brand resistors, but any manufacturer is fine. Get 1% or better tolerance. 10K Ohm, 1/8 watt.
You want 1206 size, so they aren't so hard to deal with. You could go bigger, 2010 size, if you are in O scale, I'd bet.
Reminder - gel type CA. Trying to use the thin stuff will be an exercise in frustration.
 |
| Done so far |
 |
| 10K 1/8W 1206 size, if you are curious |
Wednesday, October 10, 2018
Kansas City - NMRA 2018 Contest Photos
Didn't really take much in the way of photos during the op sessions at KC, but did hit up the contest room.
Check out the gallery on richmond-terminal.org.
 |
| Wow. |
 |
| I'm such a sucker for modern steam... |
 |
| Somebody totally scratch built a N scale steam loco. When I say totally scratch built, I mean he soldered the driver spokes to the driver hub! |
Check out the gallery on richmond-terminal.org.
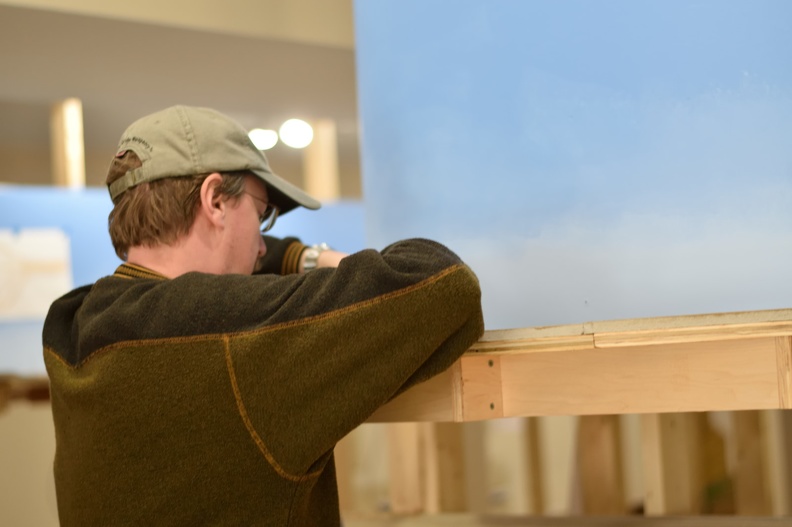
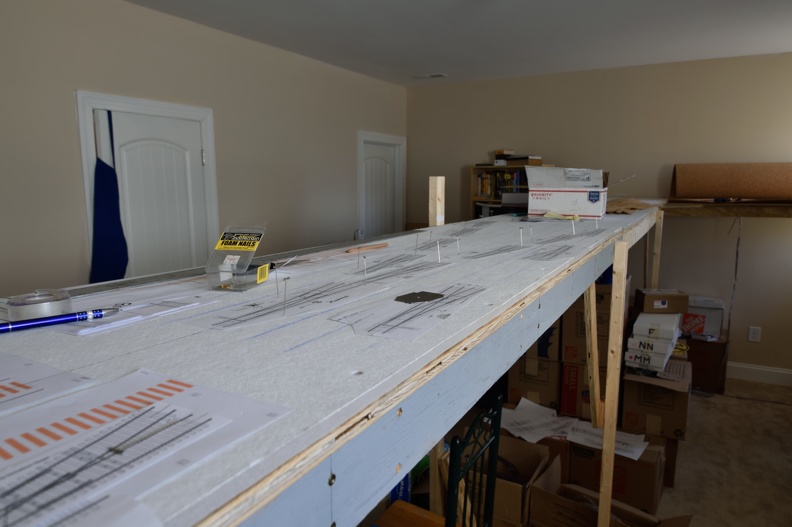
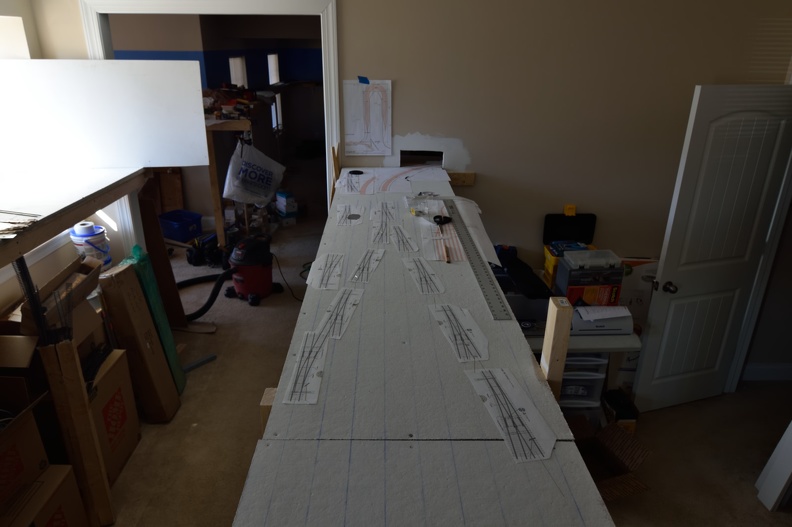
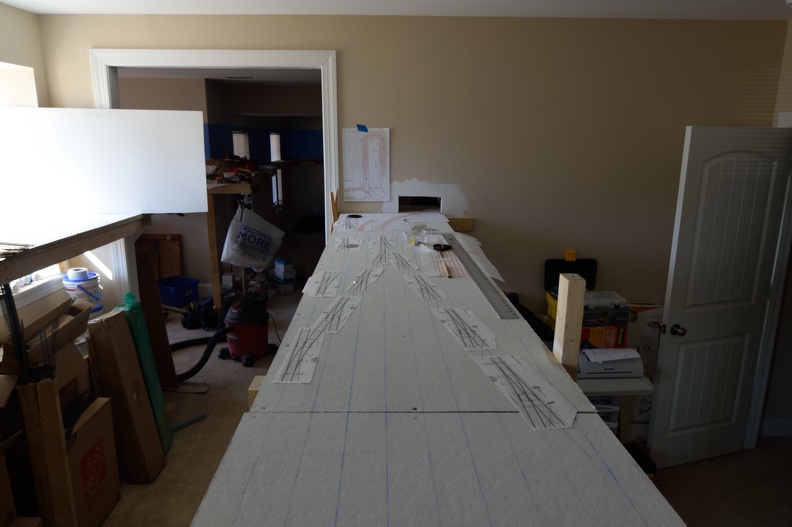
Saturday, October 6, 2018
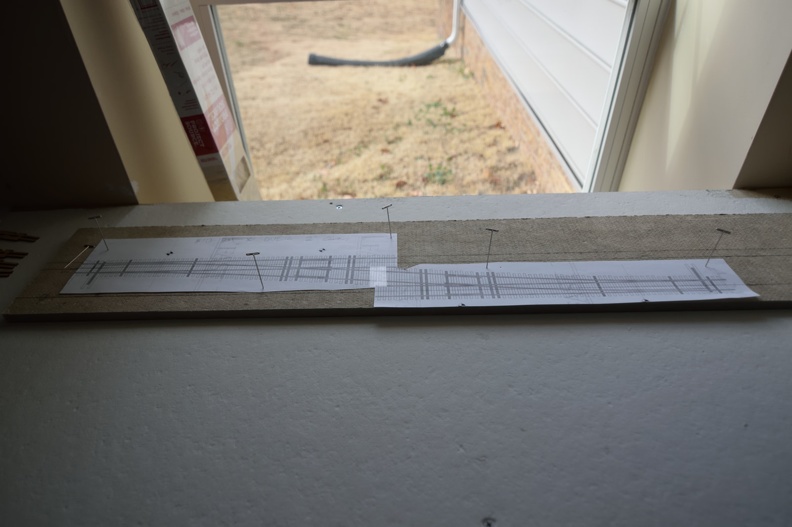
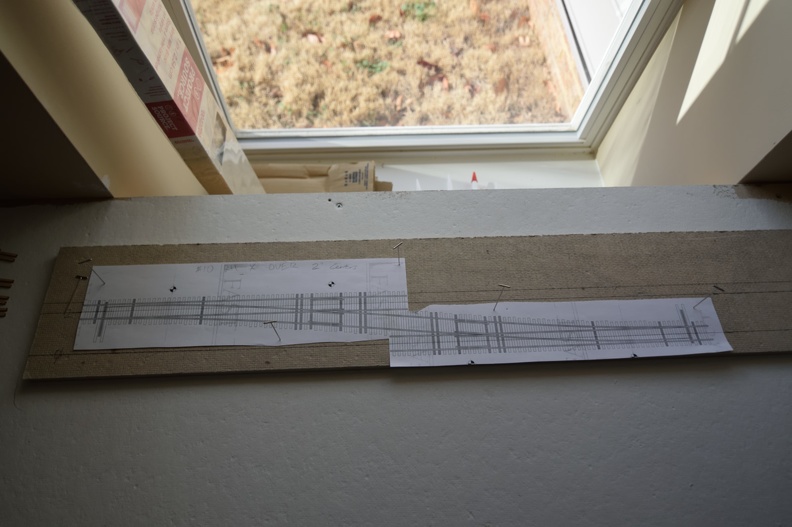
Doswell Begins
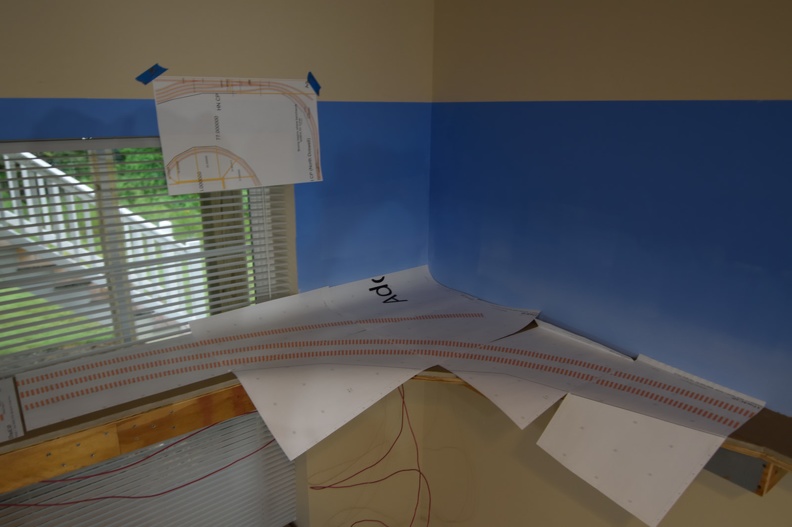
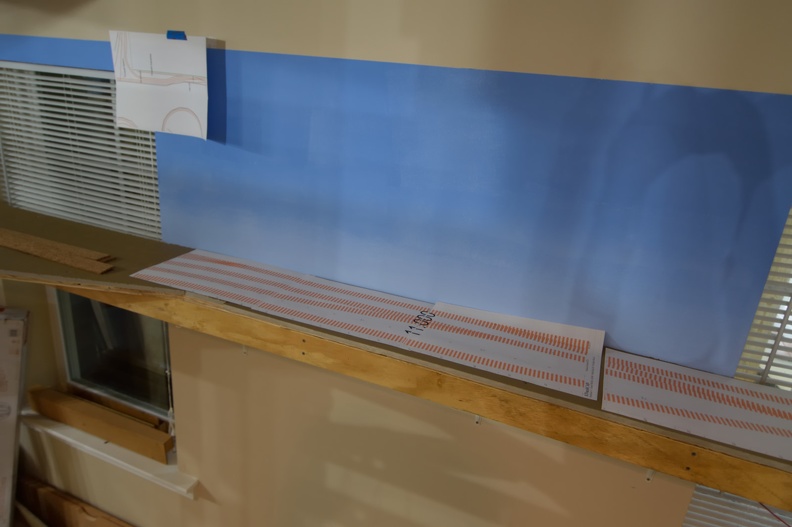
Step 1 of a model railroad is thinking and planning.
I printed out my track plan for Doswell 1:1 and am testing it against the benchwork that was built.
This will allow me to verify what I'm trying to do and also let me modify the plan if I need to tweak it before I glue down the first bit of cork and take a file to a piece of rail.
Looks like we should be good.

I think those broad curves are going to be a signature feature of the railroad.

The track layout is pretty darn close to the prototype; a fair amount of compression is required, but that's every layout ever made.
I printed out my track plan for Doswell 1:1 and am testing it against the benchwork that was built.
This will allow me to verify what I'm trying to do and also let me modify the plan if I need to tweak it before I glue down the first bit of cork and take a file to a piece of rail.
Looks like we should be good.
I think those broad curves are going to be a signature feature of the railroad.
The track layout is pretty darn close to the prototype; a fair amount of compression is required, but that's every layout ever made.
Thursday, October 4, 2018
Effective Resource Management
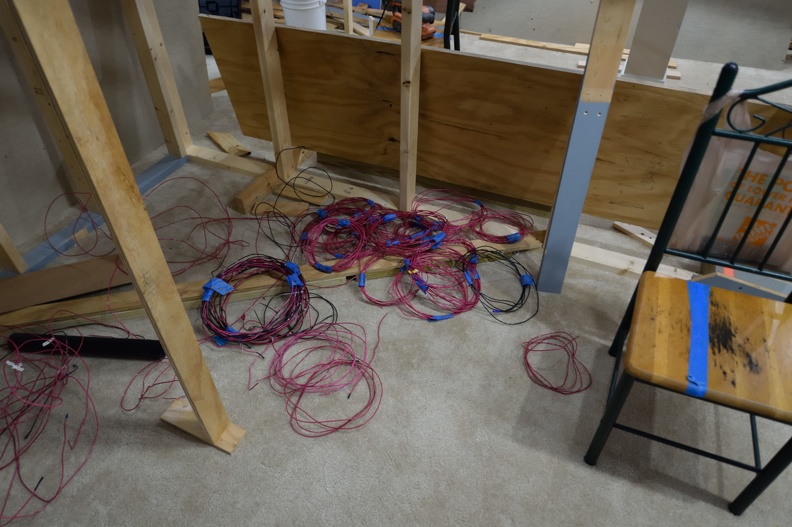
Model railroaders can be amazingly cheap about some things.
In a hobby where an model engine can easily cost $300, we will try and get every use possible out of $3 piece of lumber or a .10 cent foot of wire.
I'm not immune to these sorts of thoughts.
Yes, that is wired reclaimed from the old layout.
Yes, it has been cleaned up (suitcase connectors removed) and measured for length.
A great job for somebody who's 12.
Tuesday, October 2, 2018
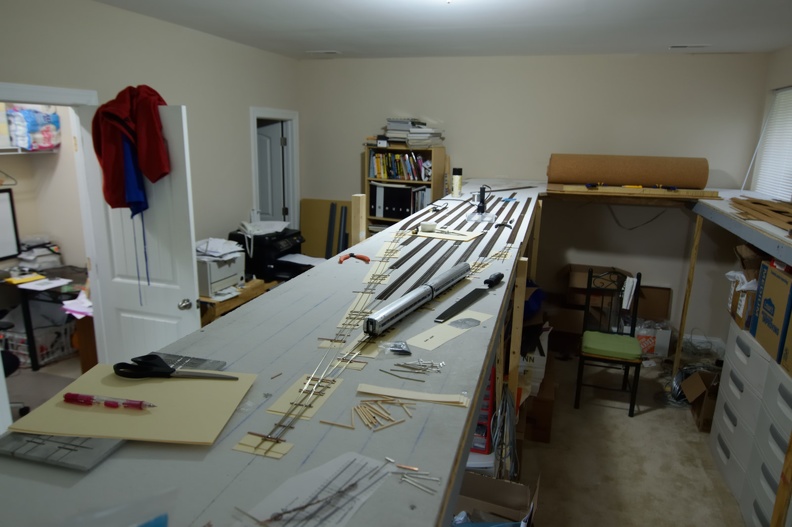
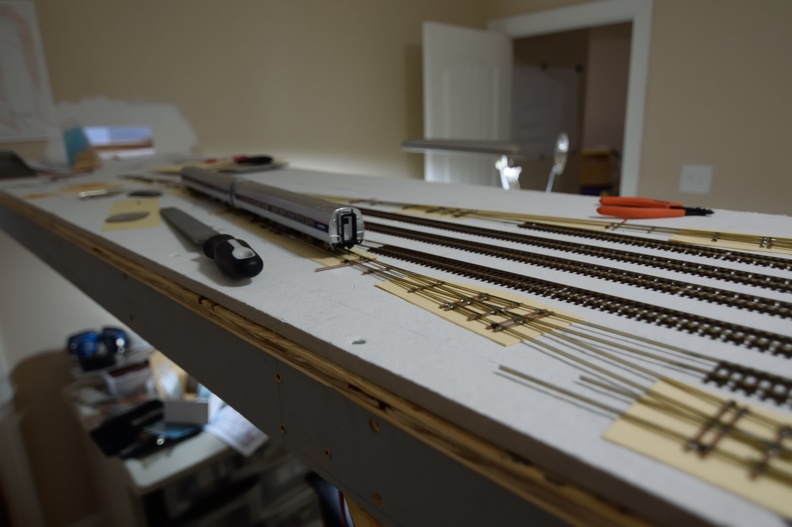
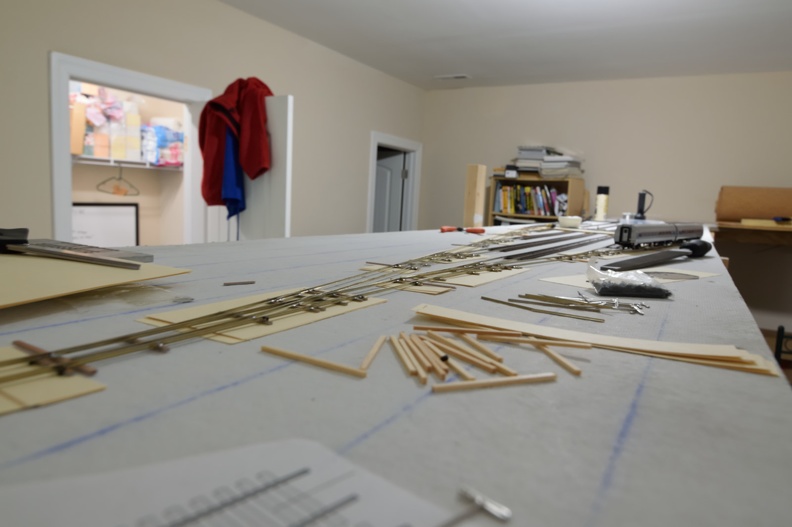
Staging Status - First Switch Ladder In
As most know, I build my own turnouts and related trackwork.
This is the biggest piece I've built so far from a sheer size perspective - 9 turnouts total.
All number 6s. I used 3 sheets of cardstock under each turnout since putting ties under this many turnouts in a staging yard is a waste of resources, not the least of which is time.
The eagle eyed among my readers will note the turnout next to the inside aisle that will open up access to a small storage yard; probably will be 3 tracks.
Not a very difficult project, but an involved one.
 |
| Testing with some Amfleets |
 |
| Didn't have enough light to get a big depth of field... |
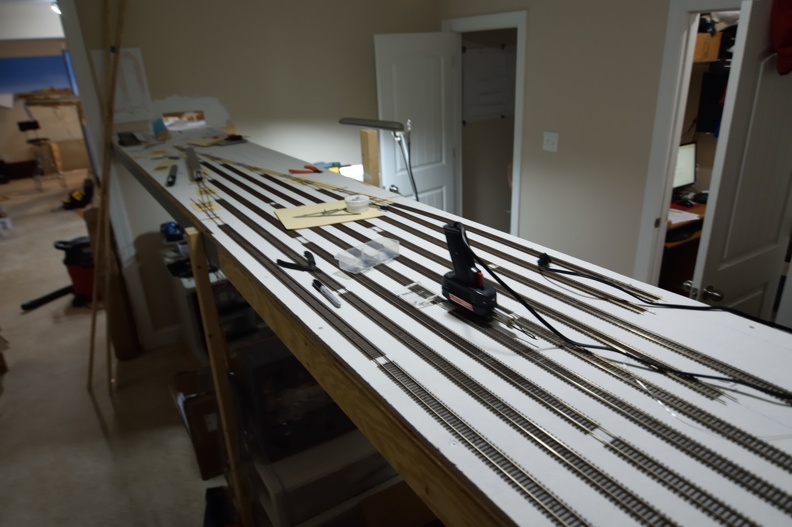 |
| 9 tracks, plus access to a small storage yard. |
Sunday, September 30, 2018
Friday, September 28, 2018
Painted Roadbed
When we last spoke, homasote was down in the spot that will become the Buckingham Branch (ex C&O) line that will run back to staging, but it wasn't ready for roadbed.
I can now report that the homasote in that area is done and it's painted with 1 exception. Paint color is a bit different as the latest gallon of brown came off Home Depot's shelf of "wrong color" paint for $10 versus having something colored to match was I was using.
I think I might break down and buy a couple of gallons to match what I had been using for the main level, when I get there, but we shall see.
 |
| Not a great angle, but still shows the consistency. |
 |
| One piece to do and then done! |
Thursday, September 27, 2018
Content Coming - Teaser Shot of Staging
Working to queue up a bunch of content; camera is full of pictures and work has been done on many fronts so expect a good variety of updates to pop up every other day as I get posts written and queued.
To whet your appetite:

To whet your appetite:
Thursday, August 9, 2018
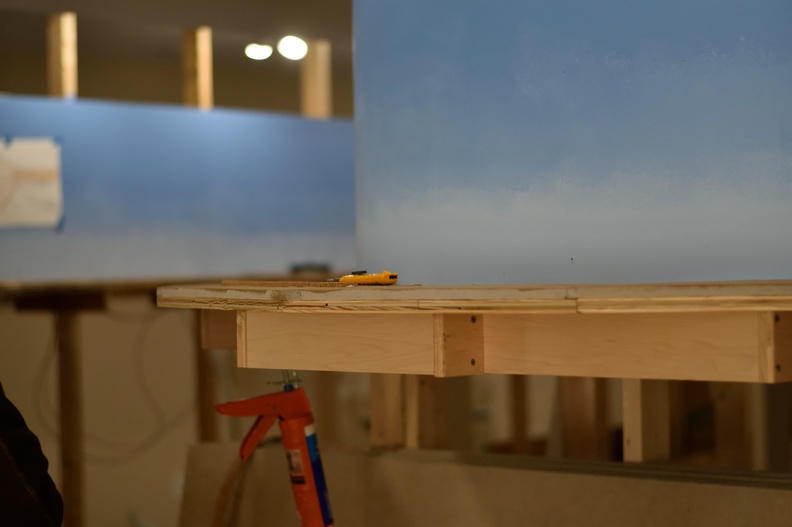
Benchwork Getting Closer
The upper level benchwork is now about 95% complete.
The only major components pending at this point are the lift bridges to be placed and that's more a case of assembling and testing versus having to make sawdust fly.
I've got to paint before roadbed and then track goes down, but that's quick work that can be done during an evening window.

And we will finish up on the other side of the railroad; this is approaching the Hamilton Control Point.
As always, more shots at the website gallery.
The only major components pending at this point are the lift bridges to be placed and that's more a case of assembling and testing versus having to make sawdust fly.
I've got to paint before roadbed and then track goes down, but that's quick work that can be done during an evening window.
 |
| Mostly finished product. |
 |
| This high POV shot is taken from the doorway. |
 |
| I need to remember to blank the door blinds as all that light makes this angle a challenge. |
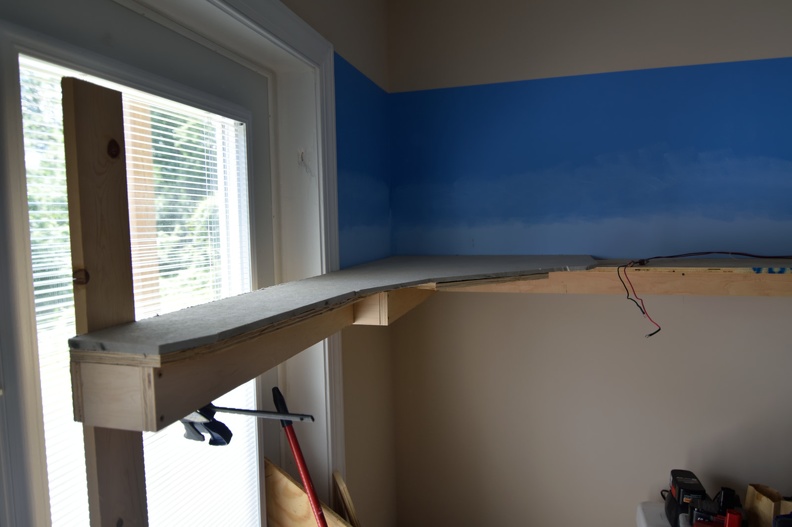
And we will finish up on the other side of the railroad; this is approaching the Hamilton Control Point.
 |
| Note the backdrop curve. |
As always, more shots at the website gallery.
Wednesday, August 8, 2018
Roadbed Progress
As I've mentioned, I am cutting pieces of cork out of a roll of the floor under-layment product.
Once down on the layout, I run the belt sander (with a 120 grit belt) over it to give me a better working surface as well as take care of any imperfections or un-smoothness between pieces.
To show how this goes, a couple of shots as I work towards Doswell.
Once down on the layout, I run the belt sander (with a 120 grit belt) over it to give me a better working surface as well as take care of any imperfections or un-smoothness between pieces.
To show how this goes, a couple of shots as I work towards Doswell.
 |
| Higher POV shot |
 |
| Note the bevels showing so that when ballast gets applied, no hard edges protrude. |
Monday, August 6, 2018
Website Updates
Fixed some menus, a couple of typos and reworked a couple of sections.
Take a look at the about page; there is a link to the track plans that are used for the build process. http://richmond-terminal.org/about.htm
Take a look at the about page; there is a link to the track plans that are used for the build process. http://richmond-terminal.org/about.htm
Quick August Update
In the last few months, the railroad has not been much of a priority, which goes double for updating the blog and website.
I'm going to do some clean up on the site this week.
I'm also going to post a couple of new content blog entries as well.
I'm going to do some clean up on the site this week.
I'm also going to post a couple of new content blog entries as well.
Sunday, April 1, 2018
Brass, Part V
This is a small interim update as I've received a few pieces over the last few months that haven't met the lens yet, as there has been a lack of daylight and daylight hours.
Now that days are getting longer, a couple of quick items in this post and then a snap or three.
Purchased some of the "Brass Buyers Guide" issues from Railpub as I thought taking a trip through that history would be neat. I'm a mix of amused, face palmed and sorry I wasn't an adult in the 80's.
Traded emails with Chuck @ UTI as he's doing a run of 10-6 Pullmans, including some RF&P and N&W models. He's running the smooth side cars. I hope to convince him to run some fluted side cars as the ACL had a bunch as did RF&P. https://union-terminal-imports.com/ if you are interested. He did mention that more Amtrak units probably won't be forthcoming as the plating process has a high waste rate; something around 50%. Ouch!
I put reservations in via brasstrains.com for a two, one painted and one not. UTI also has a DOD caboose project going and is apparently talking about making the NS Heritage locos.
The Heritage stuff is a bit of a big wha?? to me as they've been done in plastic, multiple times. Figure a $1000 price point, per model, and I wonder - why?
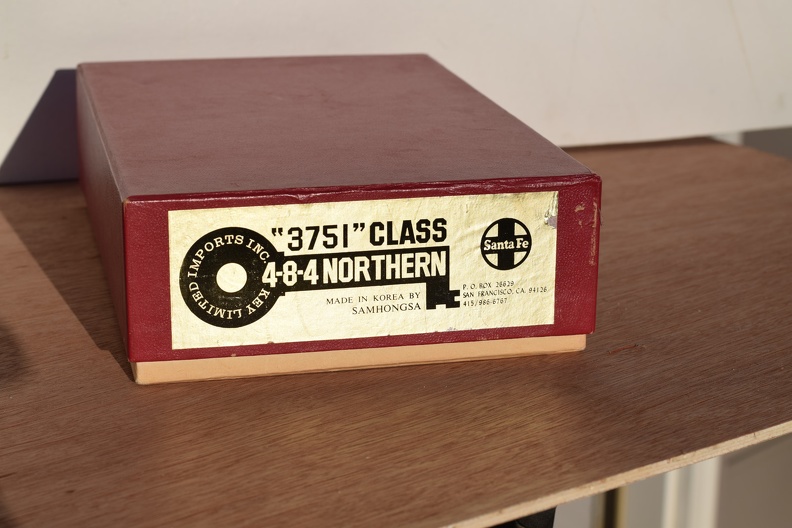
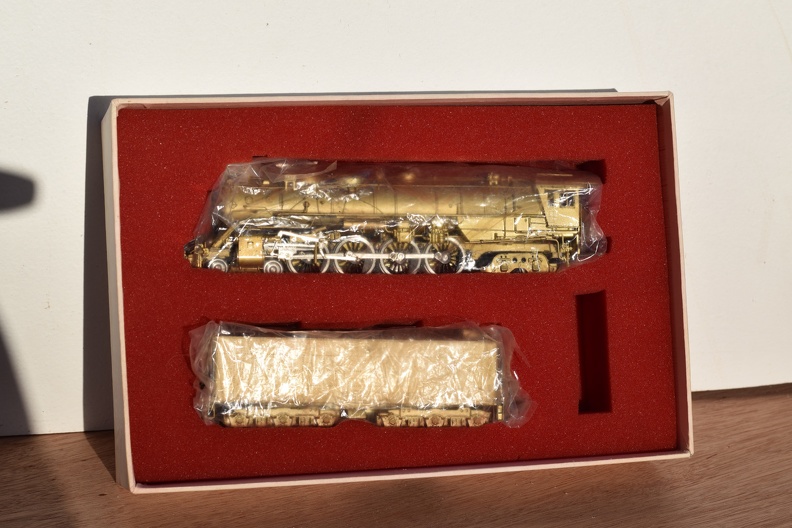
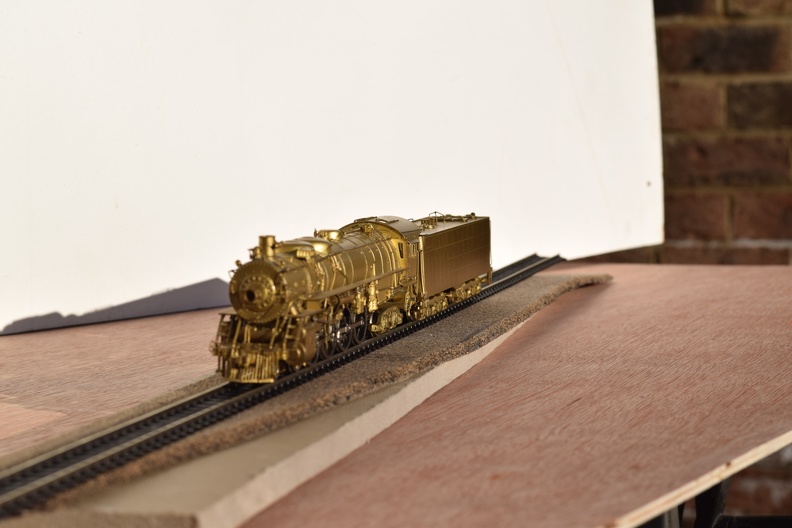
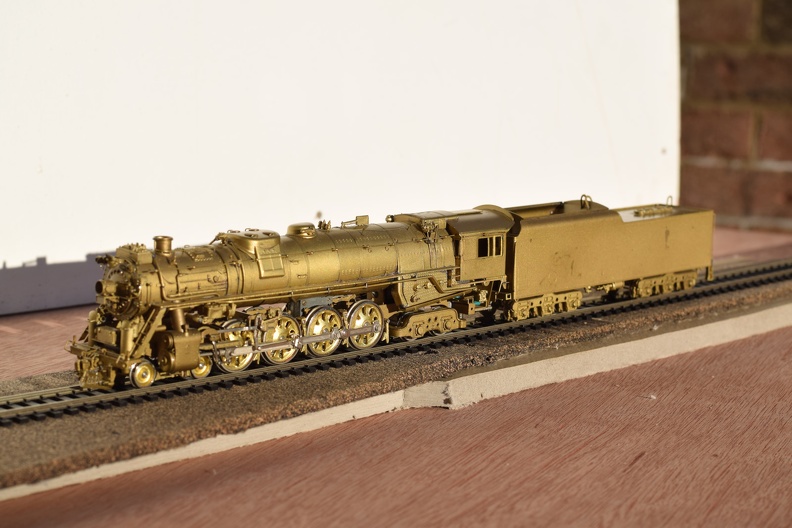
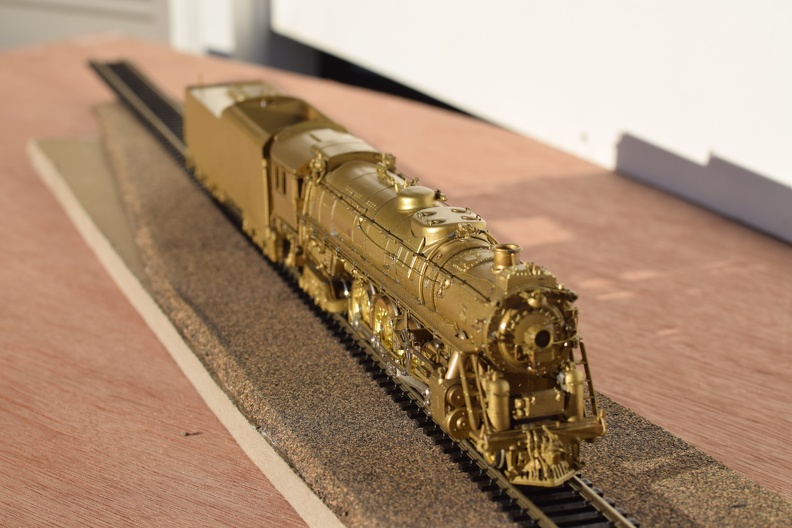
Anyway, I'll close with some pictures of steam locos I've scored off of ebay.


Now that days are getting longer, a couple of quick items in this post and then a snap or three.
Purchased some of the "Brass Buyers Guide" issues from Railpub as I thought taking a trip through that history would be neat. I'm a mix of amused, face palmed and sorry I wasn't an adult in the 80's.
Traded emails with Chuck @ UTI as he's doing a run of 10-6 Pullmans, including some RF&P and N&W models. He's running the smooth side cars. I hope to convince him to run some fluted side cars as the ACL had a bunch as did RF&P. https://union-terminal-imports.com/ if you are interested. He did mention that more Amtrak units probably won't be forthcoming as the plating process has a high waste rate; something around 50%. Ouch!
I put reservations in via brasstrains.com for a two, one painted and one not. UTI also has a DOD caboose project going and is apparently talking about making the NS Heritage locos.
The Heritage stuff is a bit of a big wha?? to me as they've been done in plastic, multiple times. Figure a $1000 price point, per model, and I wonder - why?
Anyway, I'll close with some pictures of steam locos I've scored off of ebay.
 |
| I know, I know, Sante Fe?? |
 |
| Coming to an excursion train near you. :) |
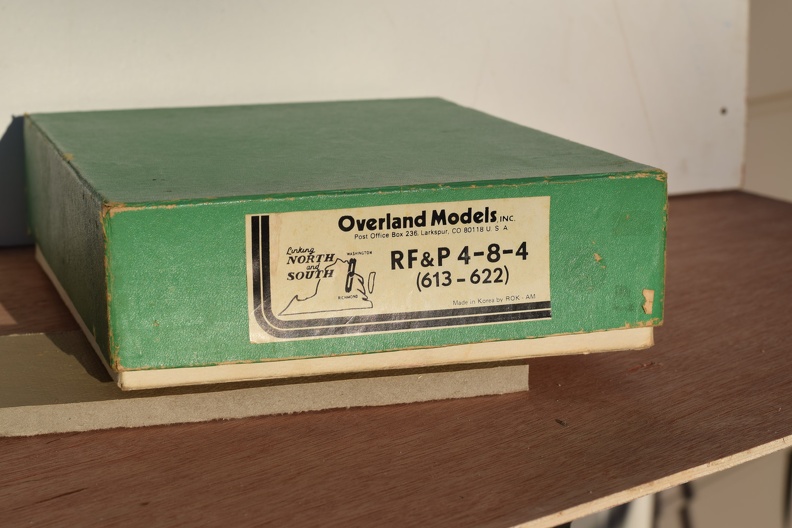 |
| Box could be better, but it's what is inside that counts. |
 |
| Note the ATC gear between the air pump shields. |
Thursday, March 29, 2018
Workbench Addition
Like many model railroaders and other hobbyist, I do a fair amount of work on my workbench and in the course of that, I solder.
Soldering makes fumes of course, and they are not good for you, on top of the fact that it makes it that much harder to know when your better half has baked cookies or similar delights.
Starting track work builds again made me realize just how nasty solder smoke is and I resolved to do something about it.
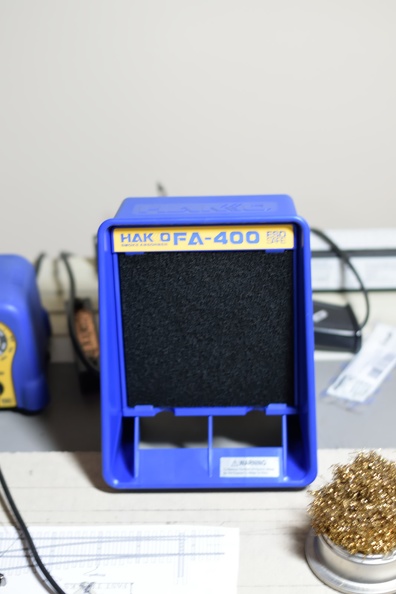
I've got a nice little iron, a Hakko 888 so when I when looking for something to handle the smoke, Hakko was on my list.
I ended up with a FA-400 which you can setup as in the picture, or rotate it and place face down so you get a higher suction from the vents at the bottom of it

Activated replaceable charcoal filter and less than $100 on Amazon, delivered. I bought some spare filters while I was at it.
With this running, soldering is great - no smell, no fumes to inhale. It's really helped me re-find the pleasure in building track at the bench.
Soldering makes fumes of course, and they are not good for you, on top of the fact that it makes it that much harder to know when your better half has baked cookies or similar delights.
Starting track work builds again made me realize just how nasty solder smoke is and I resolved to do something about it.
I've got a nice little iron, a Hakko 888 so when I when looking for something to handle the smoke, Hakko was on my list.
I ended up with a FA-400 which you can setup as in the picture, or rotate it and place face down so you get a higher suction from the vents at the bottom of it
Activated replaceable charcoal filter and less than $100 on Amazon, delivered. I bought some spare filters while I was at it.
With this running, soldering is great - no smell, no fumes to inhale. It's really helped me re-find the pleasure in building track at the bench.
Wednesday, March 28, 2018
Main Line Crossovers
Many of the cross overs for Version 2 are Number 10. Version 1 was all number 8's and a couple of those are being re-used for certain places, but as we are trying to capture the spirit of big time main line railroading, big # turnovers seem to be called for here.
I pieced together a jig and point tool from Fast Tracks over the years for number 10. At the time, they only sold a standard jig, not a cross over jig like I have for 8s.
Remembering a bit of my process from building the #8s last time, I figured using the printed templates to help me cut rail to length would be a good idea. It would also help me get the spacing from frog to point, as having a problem there can make your component turnouts nonparallel, which is a big downer on a crossover.
Grabbed a piece of homasote off the scrap pile and marked out some centerlines. I put my spacing at 2", 2.5", 3", 3.5" and 4" as I've got places where I have crossovers at those various distances. The main line is either 2" or 2.5", but many of industrial or siding spots have a greater spacing to stress their secondary nature.

At this point, I've built 3 #10 crossovers, sold the plain jig and point tool on ebay, and have just about pulled the trigger on a cross over jig, so once I remember, expect a quick update on the finished trackwork, and the new jig, when I get it.
I pieced together a jig and point tool from Fast Tracks over the years for number 10. At the time, they only sold a standard jig, not a cross over jig like I have for 8s.
Remembering a bit of my process from building the #8s last time, I figured using the printed templates to help me cut rail to length would be a good idea. It would also help me get the spacing from frog to point, as having a problem there can make your component turnouts nonparallel, which is a big downer on a crossover.
Grabbed a piece of homasote off the scrap pile and marked out some centerlines. I put my spacing at 2", 2.5", 3", 3.5" and 4" as I've got places where I have crossovers at those various distances. The main line is either 2" or 2.5", but many of industrial or siding spots have a greater spacing to stress their secondary nature.
Of course, in the time it's taken me to start of this 2nd version of the railroad, Fast Tracks has made a #10 cross over jig available and made a #12 jig. Oh boy..
 |
| You can see some of the other spacings marked from this angle. |
Monday, March 26, 2018
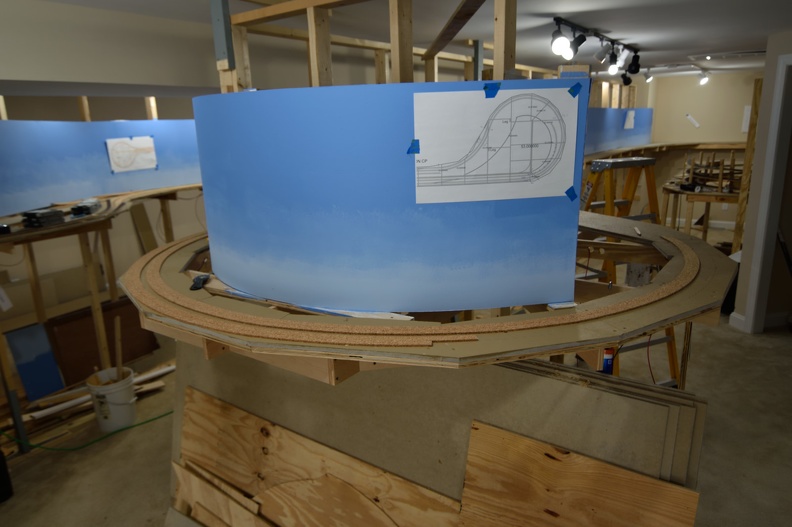
Roadbed Progress Update
Roadbed has made it to the 2nd turn back curve that caps the end of the peninsula closest to the stairs.
O. Winston Chase was on hand to capture a couple of photos.
Well, trust me, cork is down so we will be prepared for track.
O. Winston Chase was on hand to capture a couple of photos.
 |
| Not sure what the photographer was attempting to capture here |
 |
| Hmm. Apparently, you have to be a bit taller than me to make a good over the shoulder shot. Who knew? |
Saturday, March 24, 2018
Content Coming
Been busing with railroad stuff during the weekends and family stuff all other times. Have some travel coming up so expect some content getting queued up
Monday, February 26, 2018
Staging Ladder Build Start
Now that I've finished up getting track inbound to the north end staging yard, next step is to build the ladder for this side of it.
The ladder will be put together using the fast tracks jigs to give me skeletons of turnouts to solder into the correct place to give me the 2.5" track spacing that I'm using here.
The ladder is a compound #6 design for 9 tracks.
First shot is a quick overall look, but due to the height of the yard, it isn't a great angle to see any detail.

Here's a look down the inside ladder.
Now, a center, high angle view to give a look at the overall design.
Here's a bit of a better angle.

These pictures don't show it, but I've already started to layout the rail components I need and hopefully I will get a non-rainy, non-sick day (rained today and both kids are sick with norovirus. Sounds as fun as it is..) to start getting the joints prepared so I can start piecing this together.
The ladder will be put together using the fast tracks jigs to give me skeletons of turnouts to solder into the correct place to give me the 2.5" track spacing that I'm using here.
The ladder is a compound #6 design for 9 tracks.
First shot is a quick overall look, but due to the height of the yard, it isn't a great angle to see any detail.
Here's a look down the inside ladder.
 |
| Note the capping of the ladder with a RH to give me a lead to some stub end storage tracks. |
 |
| Shot from the tripod on the benchwork; also using a 11-16 wide angle lens so this skews the perspective a bit. |
These pictures don't show it, but I've already started to layout the rail components I need and hopefully I will get a non-rainy, non-sick day (rained today and both kids are sick with norovirus. Sounds as fun as it is..) to start getting the joints prepared so I can start piecing this together.
Sunday, February 25, 2018
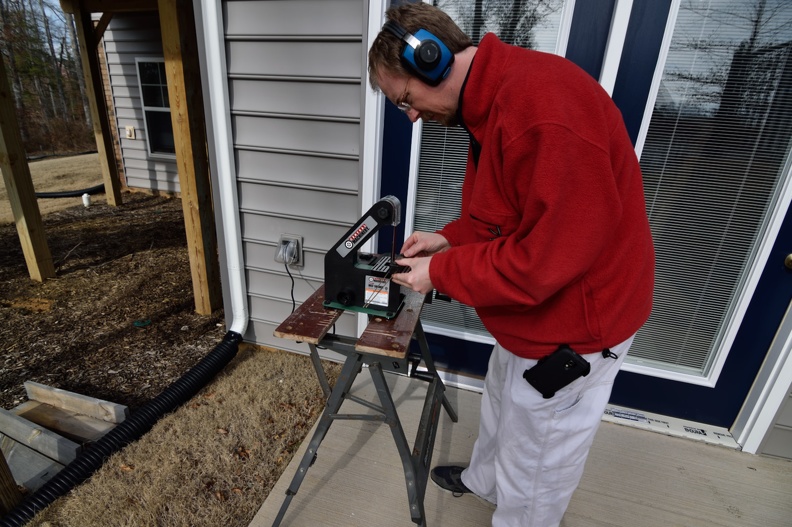
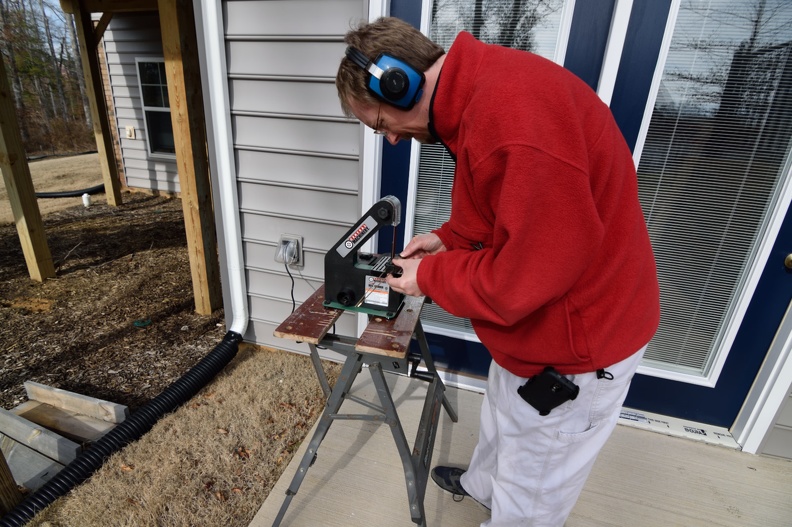
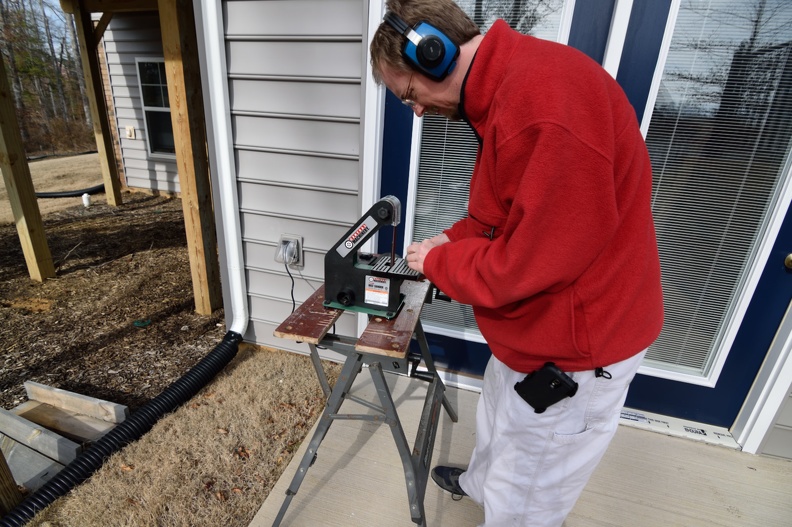
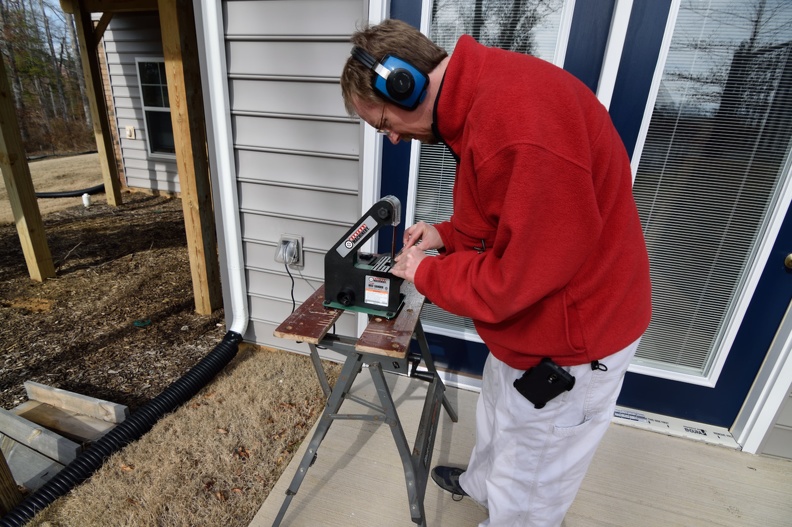
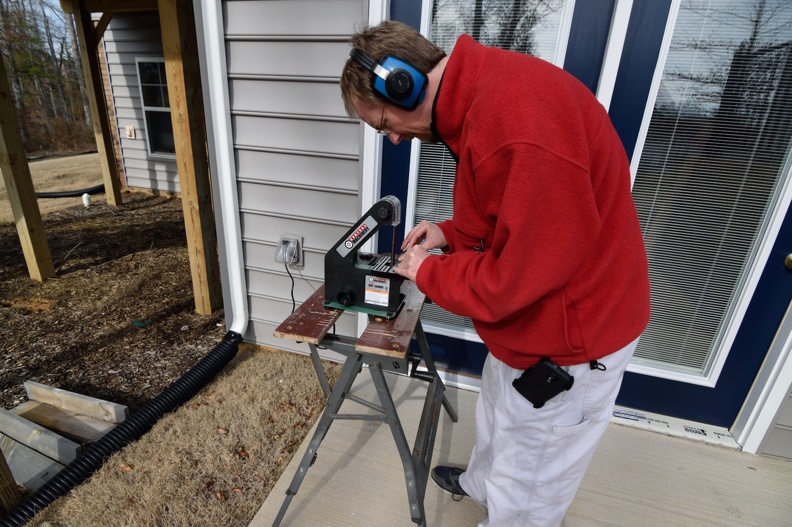
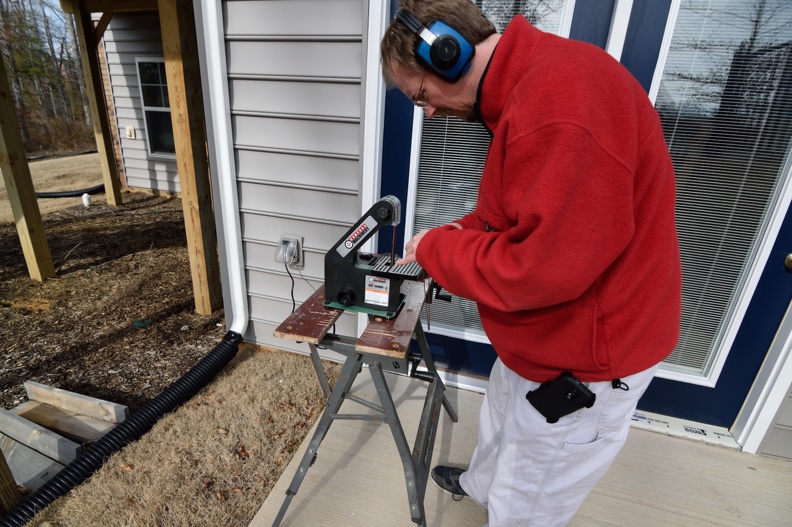
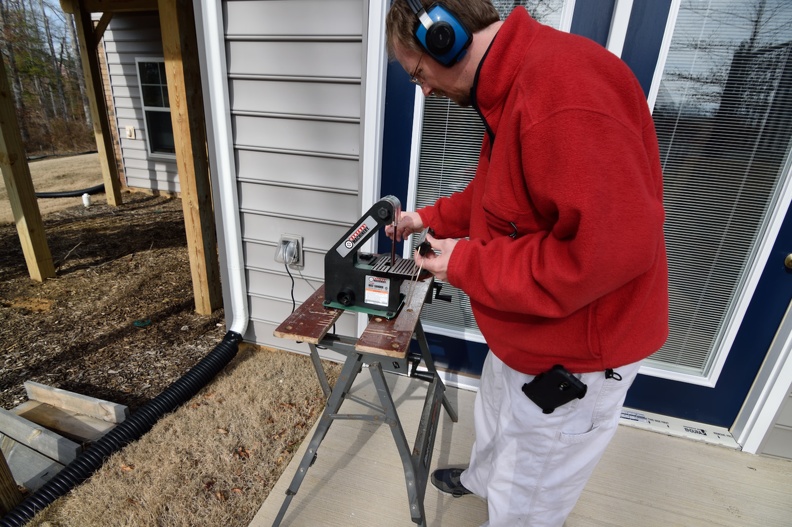
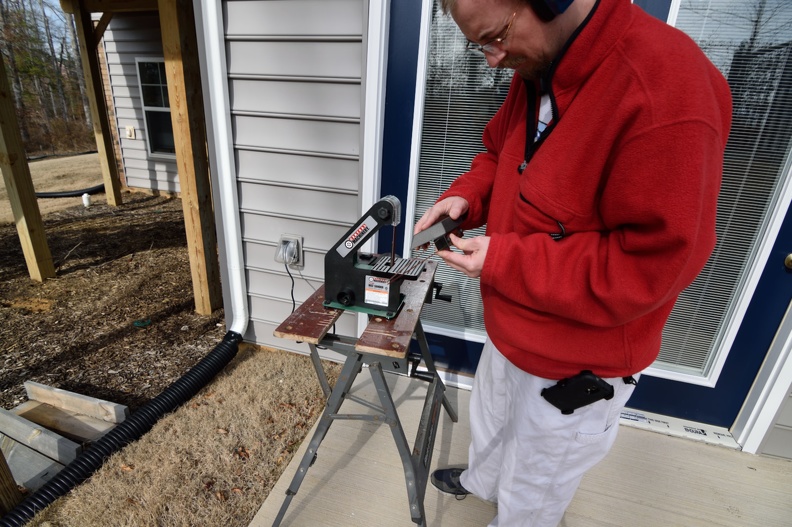
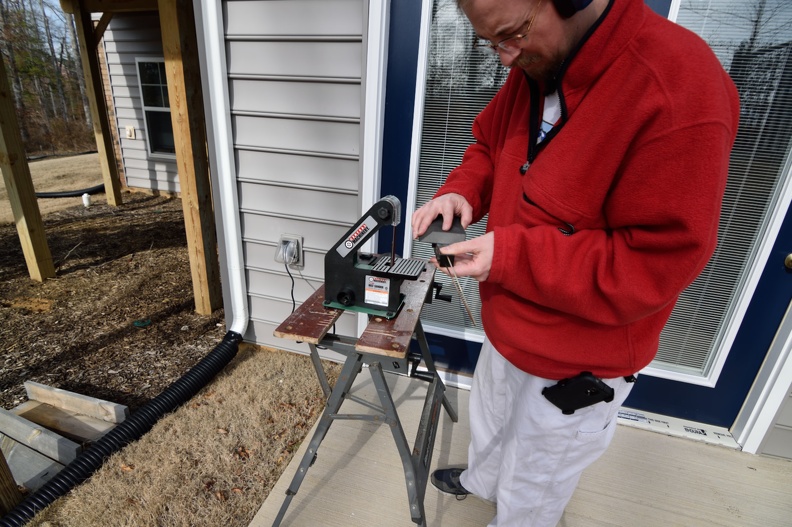
Another tool for the toolbox or How to speed up your handlaying
One of the downsides about handlaying is that it can be a bit slow. Results can be outstanding, but it takes time.
You might remember that set of 3 curved turnouts I had for the staging yard on version 1. "handlaying track or what confidence can get you" is the post about it. (That was in September of 2014, BTW...)
That took an entire Saturday that that did not include getting ties down so it could be installed.
So, take it from me that shaping points and frogs manually with a file is time consuming and even when you use the filing jig, after you have the point filed down, you need to clean it up with either a jeweler's file or a sanding stick or a sanding block or some combination of all three to have a usable product.
I normally use a bastard file, then a long single cut file to form these rails so the tools you need aren't exotic by any means, but again it takes time.
I was discussing some build experiences with a fellow modeler a couple of years back now, and he mentioned that he started using a bench top belt sander to speed his build progress. I found that idea intriguing and filed it away for future reference.
During a Christmas sale, I bought one of the cheap Harbor Freight 1" x 30" bench top belt sanders. It is a very basic machine, but at $50 before a 20% coupon, I could take a flyer on it and if I found that it really helped, I could then research and purchase something at a higher quality point from Dewalt or Delta or whatever without slowing down my build progress as 10 scale miles doesn't exactly build itself.
I finally got it out of the box this last week and had a sunny afternoon to give it a try.
Amazing!
I had a set of points shaped and only needing a quick pass with a sanding block in less than 2 minutes.
I setup the camera and hit the timer to give me a 20 second delay before starting and then click off 9 pictures. The delay between pictures is around 5 seconds (not set-able on my entry level Nikon, I've found).
Really looking forward to getting a stock of points and frogs built up so I can be ready for hand laying as the layout progresses.
You might remember that set of 3 curved turnouts I had for the staging yard on version 1. "handlaying track or what confidence can get you" is the post about it. (That was in September of 2014, BTW...)
That took an entire Saturday that that did not include getting ties down so it could be installed.
So, take it from me that shaping points and frogs manually with a file is time consuming and even when you use the filing jig, after you have the point filed down, you need to clean it up with either a jeweler's file or a sanding stick or a sanding block or some combination of all three to have a usable product.
I normally use a bastard file, then a long single cut file to form these rails so the tools you need aren't exotic by any means, but again it takes time.
I was discussing some build experiences with a fellow modeler a couple of years back now, and he mentioned that he started using a bench top belt sander to speed his build progress. I found that idea intriguing and filed it away for future reference.
During a Christmas sale, I bought one of the cheap Harbor Freight 1" x 30" bench top belt sanders. It is a very basic machine, but at $50 before a 20% coupon, I could take a flyer on it and if I found that it really helped, I could then research and purchase something at a higher quality point from Dewalt or Delta or whatever without slowing down my build progress as 10 scale miles doesn't exactly build itself.
I finally got it out of the box this last week and had a sunny afternoon to give it a try.
Amazing!
I had a set of points shaped and only needing a quick pass with a sanding block in less than 2 minutes.
I setup the camera and hit the timer to give me a 20 second delay before starting and then click off 9 pictures. The delay between pictures is around 5 seconds (not set-able on my entry level Nikon, I've found).
 |
| 1 and Begin! |
 |
| 2 |
 |
| 3 |
 |
| 4 |
 |
| 5 |
 |
| 6 |
 |
| 7 |
 |
| 8 |
 |
| 9 and done! |
Really looking forward to getting a stock of points and frogs built up so I can be ready for hand laying as the layout progresses.
Subscribe to:
Posts (Atom)