Showing posts with label modeling. Show all posts

Friday, December 19, 2025

Crossroads Rebuild - Structures - Owen Steel

 Longtime readers will remember that historically, the Richmond Terminal eschews scenic vistas and related stuff.

Some trees have been planted, and there are some profile boards glued to backdrops, and even some ground foam here and there.

Structures haven't been any sort of focus, and until one of the crew built some kits up for me to keep him busy, the railroad was structure-less.

With the rebuild of Crossroads, I planned to have the space for a couple of structures, based on the stock of building kits that I had.

We will dive into one of the builds in this post. This is based on the "Armstrong Electric Motors" background kit. For the Walthers' webpage on this kit, click here. 

This is a 3 story, brick building that suggests a WW2 or just postwar style of construction with a loading dock for railcar spotting.

Walthers offers what I will call "standard" structure kits that let you build a "3-D" standalone building, and they also offer background kits that are a "2.5-D" building that is made to snuggle up to your backdrop. The backdrop versions are generally the full kit that is missing a few sprues of parts. This means that you can kitbash or customize what you are going to build fairly easily.

As many building kits don't have the size to properly represent an industry with rail service, combining a few kits lets you illustrate the "mass" of industrial buildings in a space that is less that 2" deep.

Out of the box, the kit is molded in gray plastic, which is pretty dull, but fairly realistic as most industries aren't exactly pretty looking. You can build it to 3 different sizes, width wise, a 2, 4, or a 6 column. If you combine 2 kits, you can get 12 columns, which is what I ended up doing.

I decided to paint the window frames a nice green (Vallejo Air 71-), and then shoot the walls a brown-red (Vallejo Air 71-) mix to make it feel more traditional masonry.

Cutting the frames off the sprue. I dialed the airbrush to "thorough"

Note the 2 different sizes of frame.

The kit does include clear plastic to be used for windows. I have to say that getting good results from kit building is somewhat dependent on the tools and techniques that you use. I used canopy glue to glue the windows in, which is the ONLY adhesive you should use for stuff like that. I didn't learn that canopy glue was a thing until I was well into adulthood.

You can see the still wet canopy glue in the corners.

Once it was all assembled on the bench, I did a QA check and realized that I missed some spots with the airbrush, so I had to use a brush for some touch ups.


Here's the structure on the layout. I need to add the decaled signs to finish this, but this is a huge upgrade from the little cardboard sign and bare track.


Tuesday, December 24, 2024

The LDSIG Tour at NMRA 2024 Long Beach

 As I have done for the past few years, I did the LDSig tour at the NMRA National Convention.

I took a bunch of pictures, and encourage you to look at the full gallery on richmond-terminal.org, but here is a sampling of what you will see:


That rail is STEEL, by the way.. Handlaid decades ago.


Love some Heritage style units!


The gallery has over 100 pictures - don't miss it!

Sunday, December 22, 2024

More HBRX Cars, Part II

I had put a post together 2 years ago about my work on a run of custom painted 57' Mechanical reefers, painted for Hood Brothers Packing.

Initial Post

The one shortcoming on the pilot model, was the lack of the lube plate decal to add the final detail to 5800.

I bought a decal sheet of only the lube plate detail and it has been sitting around for over 18 months. I finally decided it was time to get some additional cars completed.

Number 5801 and 5802 have been added to the roster!


Saturday, February 17, 2024

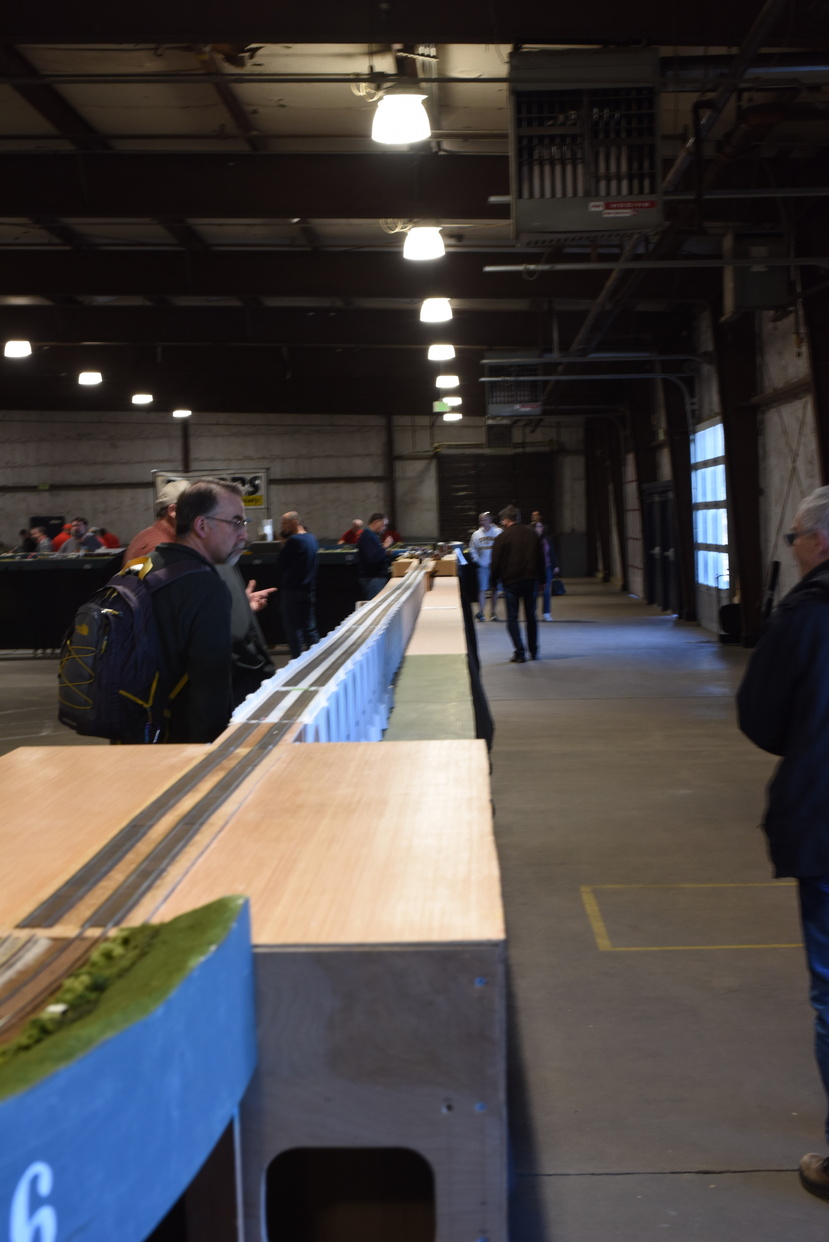
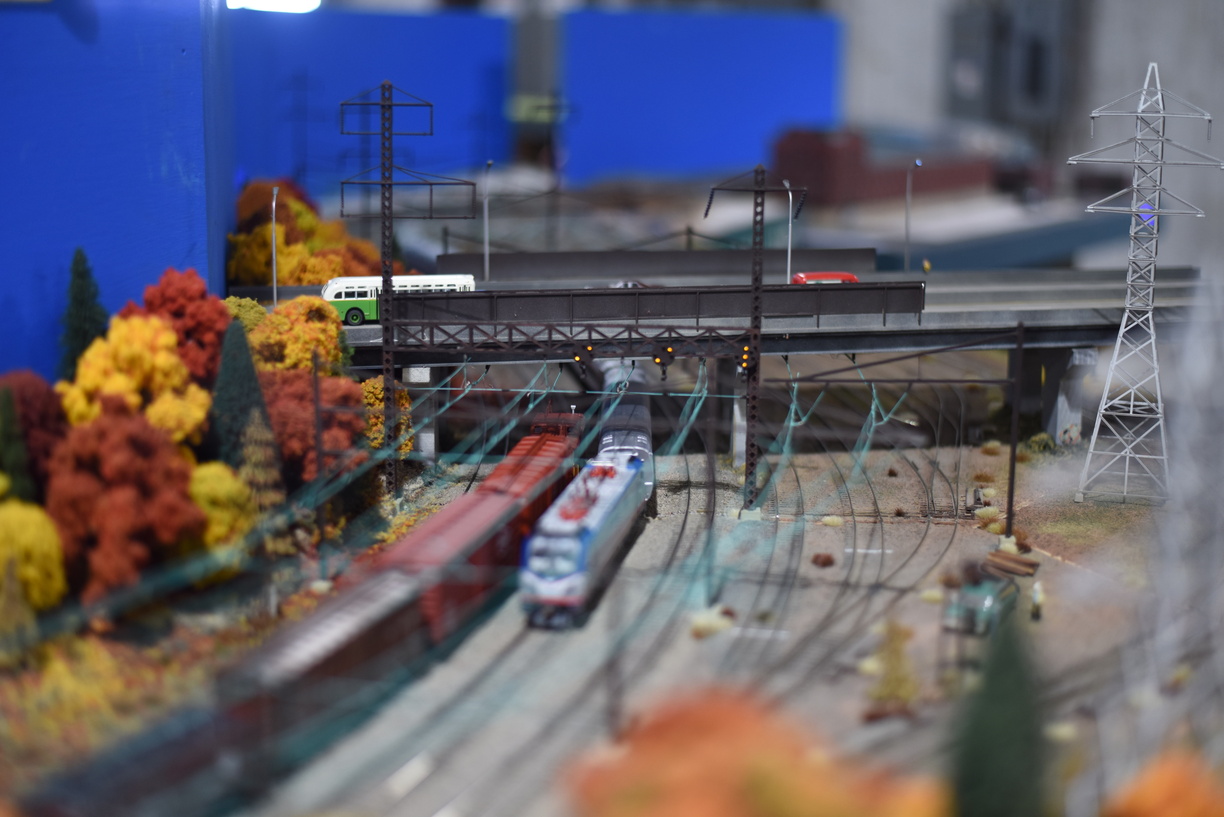
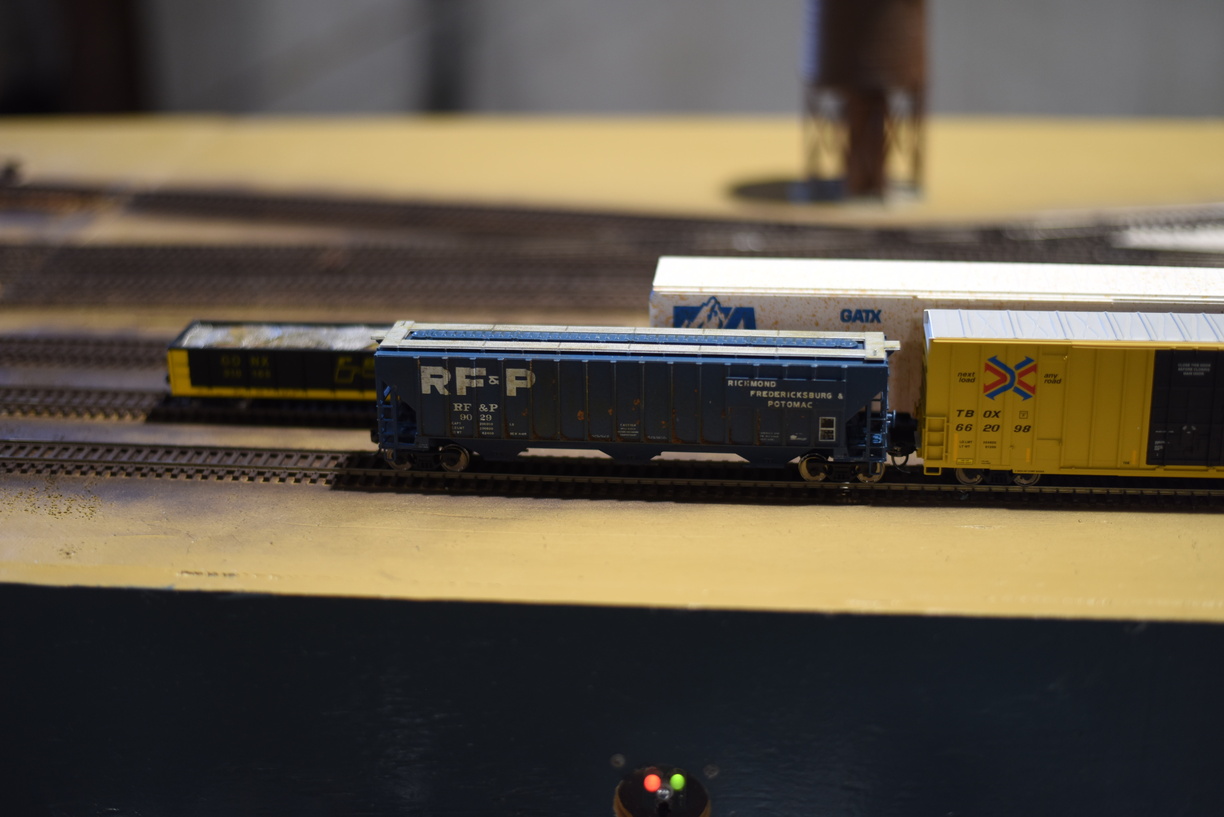
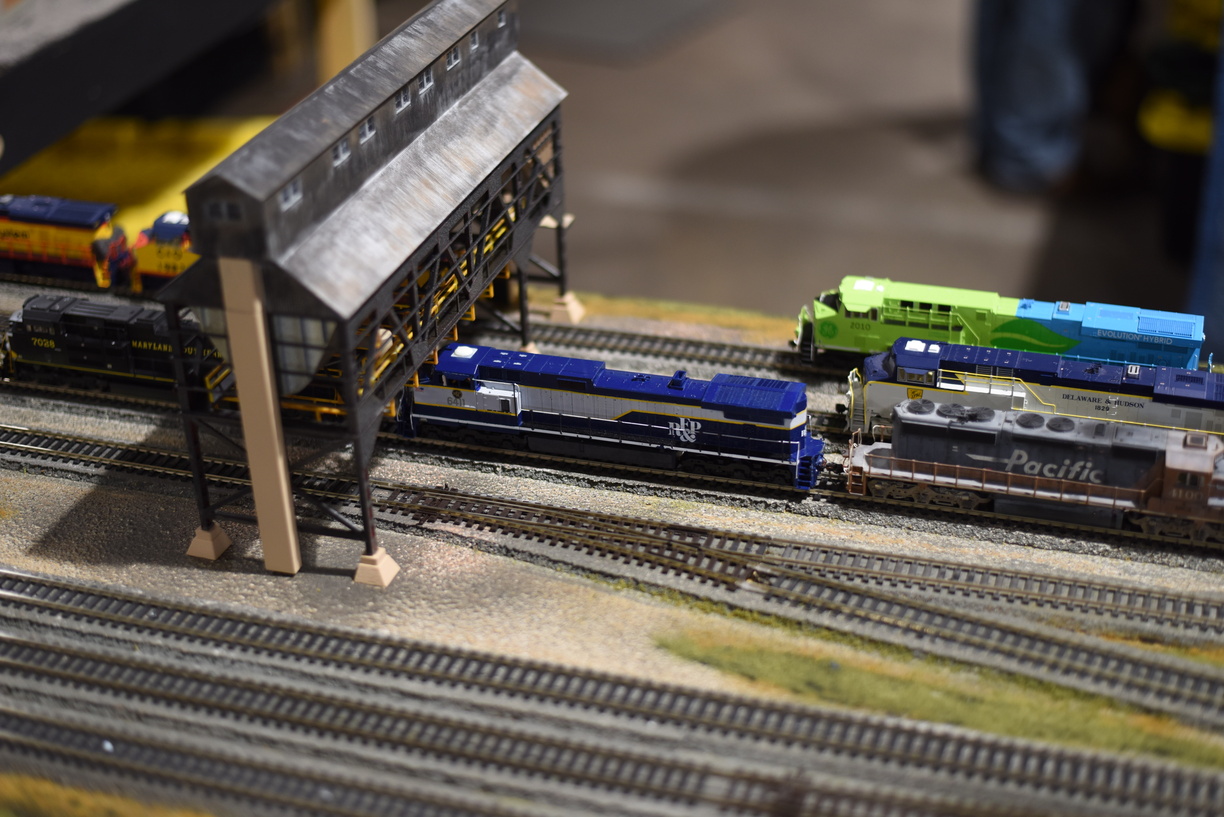
Timonium Train Show, in a few pictures

I wanted to share a couple of shots with the audience from the train show in Timonium, MD, the first weekend of February.

I had to do a bit of shopping, and after I finished, I took my camera through a bunch of the layouts and took some photos of things that struck my fancy.

Enjoy!


This would have been better with a tripod and a different lens.. And yes, that bridge is VERY long.

PRR style signals and catenary. Looks great!

RF&P Car spotted!

An RF&P wide nose unit? Sign me up!

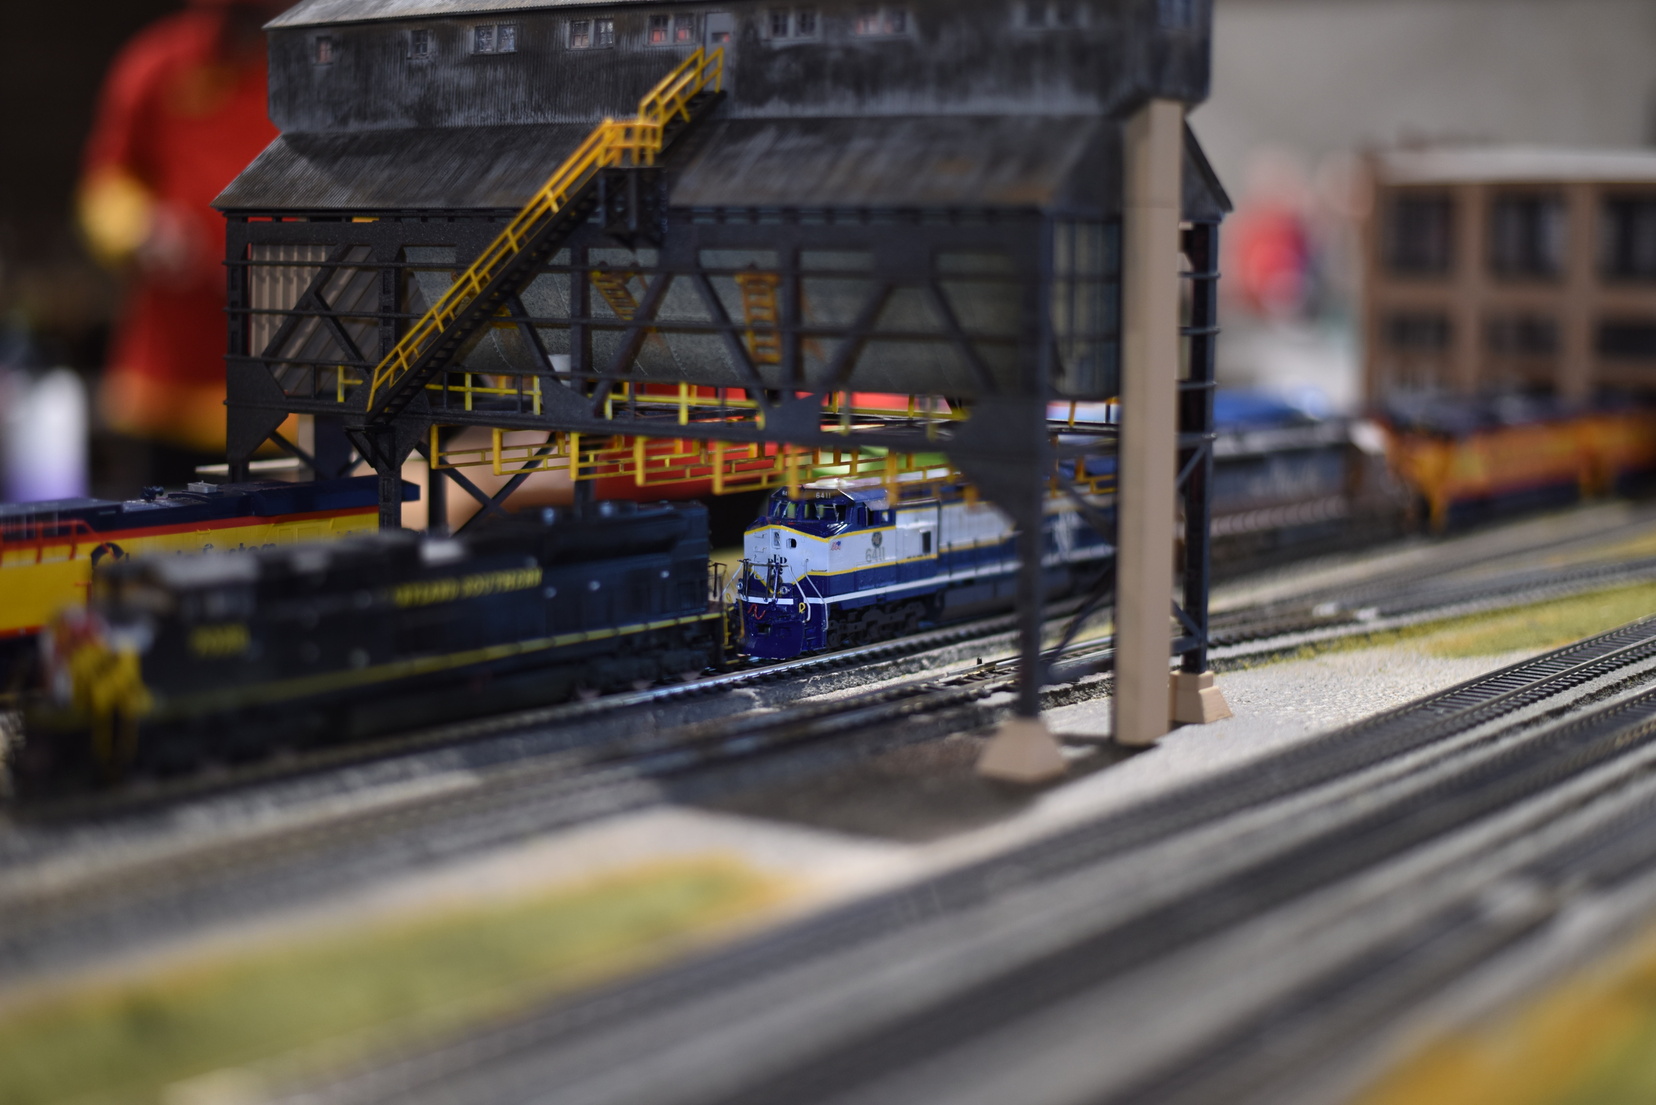
I just wish this wasn't under the coaling tower!

More photos can be found in the gallery at richmond-terminal.org


Tuesday, February 13, 2024

Resistor Axles, Tank Cars and working around all the different truck designs

As my long term readers and any operators of the Richmond Terminal know, the layout is signaled.

How it works is based on the system being able to detect that something - a engine, a passenger car, a freight car, an entire train - is in a block of track. Since I am using DCC, the easiest way to figure out if something is there, is by measuring that there is some amount of current draw.

Engines are easy, as they draw power, even when they aren't moving since the decoder does need a bit of power no matter what (sound decoder or not). For passenger cars, if they are lighted, again easy.

For your standard freight car, they don't draw any power, so that's a problem.

As my rolling stock is standardized on metal wheelsets, I have made a bunch of resistor wheelsets, where I glue a small surface mount resistor and then use conductive ink or paint to make a circuit. You can take a look at a prior blog post where I talk about making a batch of resistor wheelsets here. I fixed the resistor size - they are actually 1206 size SMT resistors. 10K Ohm, 1/8 watt - on that post when I realized I erred.

My standard replacement axle is Intermountain. They sell the axles in bulk packs of 100. They fit in a wide variety of truck designs, but for some truck designs, they do not fit correctly.

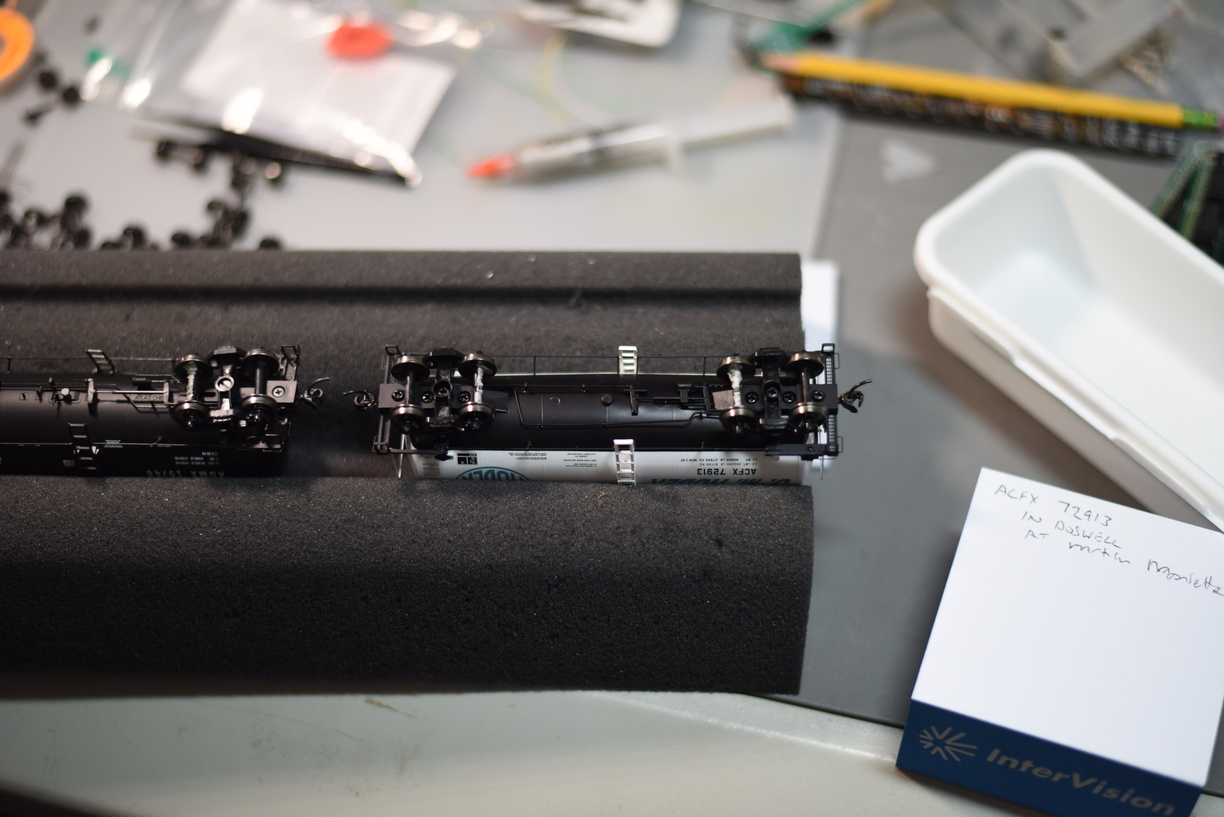
As an alternative, especially for cars that the factor axles are plastic, while the wheels themselves are metal, I glue the resistor in the middle of the axle, and then connect each side to the wheel with conductive paint.

It seems that tank cars are a consistent issue with being incompatible with the Intermountain option.

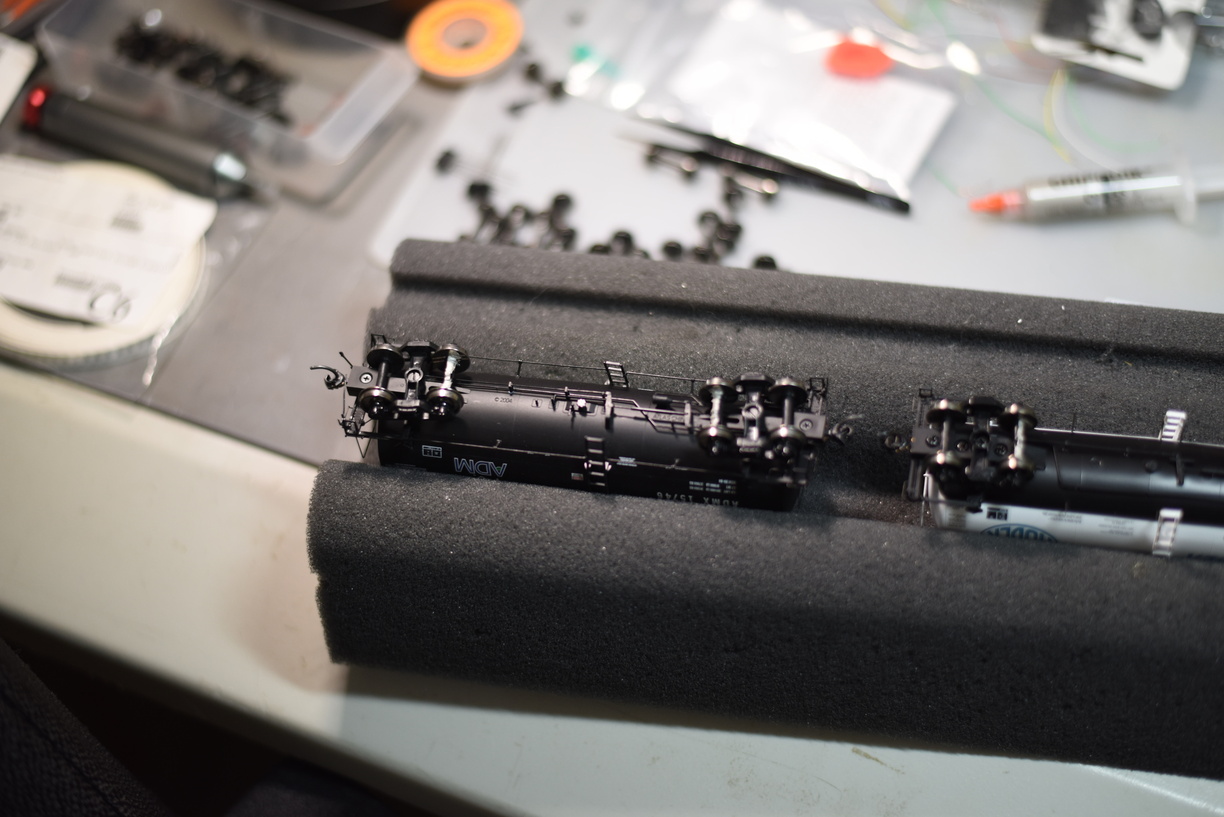
I have been checking the tank cars and also spotting any without Kadee couplers installed, so I grab them for the coupler replacement, and take the opportunity to handle the resistor wheelset issue.


The paint does take a bit to try, so doing this can tie up the foam cradle for a day.

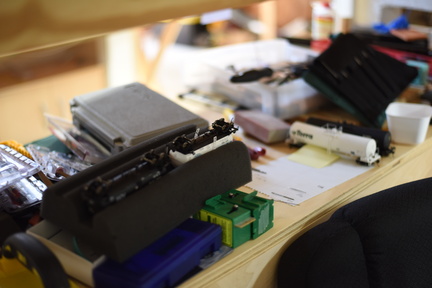
Cradle off the bench so I can do something else.


Saturday, December 24, 2022

Freight Car Projects Part I: Hood Brothers Packing Refrigerator Car

 As the layout is starting to transition from major construction phases such as benchwork, roadbed and track towards tasks like signaling, operating improvements and limited scenery, I had a chance to consider some car building projects.

I have a stock of undecorated kits, mostly Athearn blue box from many years ago. Most production now are assembled and decorated cars, and when undec options are available, they are hardly cheaper than the ready to go option.

As an example, looking at trainlife.com, they have a handful of Exactrail kits for around $50 each. This means anybody looking for source material for a fleet of freelanced cars for their railroad is in a tough place unless they can haunt train shows and find folks selling new old stock options.

In my pile of kits, I have 4 Athearn 57' Mechanical Refrigerator cars. 

The prototype basis is a R70-20 series car that Pacific Fruit Express (PFE) and other refrigerator car leasing companies used. It is primarily a western US prototyle, as on the east coast, Fruit Growers Express (FGE) was the dominant leaser AND producer of cars. FGE had a facility in Alexandria, VA that built cars used by most of the Eastern railroads. Model exist of the FGE cars, of course, but I don't have any in my stock.
So, back to these 4 cars. I know they didn't match the handful of FGE cars lettered for the RF&P, so that was out. I kept turning over what to do with them in my mind.

In November, late one night as I was trying to fall asleep, I had a flash of inspiration - I could decorate these for Hood Brothers Packing, which was a major industry and shipper on Keith Stillman's Easton and Potomac.

I figured that both the E&P and Hood Bros was rebuffed in trying to join with FGE and its owner railroads when the Armour Packing antitrust fallout happened (what caused FGE to be created) and as FGE expanded westward with Western Fruit Express (WFE), PFE came calling to find an Eastern based partner and found Hood Bros and the E&P, hence these cars.

The paint scheme is simple - reefer white all over, with green lettering.

After polling the E&P FQOs, I was able to get my hands on a original decal sheet to use as basis for my custom printed decals. I used Micromark's clear decal paper and was able to print using my standard Epson printer, turning up the quality as far as it would go. I bought a can of an acrylic fixative, as recommended in the decal paper instructions, to spray after printing to seal the decals up.

The cars are molded in black plastic for all parts out of the box. I planed on a white body, but as I dug through my drawer of paint, I found a bottle of gray and thought that would look great for the underbody.

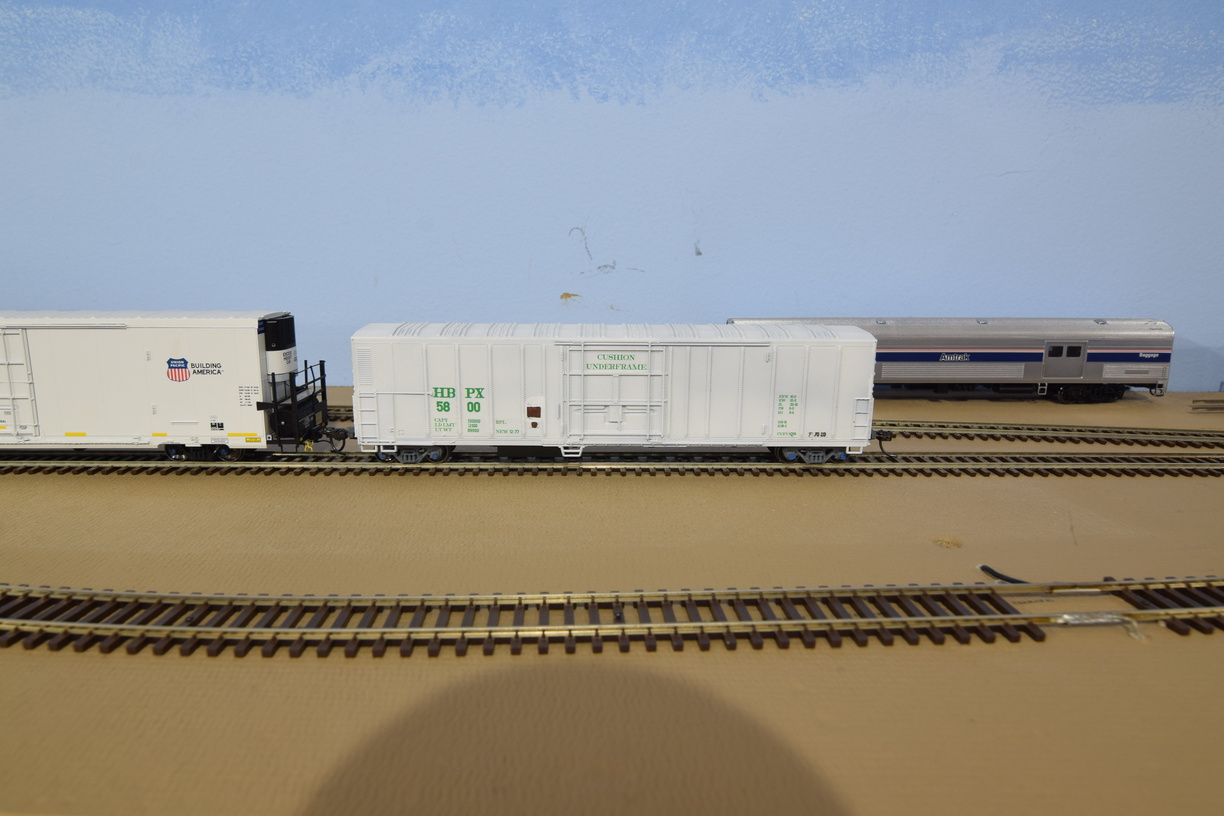
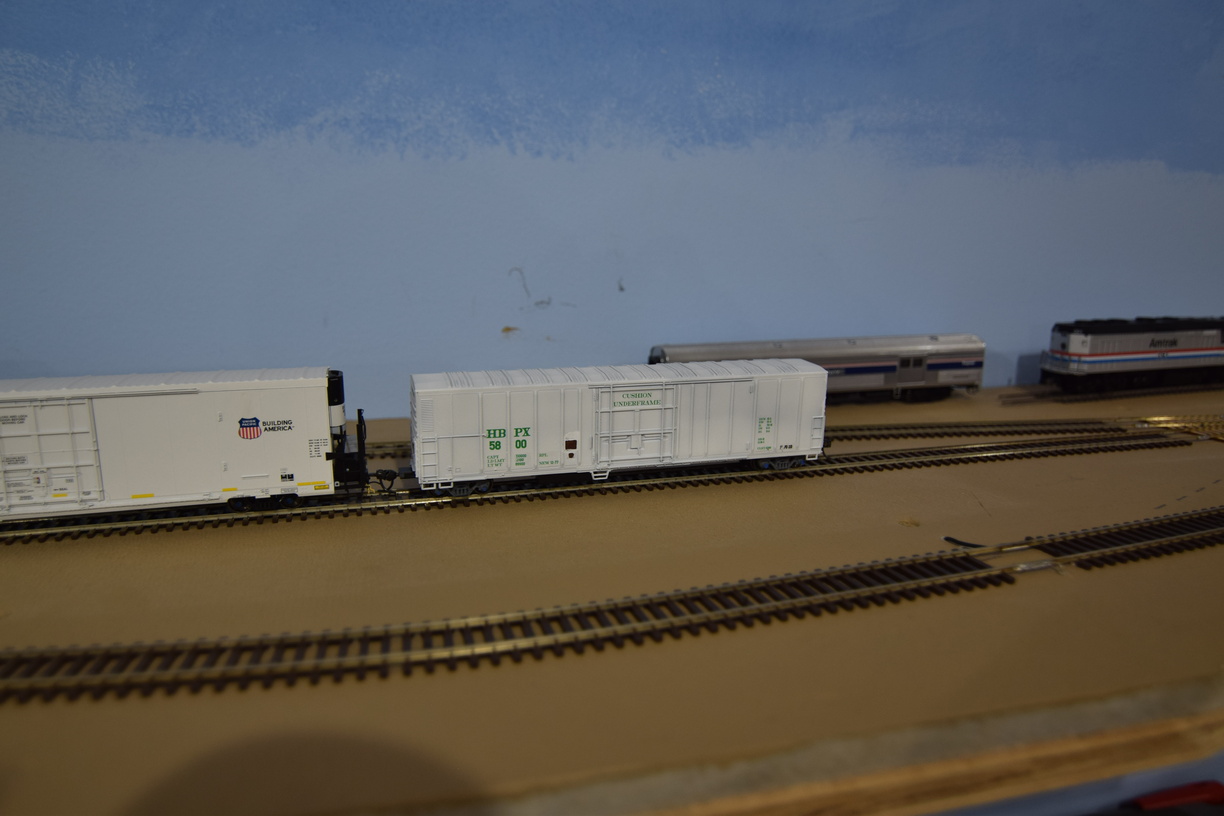
Car 5800, double zero, was my original test car for this - a proof of concept to use a technology term.


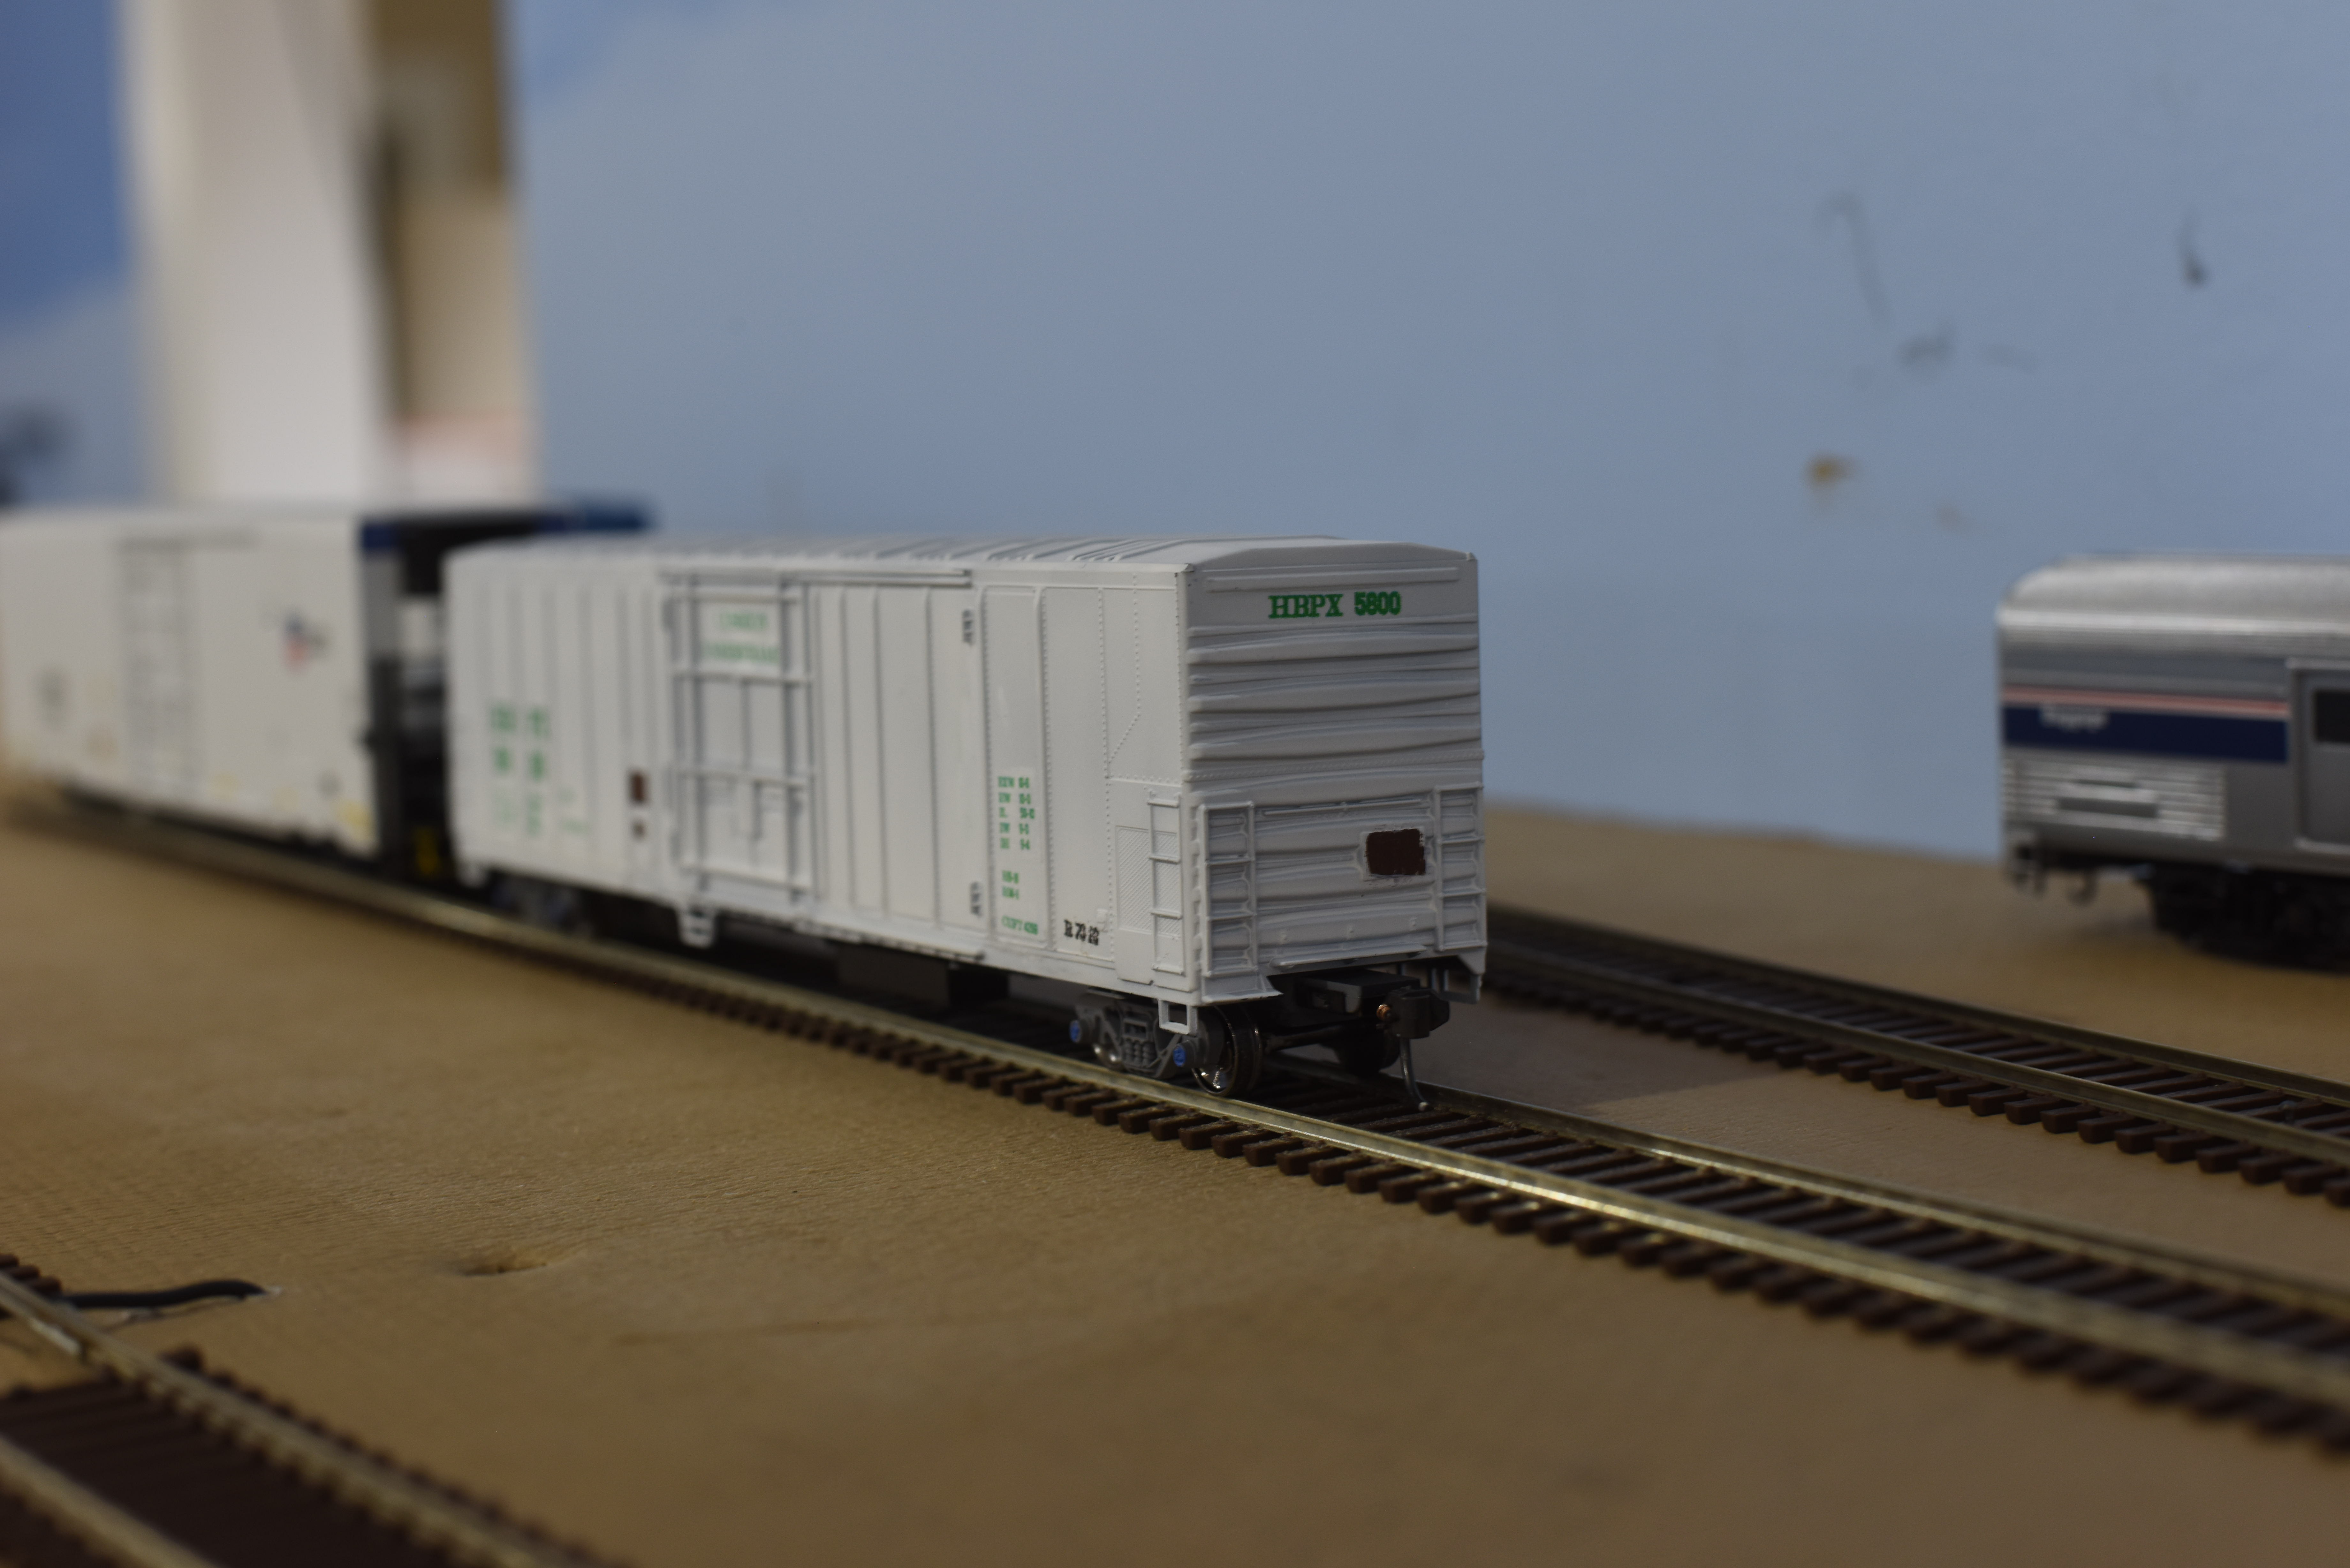
I really like the white body, gray underframe, black fuel tanks, and blue roller bearing caps.


Next to a current production style reefer built by Trinity (this model is probably BLMA), which are 64' long and excess height to boot, these cars seem small, but this encapsulates railroading in the 1990's - there is lots of change as the 40' long standard boxcars finish fading away, and many of the 50' cars begin to show their age and hard lives as the allowable total car weights rise and shippers ask more from the railroads.


As I expect these cars to be a part of operations, I made sure to include reporting marks on the ends, high enough to be read from either side from an angle.


I airbrushed the body, underframe and trucks. (A separate, longer post about airbrusing and painting is in development) The tack boards and roller bearing caps were brush painted. Paint was a mix of old Polly Scale (reefer white and MOW Gray) and Vallejo Model Color. Going forward, all the paint will be Vallejo, as my stock of Polly Scale is a few bottles, of which I've used all my reefer white up..

After Double Zero was done, I realized I was missing decals for the COTS lube plates and I needed to finish any touchups, before I sealed up everything with a matte spray varnish. You can pick out where I used Vallejo Model Color white to clean up around the tack boards after the fact.

I also realized that I should put some spaces in the decals so I could apply the reporting marks and car numbers with one decal, versus trying to line up 4 different smaller decals. Same story for the car data, such as cubic feet, weight and similar.

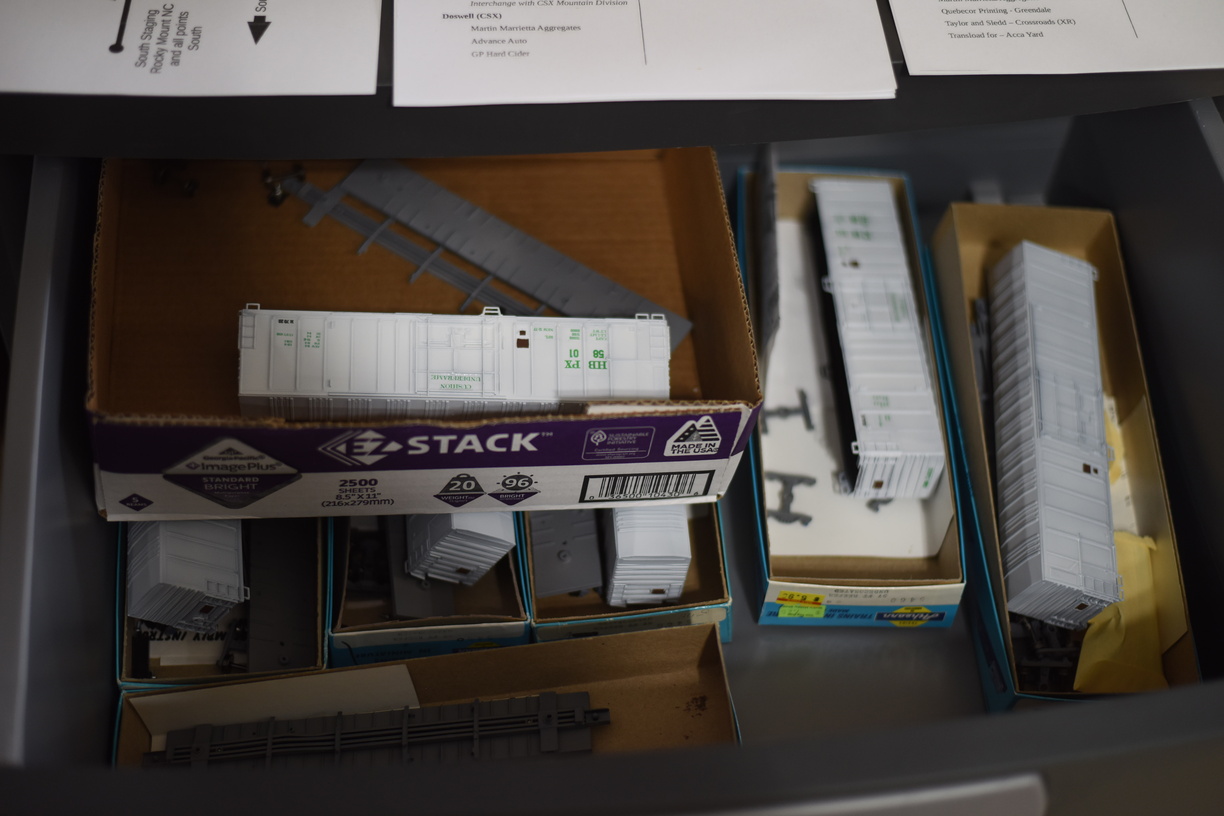
Here's the drawer of the cars in progress. The cars with decals applied are from the first run of 3; the 4th car had been assembled as a plain black car and put on the layout by a child so I couldn't find it until after I had painted the first 3 cars, so it was rolled back to the next run.


You will note in this shot some painted car bodies but not decaled. I sourced another couple of cars from eBay to make it worth getting the airbrush setup for car #4 that I had to find and disassemble.

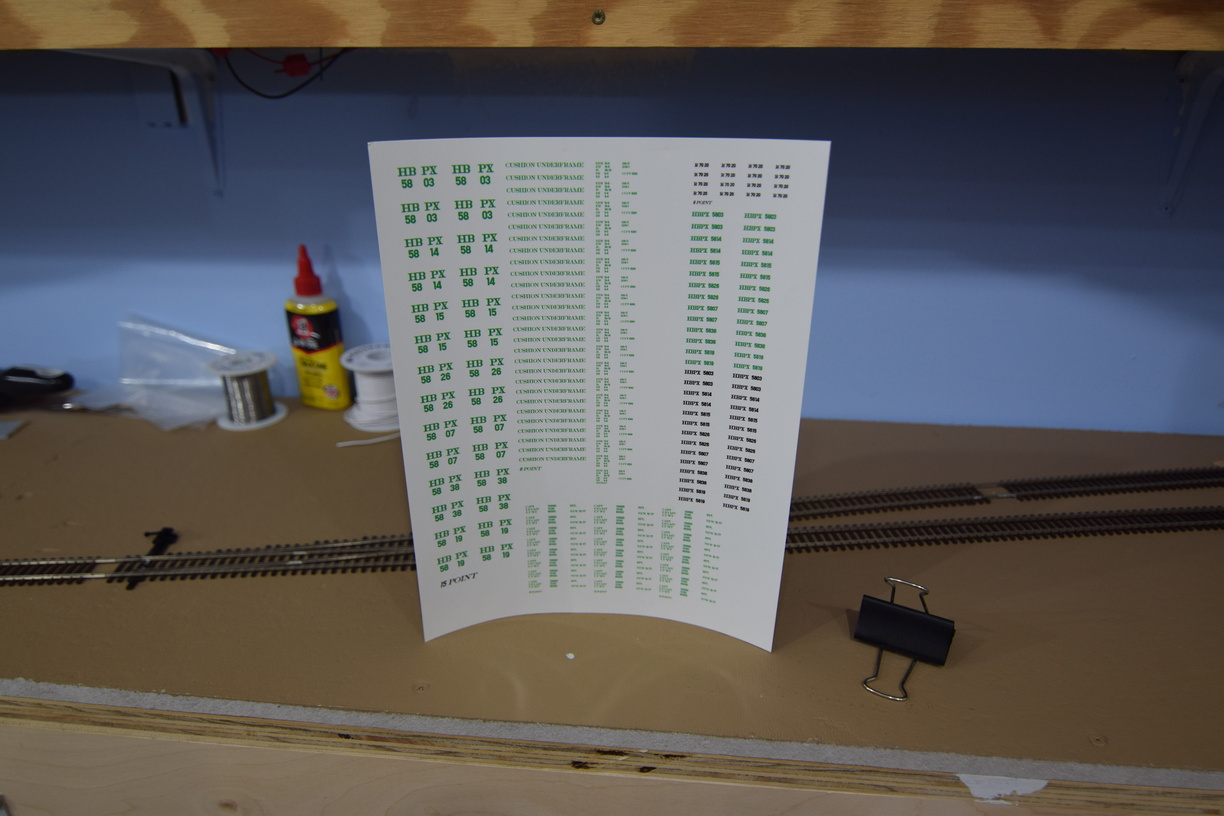
Printed decal sheet for the 2nd phase cars that will be built - I ended up sourcing 6 cars from eBay, to bring me up to 10 cars total. I spaced the numbers out to make it look like way more cars are in service, but just not on the layout.


More pictures on richmond-terminal.org.

Thursday, March 17, 2022

RF&P 10-6 Sleeper "King George" Union Terminal Imports Review and Thoughts | Brass Part VI

 Going to take a break from posts about the layout and the construction thereof and shift gears to talk about some models.

As I've discussed in prior posts on the blog, I have an interest in brass models. Unfortunately, the golden area of brass ended 20 years ago, so the choices today are significantly limited from what they were in days gone by.

This doesn't mean there aren't any good models being produced, since there absolutely are, there just isn't the breadth of offerings the hobby saw years ago.

Union Terminal Imports offered some RF&P 10-6 sleepers a few years ago, and I bought one of each road name, plus one undecorated in plain brass.

The three cars are King George, King William and King and Queen. All of these were painted in a PRR style Tuscan scheme, as they were Pullman cars in pooled service.

These models are amazingly detailed, featuring lighted and detailed interiors, plus Kadee couplers right out of the box.

I plan to run these on the layout occasionally as private varnish at the end of Amtrak trains primarily, and maybe on some inspection trains as the layout work changes from heavy building to scenery and operating tweaks.

Enough talking, let's get to the pictures.


Look at the detail around the diaphragm. Amazing.

A run of 5 cars, worldwide. No matter what, a very exclusive model.


Friday, March 11, 2022

Turnouts, a quick illustration

 Regular readers of the blog, and members of the operating/construction crew know that the standard turnout is built using the Fast Tracks series of tools.

As I built the interlocking at North Acca, I had a chance to take a side by side shot of a number 10 and number 8 turnout, focused in on the frog area specifically.


Number 10 is on the bottom, number 8 on the top.

Note the frog, wing rails and guard rails being significantly longer than the 8, as well as the frog point being prominent.

Tuesday, July 20, 2021

Brass Update - More Viewliners

 Back in 2017, I was able to get my hands on a single Viewliner sleeper, which was a brass model imported by Overland from South Korea.

Blog Post about it.

I am pleased to announce that I was able to source 3 additional cars, with unique road numbers, off eBay in 2020.

They will grace the Silver service trains as operating sessions restart sometime in late 2021 or early 2022.

Interestingly, on eBay right now, there is a Walthers run Viewliner with a buy it now price of $199.99 on it; it is a BIN listing. Auction Link Crazy stuff. I note that I only paid another hundred bucks for a brass car on all of them that I purchased.

No new releases of Viewliners seems to be in the offing and I haven't see any movement about a Viewliner II model either being mass produced.

There is, again on eBay, 2 listings of interest.

First is a custom produced Viewliner II baggage car. Viewliner II Auction As I write this, current bid is $100, on a car that has a detail level right out of the 1990's Athearn blue box kits.

Even better, another 3D printed car, for a baggage dorm Viewliner (which I didn't know was a thing), with a $289 BIN price on it. Viewliner II Dorm? Detail level is better than this first car I linked, but not by much. You can see the layers from the 3D printing process when you examine the car end shot.


Wednesday, July 29, 2020

Easton and Potomac Final Open House

Pictures of the final open house of the Easton and Potomac have been posted to the gallery.


You can find it them at Richmond Terminal Gallery

Saturday, January 25, 2020

Sad News - Keith Stillman has passed away


Keith Stillman passed away January 18th. Keith was the Superintendent of the Easton and Potomac. His railroad was the leader in the Richmond area for prototype, TT&TO operations.

I didn't know it then, but that was a turning point in my approach to the hobby. 

Keith was the person that introduced me to true operation of model railroads. Up until that point, I would certainly "play train" but it didn't occur to me that there was a way to approach the play with an amount of rigor that made the challenge have excellent replay value. 

I met Keith now over 10 years ago via the local hobby shop, which itself has passed into history. Keith's name and email address was given to me from the gentlemen at Chesterfield Hobbies as one of the local "train guys" that was very active in the hobby.

I had been living in town about a year or so and had started finishing the basement in the previous house for the construction of a railroad. (Which ended up being Richmond Terminal version 1). It seemed like a good idea to make contact with other modelers, so I sent him an email.

Keith attended the first work session ever held on version 1, and pointed out a design mistake during our work session. I had a S curve that was spaced poorly and he mentioned checking out the John Armstrong book for options on fixing that sort of track arrangement.That was the beginning, but certainly not the end of the mentoring. 

I would see what he had done with the E&P and then sought to figure out how I could do that on my own layout since he had solved a novel problem or I could learn from his experience.

Keith dispatched the RTRRv1 a couple of times as well as filling other slots. He approached operations seriously, but didn't let that take the humor out of the situation. 

He never let a good opportunity to make fun of us "train nuts" and himself, by extension, go to waste. 

He set the standard for documenting a railroad, even with his frequent complaint that model railroaders can't read.

We lost a craftsman, an author and a contributor to the progress of the hobby with his passing. I am indebted to Keith more than I can put into a couple of paragraphs and I expect that I'm not alone in reflecting on his impact.

Keith dispatching V1 before I moved the DS office under the stairs.

Friday, September 6, 2019

Curving Backdrops

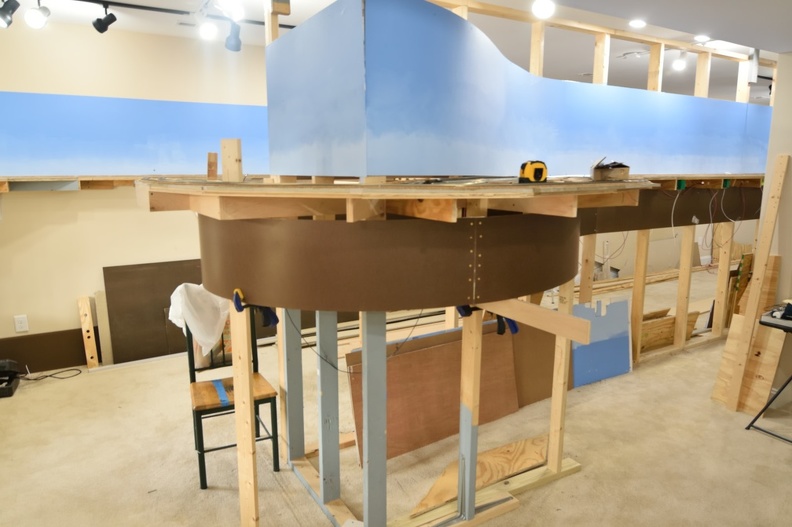
After having some success with curving backdrops on the upper level, I decided to continue the process on the lower level.

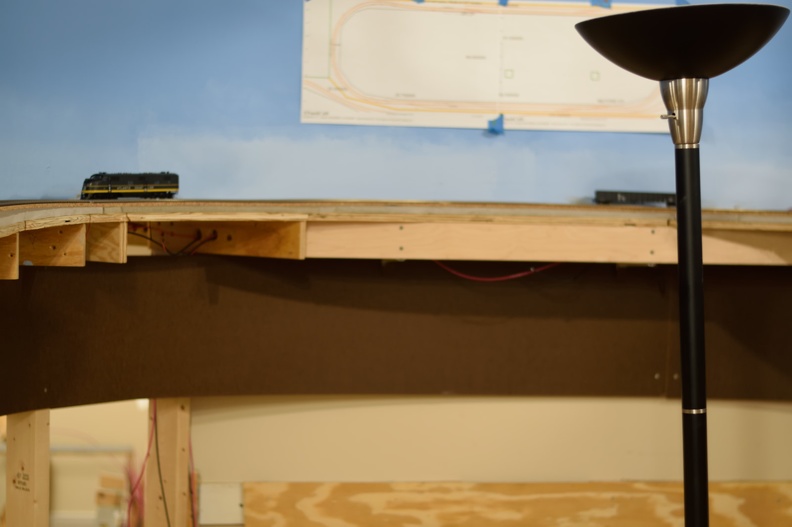
I'm using 1/8" masonite for the backdrops. I am not doing anything like wetting or kerfing to make it fit certain radii; just letting it flop.

The current progress (as of September 2019) is much further than these shots show, but I wanted to show the progression in a somewhat step by step format.

This is at the end of the center aisle.
With some temporary support in place.
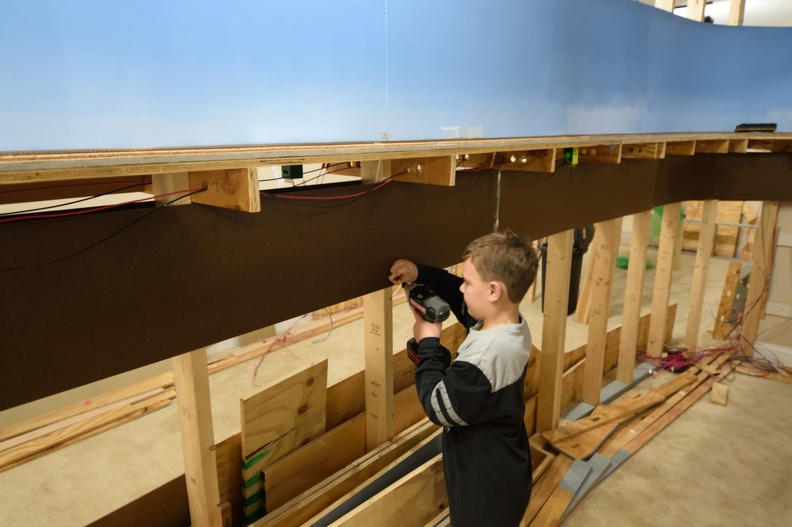
2nd Son is just the right height to help fasten everything in.

Friday, December 22, 2017

The Brass Bug, Part I

Brass Trains.

Anyone who's been in the hobby for any length of time knows about brass.

Brass has a much varied reputation, depending on who is doing the telling.

I could probably spend a couple of pages rehashing all the ink that's been spilled or all those electrons that have been inconvenienced over the years but in the interest of making this post actually useful, I won't.

I've had an interest in brass, but it was an armchair interest, as I'd not been in a place, life wise, where my interest could coalesce.


My father has had a single brass engine, a United 2-10-0 Russian, since the late 1980's when we were living in Meridian. This model in question was professionally painted and he bought it from the painter direct as somehow it became his via a deal with another customer.

The painter was one of the civilian contractors that worked on the base (NAS Meridian, MS). (I'll have to ask Dad which group he worked in.) The name of the painter is Mr. Alexander; I don't think Dad remembers his first name; and in the telling he was a custom, professional painter of some note as his customer base was diverse and included some folks of various levels of fame, to include some country artists.

Anyway,I ran it a couple of times on the 4x8 we had then; the big open frame motor that it has isn't exactly a well running machine that will creep along at a single volt, but it still ran fairly well as I remember.

Be that as it may, as always, time passed.


I became an adult and got pretty established in a career.

First brass model I purchased was at the 2012 National Train Show, an Overland Amtrak P42.

I'd like to note, that at this point, Kato had yet to announce their plastic P42 and the Kato F40PHs did not have (and do not have, even in multiple units) the ability to pull my modeled auto train up the helix on version 1 of the Richmond Terminal. (And they won't be able to on Version 2 either, but there's a workaround for that already in place)

The brass bug got a nibble on me.

I was able to fight the infection off, I thought.

I remember telling Dad after I'd bought it that when I passed, one of my sons would get that Amtrak P42 and the other would get that United Russian.

Turned out, it just went dormant.

While working on this post again (probably for the 5th or 6th time; writer's block), the youtube playlist had clicked over to Nothing More's "Fade In/Fade Out"; that'll hit you in the feelz. https://www.youtube.com/watch?v=z5BGVL6Ja9M

Tuesday, October 14, 2014

Amtrak, Part IV, Model Car Part II - Superliners

The Superliner cars have been well represented in HO scale; with multiple offerings from Walthers, Kato and a few brass lines over the years.

We are very fortunate that these cars have been the subject of lots of good models over the years, as the prototype cars are a significant part of the fleet.

The idea of a multiple level car for long distance routes was first done by the ATSF for service on the El Capitan. Budd built these cars starting 1954, with a couple of runs as the years went on. Of course, as passenger service faded, the railroads stopped buying new varnish. With Amtrak's 1971 start, new cars began to be purchased again. For more information on these cars, take a look at wikipedia here and here.

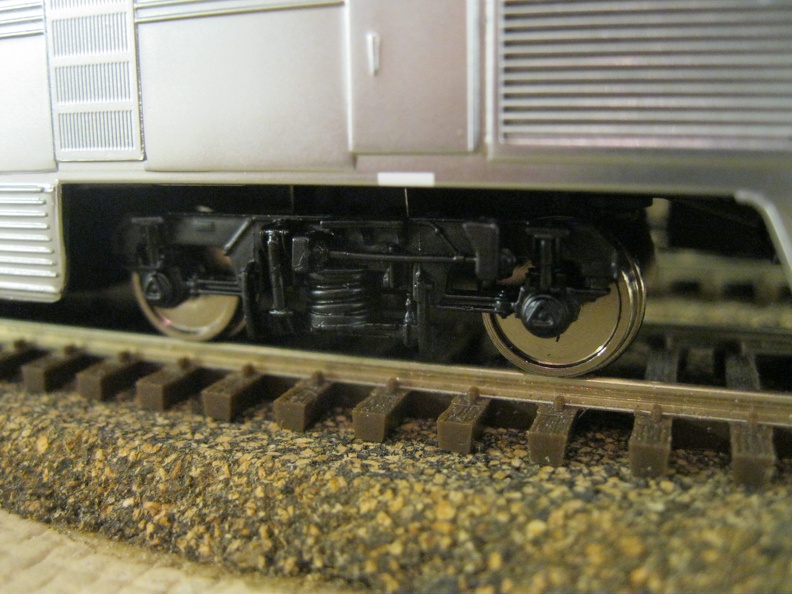
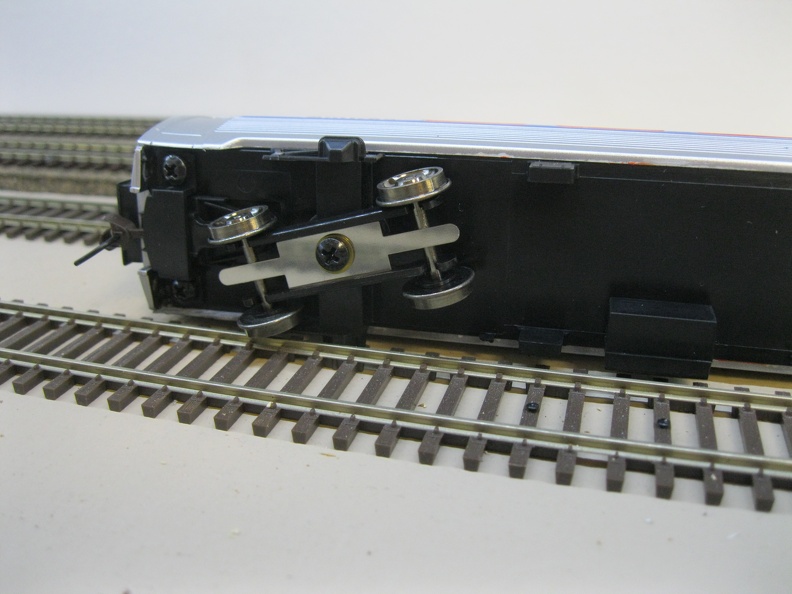
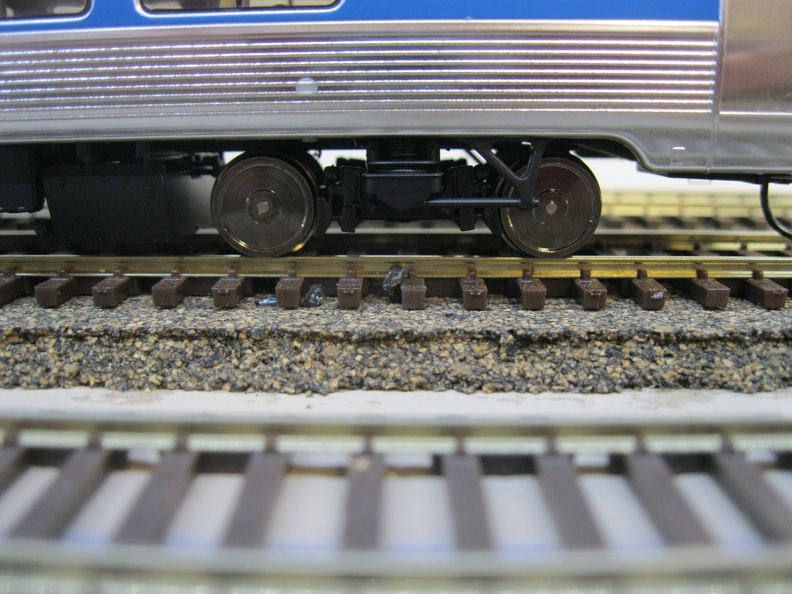
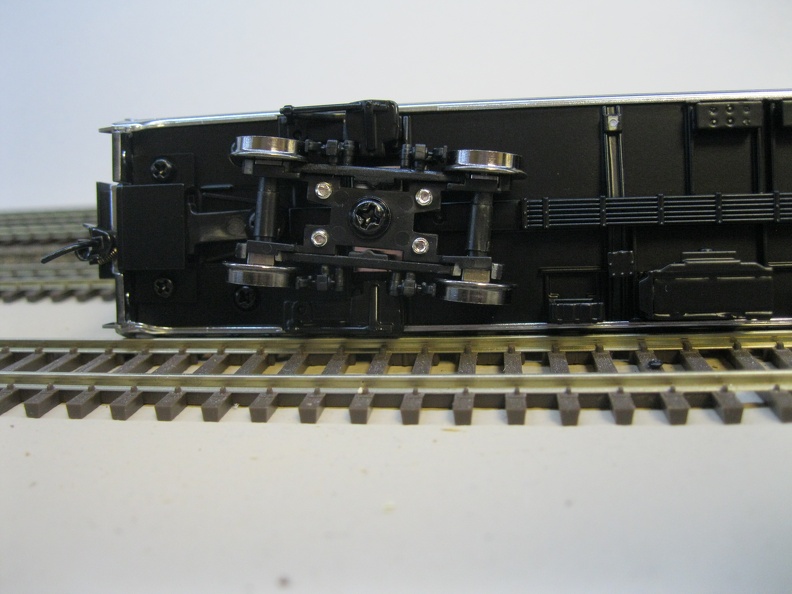
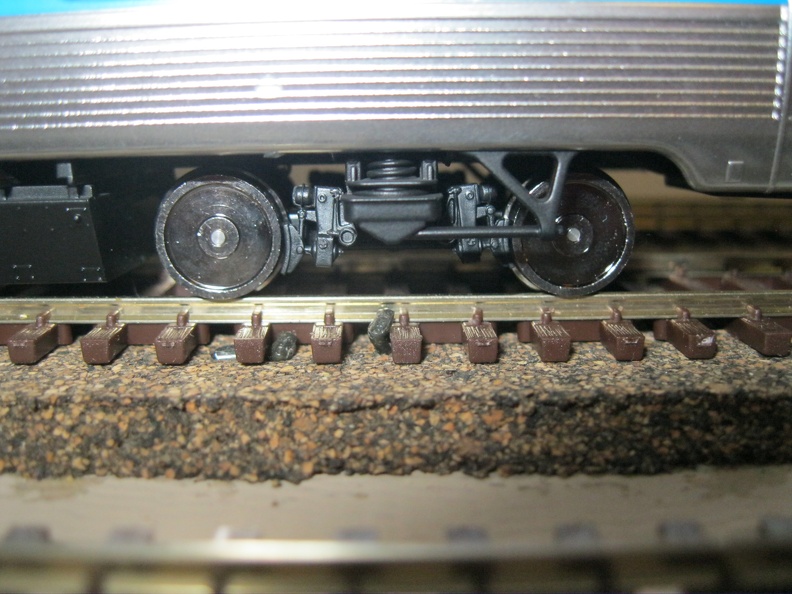
There are two major runs of Superliners, each was produced by a different manufacturer; called Superliner I and Superliner II. The major spotting difference is the trucks. The I has a very intricate design from a German firm, while the II uses a GSC truck. The truck details have been carried over into the models.
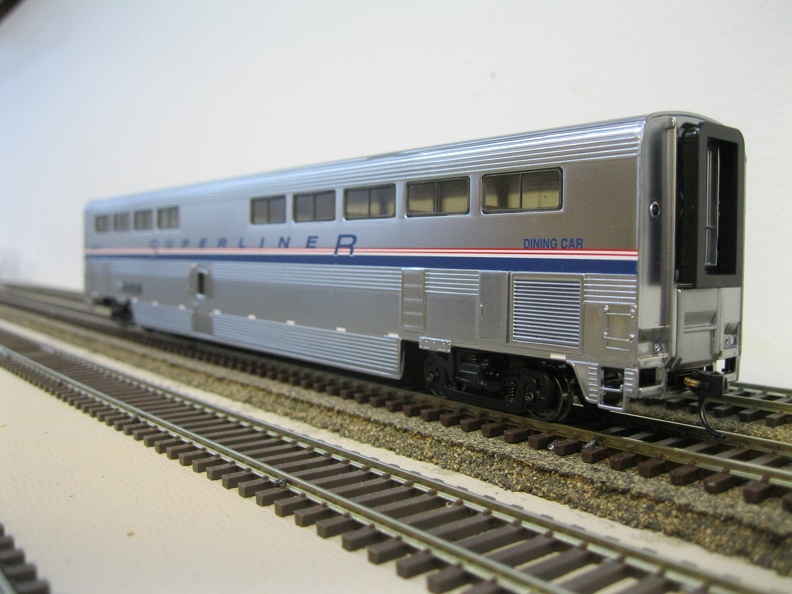
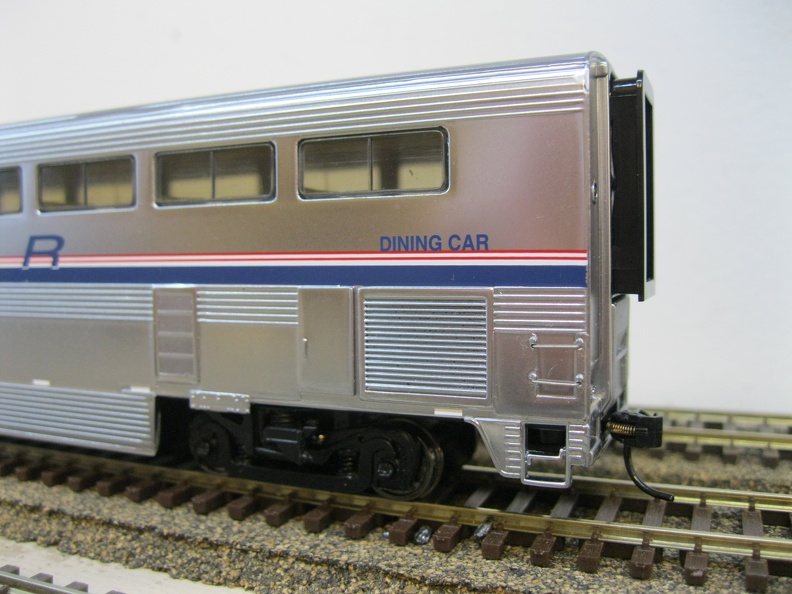
Now, the models have been pretty decent quality. The first run from Walthers was pretty decent, but detail was fair for the time period and looking at them now, details are lacking.

One thing to keep in mind is that these cars have almost no underbody pieces, as the prototype designs moved all that equipment to the lower level ends of the cars.

The later runs from Walthers, with the 'new plated' finish are very nice indeed and the Kato units run neck and neck with them. The Walthers offerings are a bit cheaper in my experience and I've amassed quite a few of them to be able to run the Auto-Train on my layout. (As the Auto-train is the only Superliner equipped train in the southeast.)

The diners, coaches and sleepers and fairly similar across the line; the differences are in the numbers of windows and their spacing.

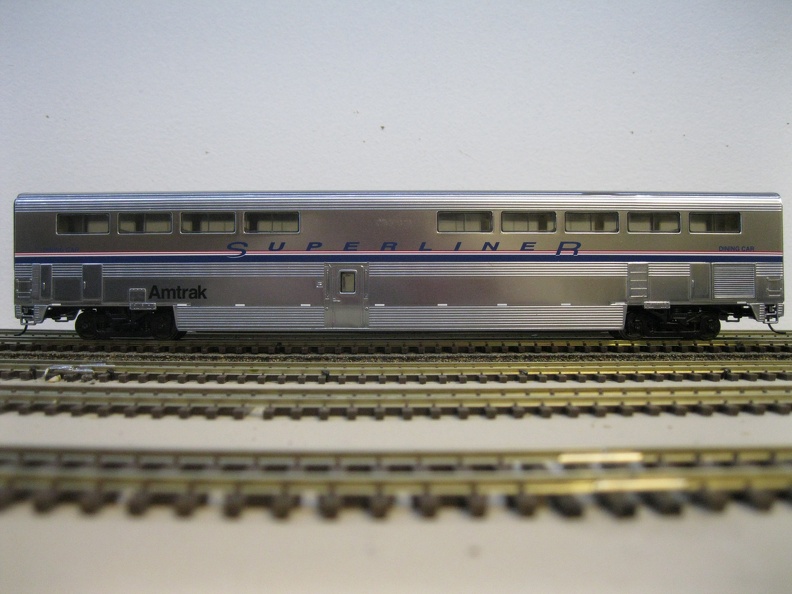
Here are a few of the model cars; captions provided to give additional information.

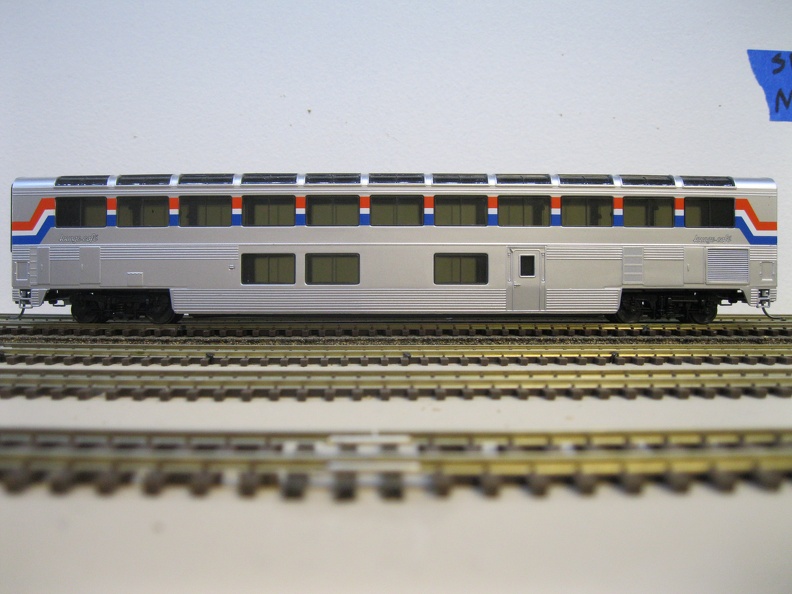
First we will start at the current production plated car, from Walthers:


This is a Superliner II - Note the truck.
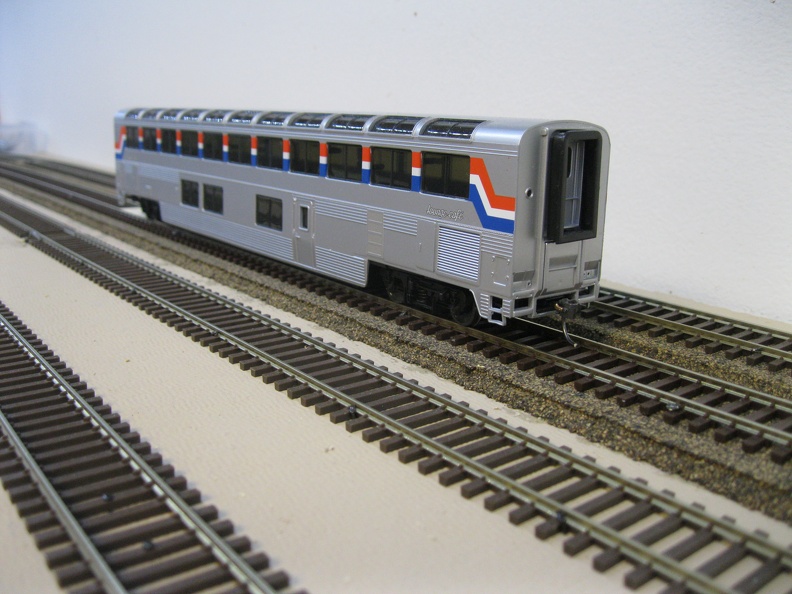
Now, let's move on to a older production car from Walthers without the plating.

Detail is decent, but not as sharp as the newer car. Note the stirrup steps.
Here's the Superliner 1 truck - much more complicated design.

Friday, September 19, 2014

Amtrak, Part III, Model Car Part I - Amfleet

The Amfleet cars actually have a fairly interesting history on the model front, at least in HO scale.

If you are interested in the more of the Amtrak fleet information, especially the stuff that is electric, a good resource for bunches of his model stuff is Kyle Nembhard; his site is here.

Anyway, for a pretty numerous prototype, accurate cars in HO scale have been just about non-existent. There was a brass version offered, I believe in the 1980's, that was the basis for some of the earlier plastic versions. Unfortunately, the brass model had a couple of issues that got carried over to the plastic version.

Both Walthers and Bachmann produced Amfleet cars, in various types and schemes and if you were operations focused, they could be considered 'good enough'.

Underbody detail was almost nonexistent, other details were lacking, and the overall shape wasn't quite right.

Walthers spun up to produce a Metroliner model a few years ago and thereafter, announced new Amfleet cars from totally new tooling, which was good and would be offered in their Protoline, which was also very positive. The one major downer was the price. Standard cars were priced at $79 and lighted cars were another $10.

The test version of the cars that I saw at Walther's booth at the 2012 train show were very nice and I was impressed at the level of detail on the car. I was still a bit taken aback by the eighty dollar price tag, but felt a bit better about what I was getting for my money.

Originally, these car were going to be available January 2013, but they finally shipped this year (2014) in late winter.

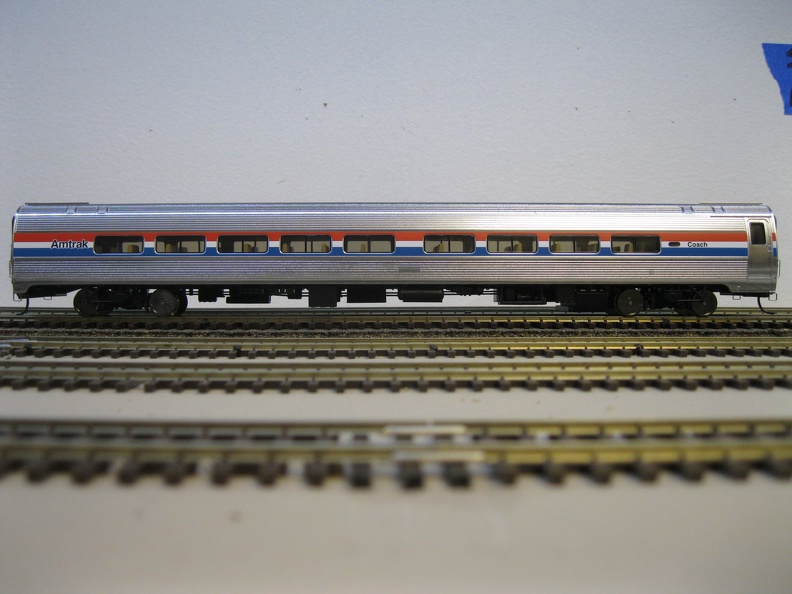
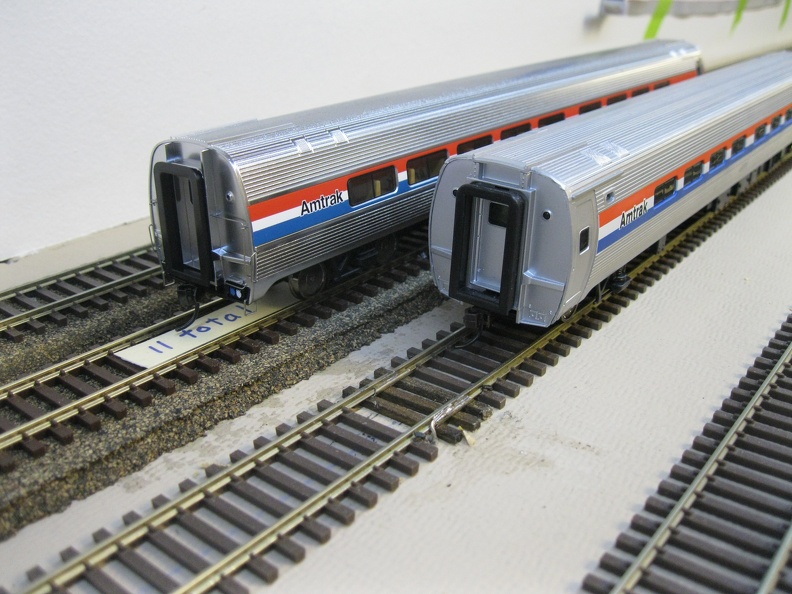
Here is the new car; this particular one is a coach.


Note the overall shine to simulate the stainless steel of the prototype car, the underbody details aplenty and the very light and lacy grab irons on the corners.

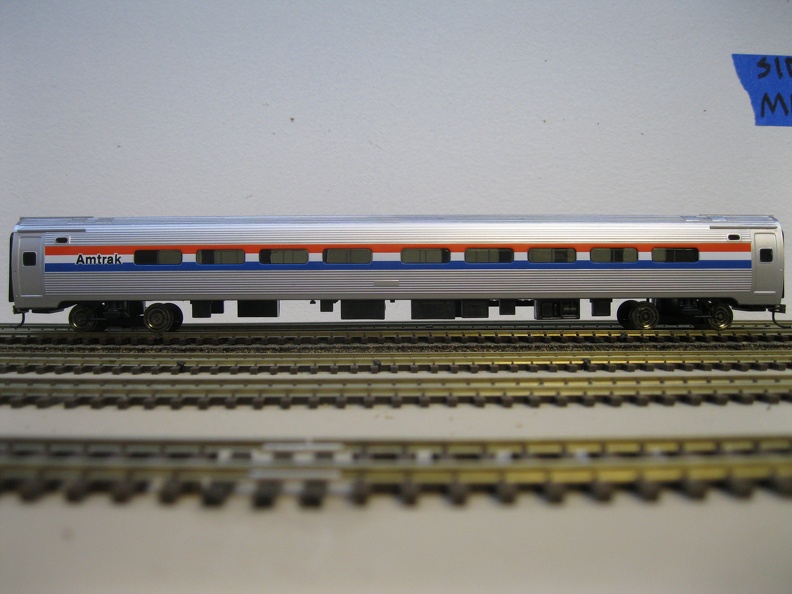
Now, let's look at one of the older production Walthers cars.

Less shiny to start with; you can see lots of air through the bottom of the car and grab irons are totally missing.


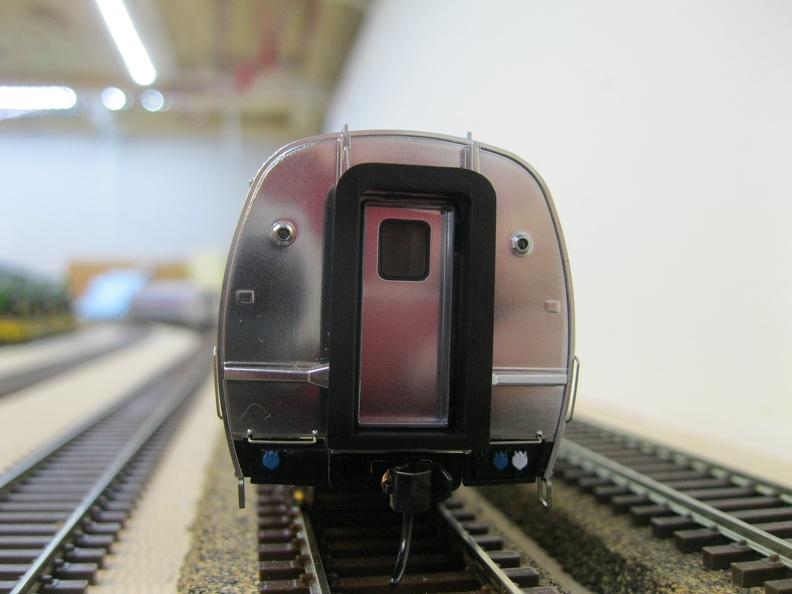
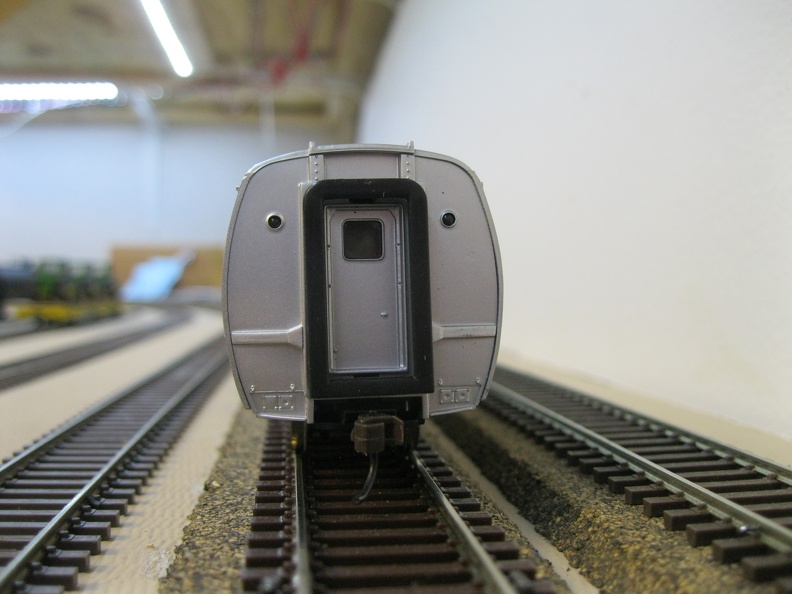
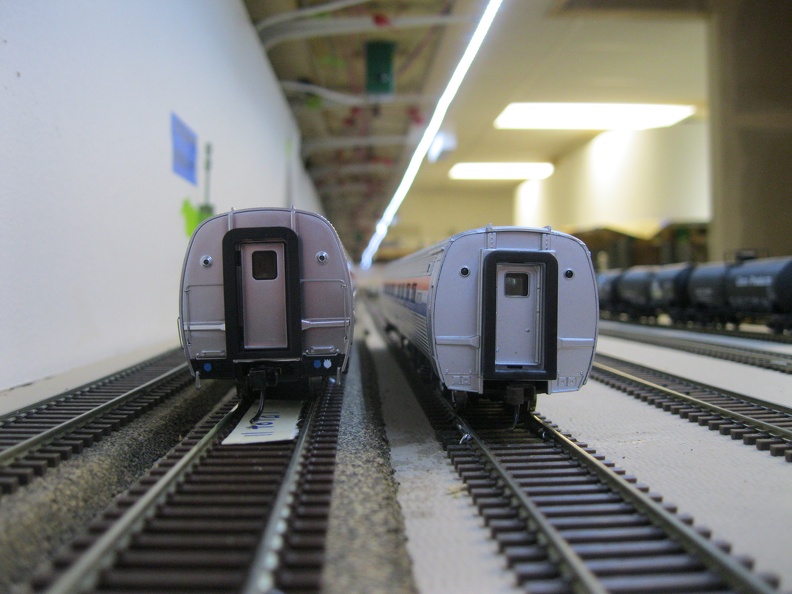
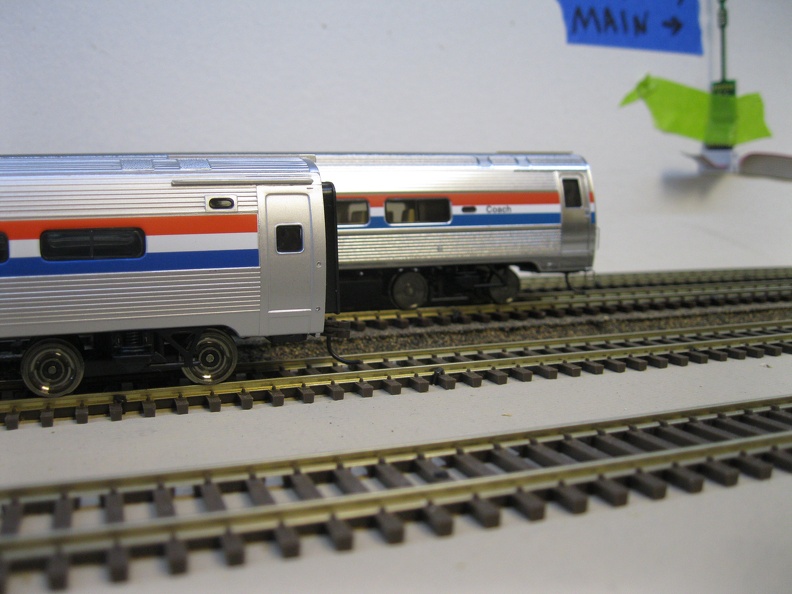
Let's look at a couple of other angles of these cars.


Again, the level of detail in the newer car (top picture) is much higher. Also, this shows the different profile of the cars; if you look near the upper corners, it is pretty noticeable.

About the trucks for these older cars. The original design left lots of be desired.


Basic truck, no bearings and the axles will wander back and forth inside the truck. And if you want to light it, some work will be needed. Without some serious hacking, you will only get pickup on one rail per truck.

Now, the new truck is off the chain.


Let's finish up with some shots with both cars.


Coming up in this theme is a look at some of the Superliners, a look at the baggage cars and then hit the sleepers and diners.